There are many good reasons to work on and develop your core muscles, and these benefits go far beyond the aesthetic bonus of getting flatter abs.
Developing and maintaining a strong and functional core will ensure that other areas of your body will work more harmoniously, allowing you to maintain good posture and conduct everyday movements of reaching and bending more easily and safely. It will also help prevent back pain and improve your continence.
Planking has become increasingly popular for core strengthening, and for good reason: it works. Slacklining is another fun and exciting alternative that is gaining popularity.
Core Efficiency
The plank is one of several fitness tests that can give you an indication of your potential health risks. If you cannot hold plank position for two minutes, you’re likely lacking in core strength, which is important for overall movement stability and strength.
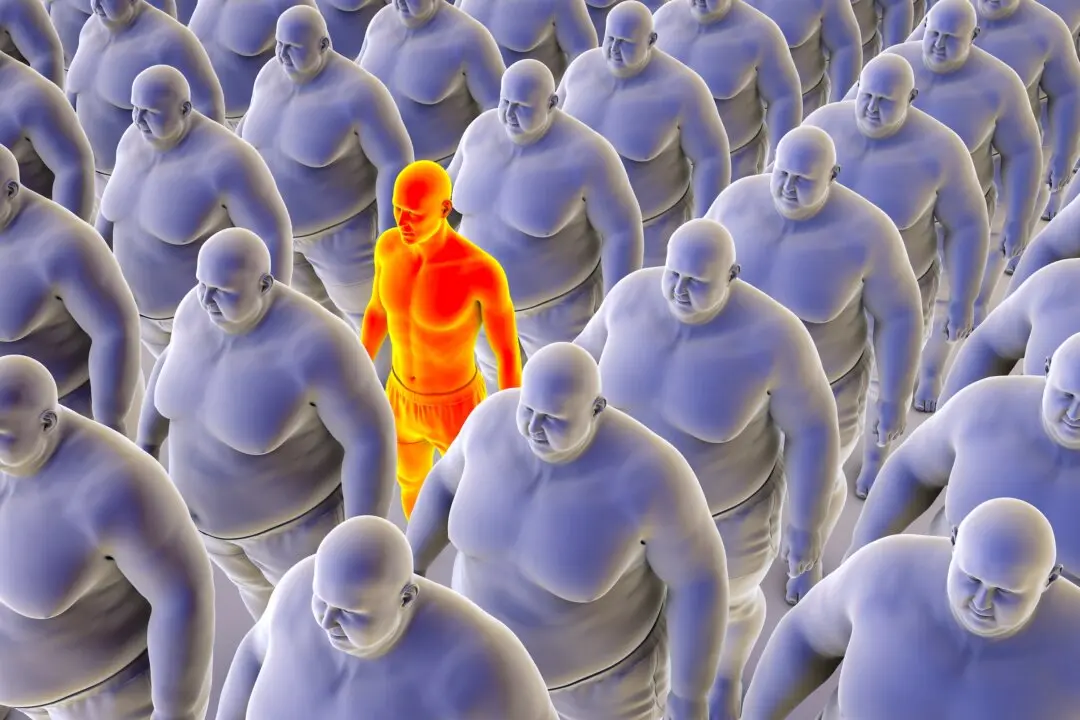
Being unable to hold a plank for two minutes may also indicate that you’re carrying too much weight, and would benefit from shedding a few pounds.
Planking engages multiple muscle groups simultaneously, making it a very efficient and effective core-strengthening exercise. As discussed in a recent Huffington Post blog, you can also perform the plank in different directions: front, side, and reverse—each direction engaging different sets of muscles for all-around toning and strengthening.
The front-facing plank engages the following upper and lower body areas: abdominals, lower back, chest, shoulders, upper trapezius and neck, biceps, triceps, glutes, thighs, and calves. Side planking is particularly effective for training your obliques, which really helps stabilize your spine, while the reverse plank places the focus on your glutes, hamstrings, abs, and lower back.
Proper form is important, however, and overdoing it could lead to injury. Be particularly careful if you already have a bad back. You want to start off holding the plank position for several seconds, slowly working your way up to where you can hold it for about two minutes. As noted by Estelle Underwood in the featured article:
“If you feel any neck or low back pain while doing the exercise, this may be an indication of weakness in the upper or lower regions of the spine. If the core is too weak, the spine will sag, causing compression in the vertebrae, pressure on vertebral discs, and/or shoulder joint inflammation.”
Planking 101
Planking will help build your deep inner core muscles that lay the groundwork for that six-pack look. (Keep in mind, however, that in order to really get “six-pack” abs, you have to shed fat. Men need to get their body fat down to about six percent, and women around nine percent in order to achieve that classic six-pack.) Here are two key points for performing a front-facing plank correctly:
- While in plank position, pull in your bellybutton. Your bellybutton is attached to your transverse abdominis, that inner sheath that holds your gut inside and gives your spine and vertebrae a nice, weight belt-tightening type of support.
So by pulling it in, you begin to contract that deep inner transverse abdominis muscle. If you want to work your six-pack rectus abdominis muscle, drive your chin down toward your toes while you’re focused on squeezing your bellybutton in.
- Next, do a Kegel squeeze. More women than men might be familiar with this term. A Kegel squeeze is performed by drawing your lower pelvic muscles up and holding them up high and tight. For men who aren’t familiar with that term, it’s similar to trying to stop urinating in the middle of the flow. This squeeze will allow you to feel and focus on your abdominal muscles.
To perform a side plank, start by lying down on your right side, keeping your legs straight. Next, raise yourself up on your right forearm; your body should form a straight, diagonal line from head to toe. Your hips and knees should be off the floor. You can rest your left hand on the floor in front of you for support, on your hip, or behind your head. Brace your abs and hold for one minute.
For the reverse plank, start out by sitting on the floor with your legs straight out in front of you. Placing your palms on the floor, below your shoulders, squeeze your buttocks and thighs, and then push your body up into a reverse plank position.
Alternatively, you can begin placing your elbows rather than your hands on the floor, for a less dramatic lift. Again, keep your body in a straight diagonal line from shoulders to heels, making sure your hips are in line.
In the video above, fitness trainer Jill Rodrigues demonstrates a variety of front planking positions, including the basic, intermediate, and advanced basic plank.
Reverse Curl-Ups and Leg Passes
As I’ve mentioned on numerous occasions, prolonged excessive sitting takes a tremendous toll on your health, and I strongly recommend incorporating non-exercise movements into your daily routine to counteract these ill effects. The simplest way to do this is to make sure you’re standing up every 15 minutes. That said, excessive sitting also has a direct impact on your core by weakening your transverse and internal oblique muscles—the muscles most responsible for keeping your gut pulled in. The result? A saggy, flaccid midsection.
If you have a really weak core, you’re also more likely to suffer back pain, in which case you may be better off starting out with abdominal exercises that also provide spinal decompression. This includes exercises such as the reverse curl-up and/or leg passes. To perform a reverse curl-up, lay on your back on the floor, then lift your knees and round your lower back as you lift your knees toward your chin; buttocks lifting off the floor. Your head should remain on the floor. This is a small movement. You do not actually touch your knees to your chin! As noted by physiotherapist Sarah Key:
“If you have a neck problem, clamp your hands on the front of your forehead (this helps to take the neck out of action). Keep your ankles crossed to make the legs less unwieldy and keep your knees wide so your hips don’t pinch. Fifteen at a time is the optimum number [of repetitions]. Don’t worry if the movement feels quite meager; it will get better quite quickly as you find it easier getting your bottom off the floor.”
Leg passes, which resembles a bicycling action, also trains your lower abdominals and helps take pressure off your spine. According to Sarah Key, it’s particularly beneficial if you have a tight back or rigid, painful hips. Start out by lying on your back with your knees bent; both feet on the floor. Stretch your arms out above your head for support.
Suck in your abdominals and pull your right knee toward your right armpit, getting it as close to the armpit as you can. You want to keep your lower back “glued” to the floor, so make sure you tighten your abs and push your spine down. Then, as you lower your right knee back down, simultaneously raise your left leg toward your left armpit. Keep both legs bent at all times. Do about 15 repetitions.
The Benefits of Slacklining
Slacklining is a great new way to infuse your fitness routine with a dash of fun and excitement, and few exercises can compete with it in terms of improving balance and building a strong core. It’s also excellent for improving your focus—many “find their zen space” while walking on a slackline. Since the two inch wide ribbon wobbles, your body’s muscles are constantly having to shift and adjust to maintain your balance. As a result, you'll strengthen your spine, back, and stomach, as well as your hips, legs, knees, and ankles. For a little history on this up-and-coming form of exercise, check out Slacklining4U.com:
“The Slackline itself was born in the early 1980s in Yosemite-Valley, California, USA by rock climbers looking at ways to improve balance. It also proved to be a successful means to practice and have fun when no rock climbing was possible due to wet weather. Adam Grosowsky and Jeff Ellington were the first guys to walk a Slackline. Unlike the traditional tightrope walking, with steel wire or hemp rope, they used polyamide-webbing that is a lot more dynamic, light and comfortable to use. The advent of the dynamic webbing system established a totally new era for balance movement.”
Based on Eric Goodman’s recommendation, I started slacklining earlier this year. I’ve made some progress in that I can stand on the line for longer than a minute, both parallel and perpendicular to the line. I practice on the line nearly every day that I’m home, and my balance has improved so that I can surf. My next goal is to be able to walk the line, which I hope to achieve later this year. When I do, I will do an article on the process. The site also provides detailed how-to instructions for safe slacklining. Here’s a quick summary of the key points :
- You'll need to purchase a proper line. For beginners, a 25-50 mm/1-2 inches wide webbed line is recommended, measuring about 4-8 meters/13-26 feet in length. The wider and shorter the line, the less bouncy it will be. To increase the level of difficulty, select a thinner and/or longer line. You can also decrease or increase the level of difficulty by tightening or loosening the slack of your line.
- Set up your line; around six inches to one foot above the ground when you are standing on it. This will help you avoid injuring yourself if you fall off. As long as the line isn’t touching the ground when you stand on it, you'll get the benefits, so no need to risk unnecessary injury by raising it too high in the air.
- Healthy trees with a diameter of 30 centimeters/11 inches or more are generally suitable for holding a slackline. Alternatively, you can attach the line to an iron post or other solid and sturdy fixture.
- Start out by placing your strongest foot, straight, heel-to-toe, on the slackline, a few feet in from one end.
- Focus your eyes on a fixed point in front of you, and try to keep your head up rather than looking down at the line. This will promote good posture and better balance.
- Put your arms out and knees slightly bent for optimal balance.
- Keeping most of your weight on your front foot, find your balance on your second foot, then slowly step forward.
Build a Strong Core for Life
Again, building a strong core isn’t just about developing six-pack flat abs. It’s important for overall health, stability, mobility, and good posture, too. Moreover, it can help prevent back pain, which is the most common cause for disability across the world. Core workouts don’t have to be boring, however. Slacklining can inject a sense of adventure and play into your routine, and is one of the best ways to increase mental focus and physical balance.