If there’s no insulation at all (uncommon, but not unheard of), it’s a matter of sealing things up and selecting the best insulation for your needs. But what if the house already has insulation?
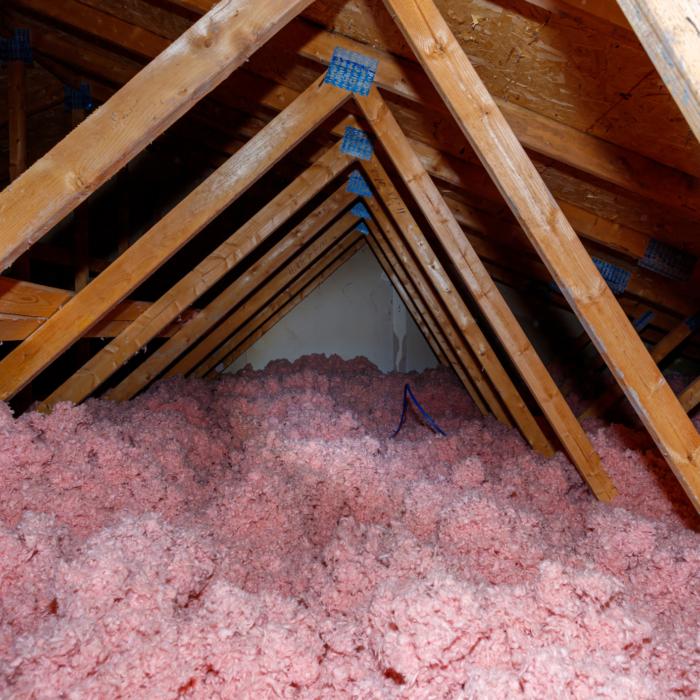
Inspect the insulation’s depth and condition. If it’s not compacted, doesn’t show signs of water damage, looks pristine, and has a good R-value, then congratulations!
However, if the R-value is a little low (which is to be expected after a few decades), adding a layer on top may be all that’s needed to bring it up to the current recommended standard. If it’s compacted—erasing the air spaces that add thermal protection—water-damaged, moldy, or shows signs of pests or rodent damage, it should be removed.
Gearing Up
When working in the attic, always step on the joists, because the drywall below may not be strong enough to support your weight. Also, be careful of any nails protruding from the roof overhead. Light up the work area with bright, hands-free work lights. Protective gloves, an N95 mask, and eye protection are the minimum equipment needed. Hooded coveralls will help protect more of your skin from irritation, particularly from fiberglass.Removal 101
Fiberglass batts are the easiest to remove. Simply roll them up and put them in heavy-duty garbage bags.For loose-fill insulation, it’s worth the cost to rent a portable insulation vacuum for its powerful suction, long and wide hose, and ability to discharge the old insulation directly into specialized recovery bags.

Seal Air Leaks
Start big by sealing up the big leak—where the walls meet the attic floor, dropped ceiling areas, and behind attic knee walls in a finished attic. There may be leaks if you see dirty insulation, signs of moisture intrusion, and evidence of pests, but you can’t always count on those clues. Try using an infrared camera to detect cold and hot spots (there are attachments designed for smartphone cameras) and an incense stick smoke test on a windy day to identify any drafts.Be sure to check for gaps around wiring holes, plumbing vents, ductwork, recessed lights, chimneys, and furnace flues, as well as attic windows and doors. Lastly, check the weather stripping around the attic access hatch/panel.
Good Air Flow
Be sure not to obstruct attic ventilation, particularly soffit vents (those under the eaves), when installing or increasing insulation, and especially when using blown-in insulation. You may have to install vent chutes or baffles that extend six inches above the estimated insulation level to ensure that the vents aren’t covered by the insulation.Check that any ridge and gable vents are clear and free-flowing, cleaning them as needed.
Ready, Set, Install
Fiberglass batt insulation—the big rolls seen at every home improvement store—is popular because it’s affordable and easy to install. Just be sure to fit it tightly, as gaps can reduce its effectiveness. The downside is that batts are susceptible to moisture damage, and fiberglass can cause skin and respiratory irritation. Use protective gear when installing.Blow-in insulation, also known as loose-fill, is made from small particles of fiberglass, cellulose, or mineral wool. It provides broad coverage and excels at filling gaps and cavities. It’s also quick to install. Some home improvement centers will throw in a free blower rental if a certain amount of fill is purchased. The only downside to loose-fill insulation is that it may settle over time, reducing its R-value.
Spray foam insulation not only insulates but also seals air leaks and gaps at the same time. It is highly resistant to moisture. But it can be expensive and is very difficult to remove.
Rigid foam panels or boards are also more costly compared to batt and blown-in insulation, but they provide a superior R-value per inch, are highly moisture resistant, and are resistant to compression. They’re easy to install, but you have to be patient when making cuts—as with batt insulation, it’s important not to leave gaps that will reduce its efficacy.