Super Soft No-Knead White Sandwich Bread

Super Soft No-Knead White Sandwich Bread
Homemade bread is better than anything you can buy in the store. (Mary Bryant Shrader)
Mary Bryant Shrader
8/9/2023
Updated:
8/9/2023
0:00

Most people love a good slice of soft white sandwich bread, which is commonly sold in a plastic sleeve at the grocery store. But you can make this bread very easily at home. And it will be better than anything you can buy at the store.

Plus, you can control exactly what goes into this bread and what doesn’t—such as dough conditioners and preservatives.

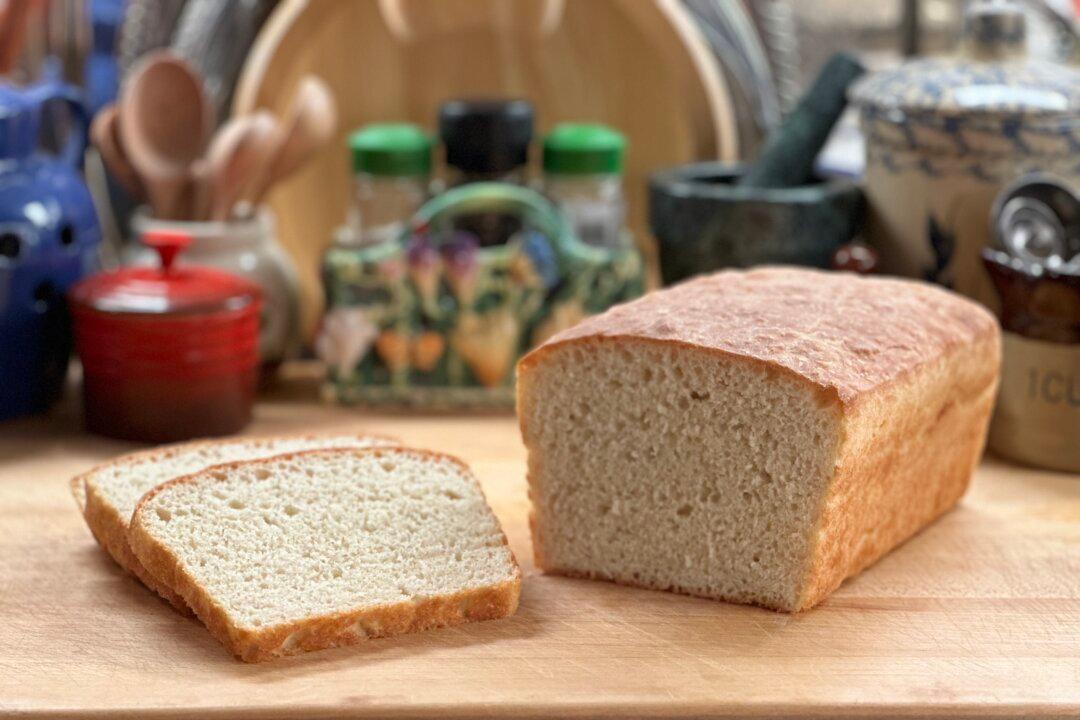
The technique used in making this bread is based on an early 19th-century recipe known as batter bread. As the name implies, this bread is made from a dough that is simply mixed together, as you would a batter. And there is certainly no need to knead a batter! The first batter bread recipe appeared in the cookbook “The Virginia Housewife” by Mary Randolph, originally published in 1824. Batter breads became a staple in the southern part of the United States and were often made with the common southern pantry staple cornmeal. But over the years, housewives in other regions of the United States adapted the batter bread recipe to be made with any type of flour to create a simple no-knead bread.

Prep Time: 5 minutes Rise Time: 2 hours 10 minutes Bake Time: 40 minutes Total Time: approximately 3 hours

Yields 2 loaves
  • 6 cups unbleached all-purpose flour
  • 1 tablespoon fine ground sea salt
  • 1 tablespoon white sugar
  • 1 (1/4 ounce) package or 2 1/4 teaspoon instant yeast
  • 3 cups warm tap water
  • 3 tablespoons unsalted butter, melted and divided
  • 2 1/2 teaspoons unsalted butter, softened
Whisk together the flour, sea salt, sugar, and yeast in a large bowl. Add the warm water and 2 tablespoons melted butter to the bowl with the flour mixture. Mix all ingredients until they come together to form a shaggy dough.

Cover the bowl with plastic wrap and transfer it to a warm place to rise for about 1 1/2 hours or until it appears to have doubled in size. (See Cook’s Notes.) After 1 1/2 hours of rise time, the dough should have doubled in size and should have a puffy appearance, like a pillow with a slightly domed top. (Don’t stress over trying to be exact; just eyeball it.)

After the rise time is complete, rub 1/2 teaspoon of the softened butter between the palms of your hands. Use your greased hands to deflate the dough by pressing down on it. Divide the dough into two equal portions.

Using the remaining 2 teaspoons of softened butter, grease two 9- by 5-inch loaf pans. Transfer equal portions of the dough into each buttered loaf pan. Even out the dough, pushing it into the corners of the pans using well-greased hands. (The dough will be very sticky.)

Place the loaf pans, uncovered, in a warm area and allow the dough to rise for approximately 40 minutes or until it is level with the rims of the loaf pans. (Do not let the dough rise past the rims of the pans, and do not let it form domes in the middle. This will cause the interior texture of the baked bread to be slightly dense and less fluffy.) This rise can take less than 40 minutes in a very warm kitchen, so keep an eye on them.

As the dough begins to rise to about three-quarters of the way up the sides of the pans, preheat the oven to 375 F with the oven rack in the middle position.

Place the loaf pans on the middle rack in the oven. Bake for approximately 40 minutes or until the top crusts are golden brown.

Using potholders, remove the loaf pans from the oven and place them on a cooling rack. Immediately brush each top crust with the remaining 1 tablespoon of melted butter. (If you prefer a crisp top crust, do not brush the tops of the loaves of bread with the melted butter.) Remove the loaves from the pans and transfer to a cooling rack.

Allow the bread to cool completely before slicing. When ready to slice, use a serrated knife.

Store at room temperature in a bread box or cloth bag. It will stay fresh for 2 to 3 days. You can also store it well wrapped (such as in plastic wrap and then placed into a plastic storage bag) in the refrigerator for up to 1 week or in the freezer for 2 to 3 months. Defrost unwrapped bread at room temperature.

Cook’s Notes

Finding a warm place for the rising: A warm place in your kitchen can be in an oven that is turned off but has an electric light or pilot light on, on top of a refrigerator, or in a microwave oven that is off. Even a kitchen counter in a warm kitchen is an ideal place to let the dough rise.

Just make sure that wherever you rise your dough, you keep it away from drafts.

Whole wheat variation: To make a whole wheat version of this bread, substitute 2 cups of whole wheat flour for 2 cups of all-purpose flour. The general rule is that for each cup of whole wheat flour used to replace the all-purpose flour, you will need an additional 2 teaspoons of liquid. If your dough seems dry after adding this additional water, continue adding 1 teaspoon of water at a time and mix until the dough comes together in the correct shaggy consistency.

Accounting for differences in ovens: Every oven is different, and whole wheat flour can often brown more quickly than all-purpose flour. If you are making this bread for the first time, check it in your oven at 25 minutes to ensure it is not overbrowning. If it is overbrowning but is not yet fully baked (when you tap the top, it does not sound hollow), tent or loosely cover the loaf pans with aluminum foil and allow the bread to continue baking for an additional 5 to 10 minutes.

Recipe from “The Modern Pioneer Cookbook” (DK, $32, ISBN 9780744077421). Reprinted with permission from the publisher. 
Mary Bryant Shrader is the author of “The Modern Pioneer Cookbook” and creator of the popular “Mary’s Nest” YouTube channel and website, where she shares step-by-step instructional videos for traditional nutrient-dense foods, including bone broth, ferments, sourdough, and more. She lives in the Texas Hill Country with her sweet husband and their lovable lab. Learn more at MarysNest.com
Related Topics