For a special treat this season, try making three-citrus marmalade in your kitchen. This combination of grapefruit, orange, and lemon creates a delightfully sweet and tangy flavor that no marmalade aficionado will be able to resist.
It will make it difficult for you to buy marmalade from the grocery store ever again.
Plus, as we approach the holidays, it makes a tasty homemade gift for Christmas (or any time). After you make your marmalade on the stovetop, you can deliver it in a lovely jar as a special gift to friends and family and tell them to refrigerate it immediately. Or, if you want to go the extra mile and make your marmalade a shelf-stable pantry staple, consider water bath canning your jars of deliciousness first. Your recipients won’t need to refrigerate them until after opening.
Water bath canning is an ideal place to start if you’re new to home canning. This recipe walks you through the entire process step-by-step. After you’ve finished, you'll also have given the gift of knowledge to yourself, and your next water bath canning recipe will be even easier.
3-Citrus Marmalade
Find a full video tutorial at MarysNest.com/how-to-make-marmalade-jam- 1 whole grapefruit
- 2 large whole oranges (3 medium or 4 small)
- 2 whole lemons
- 1/8 teaspoon baking soda
- 6 cups pure cane sugar
- 1 teaspoon butter, optional
- 6-quart heavy-bottomed, non-reactive pot
- Long-handled wooden spoon
- Candy thermometer, optional but recommended
- Four 12-ounce canning jelly jars or six 8-ounce jelly jars
- Water bath canner
- Water bath canning supplies
- 5 percent acidity white vinegar

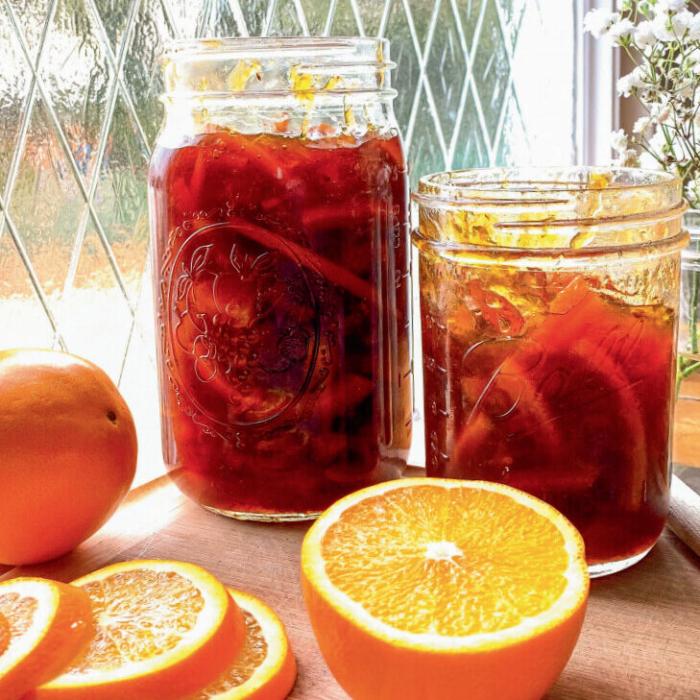
Remove all the pith (the white part) from each piece of whole fruit using a sharp paring knife and discard. Cut each section (“supreme”) of fruit from between each membrane and add to the pot with the zest. Squeeze the leftover membranes over the pot to release any remaining juice.
Sprinkle the baking soda into the pot. (This will help break down the zest, making it softer and releasing the pectin during cooking.)
Place the pot on the stove burner and add 4 cups of water to the pot. Bring the mixture to a boil and then turn it down to a low simmer. Simmer for 30 minutes.
After 30 minutes, remove a piece of the zest from the pot using a wooden spoon. Allow it to cool, and then press it between your fingers. If it is soft, you are ready to move on to the next step. If it is not soft, allow it to simmer for a few more minutes until soft.
If you plan on water bath canning this marmalade, see the “Water Bath Canning Instructions” section below before you proceed.
Put a small plate into your freezer.
Transfer the contents of your pot into a large heatproof measuring cup. If you have 6 cups of the mixture, you are ready to proceed. If the mixture does not measure 6 cups, add water so that you have a total of 6 cups of the mixture.
Return the mixture to the pot and bring the mixture up to a boil.
Slowly add 2 cups of the sugar to the boiling mixture and continue to stir. Once the first 2 cups of sugar have dissolved, add the next 2 cups of sugar and continue to stir. When those 2 cups have dissolved, add the remaining 2 cups of sugar and continue to stir the mixture.
Continue to boil the mixture until you cannot stir down the boil. (At this point, a candy thermometer should read 220 degrees F (104 degrees C). This process can take anywhere from 10 to 30 minutes.
If a significant amount of foam develops during the boiling time, add the butter and stir well to incorporate. The foam should subside. (The butter lessens the surface tension, which creates less foam at the top of the bubbling marmalade.) If it does not subside or you decide not to use the butter, you will need to skim off the foam.
Once you cannot stir down the boil, boil the mixture for 1 minute more and turn off the heat.
Remove the small plate from the freezer and place one teaspoon of the marmalade onto the plate. Put the plate back into the freezer for a few minutes.
After a few minutes, remove the plate from the freezer. If the mixture has gelled and you can run your finger down the middle of the dollop of marmalade with each side of the marmalade not leaching back into the middle, the marmalade has gelled correctly.
If you are not canning this marmalade, transfer it to clean, sterilized jars, put lids on the jars, and refrigerate. Marmalade stored in the refrigerator will last approximately 3 months.
Before making the marmalade, you will want to prepare all your canning equipment.
Using a water bath canner or a large pot fitted with a bottom rack, put your canning jars into the canner and cover them with water. Bring the water in the canner up to a boil and then turn it down to a low simmer. If you have very hard water, you may want to add vinegar to the water in your canner. The vinegar will keep your jars from developing a cloudy appearance.
Once you’ve finished the process of making the marmalade and removed it from the stovetop, you'll start to prepare your canning jars. Using a jar lifter, remove one jar at a time from the canner. Using a funnel, fill one of the empty jars with the marmalade, making sure you leave a 1/4-inch headspace.
Debubble the jar using a canning debubbler or a flat butter knife, and add additional marmalade to the jar if the headspace has dropped below the 1/4 inch headspace.
Using a clean cloth dipped in vinegar, clean the rim of the jar. Once the rim of the jar is clean, place a canning lid on the jar and then screw on the canning ring (band) to “finger-tight” resistance. DO NOT use brute force. The ring is only there to keep the lid in place while also allowing air to be released from the jar during the canning process.
Using a jar lifter, return the filled jar back to the canner. Repeat the process of filling the remaining jars with marmalade, debubbling them, cleaning the jar lid, and screwing on the canning ring to finger-tight resistance. Once all the jars are filled and returned to the canner submerged under water, bring the water up to a boil.
After 10 minutes of boiling, turn the heat off, remove the lid from the canner, and allow the filled jars to sit in the hot water for 5 minutes.
After 5 minutes, use the jar lifter to remove the filled jars to a flat surface that is covered with two layers of dish towels or other fabric. As the jars cool, you should hear a “ping” sound. This sound indicates that the filled jars have sealed correctly.
Once the filled jars have cooled completely, check to see if each jar lid has sealed correctly. The “button” in the middle of the canning lid should be depressed. If the button is depressed, unscrew the ring (band). If, for any reason, you have a jar lid that did not seal properly, you must refrigerate that jar of marmalade.
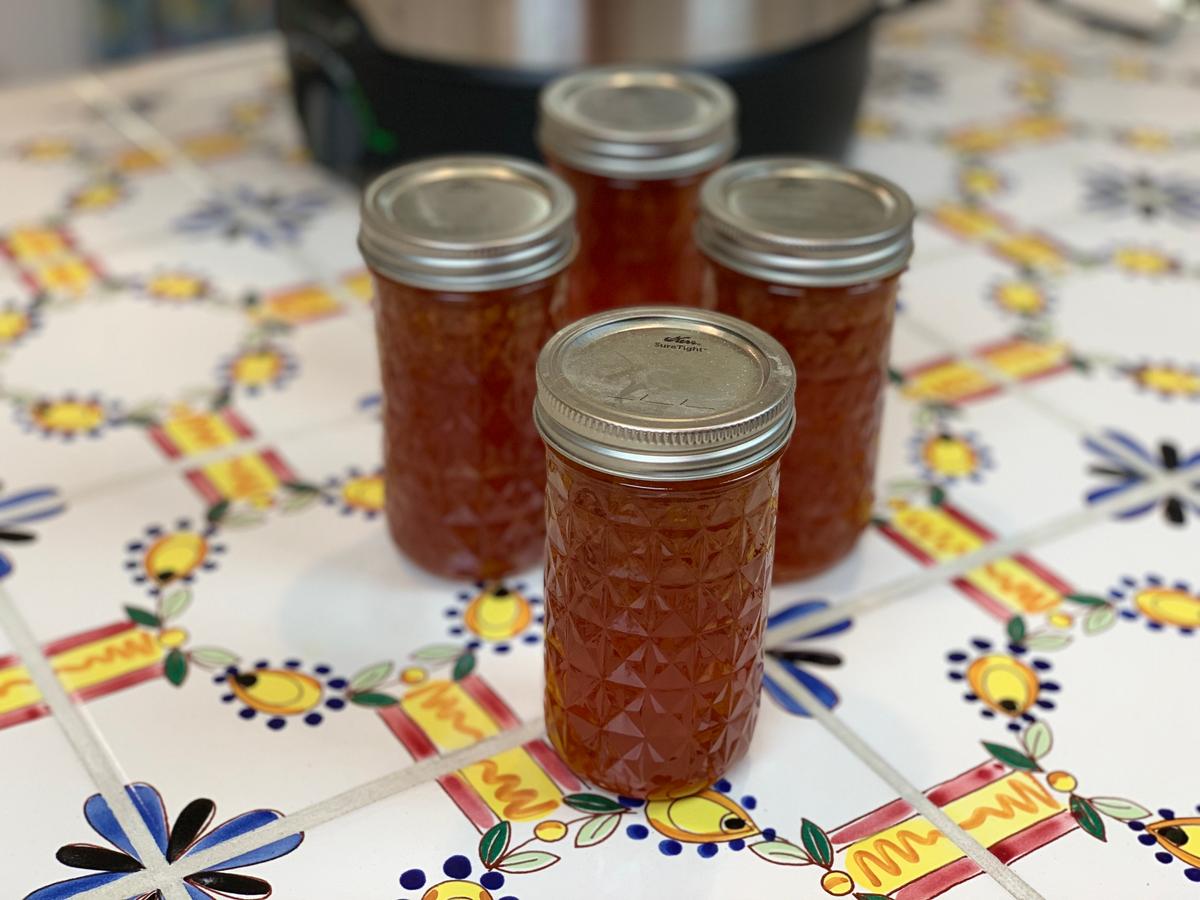
Your jars are now ready to be stored. If you use the latest version of Ball canning lids, your marmalade will have an 18-month shelf life. If not, then your marmalade will have a one-year shelf life. Once opened, you must refrigerate your jar of marmalade, which has a three-month refrigerated shelf life.