If you have a kitchen garden and have been blessed with a bounty of pickling cucumbers (a common variety are called Kirby cucumbers), these three recipes will please any palate.
Quick Pickles for Any Palate
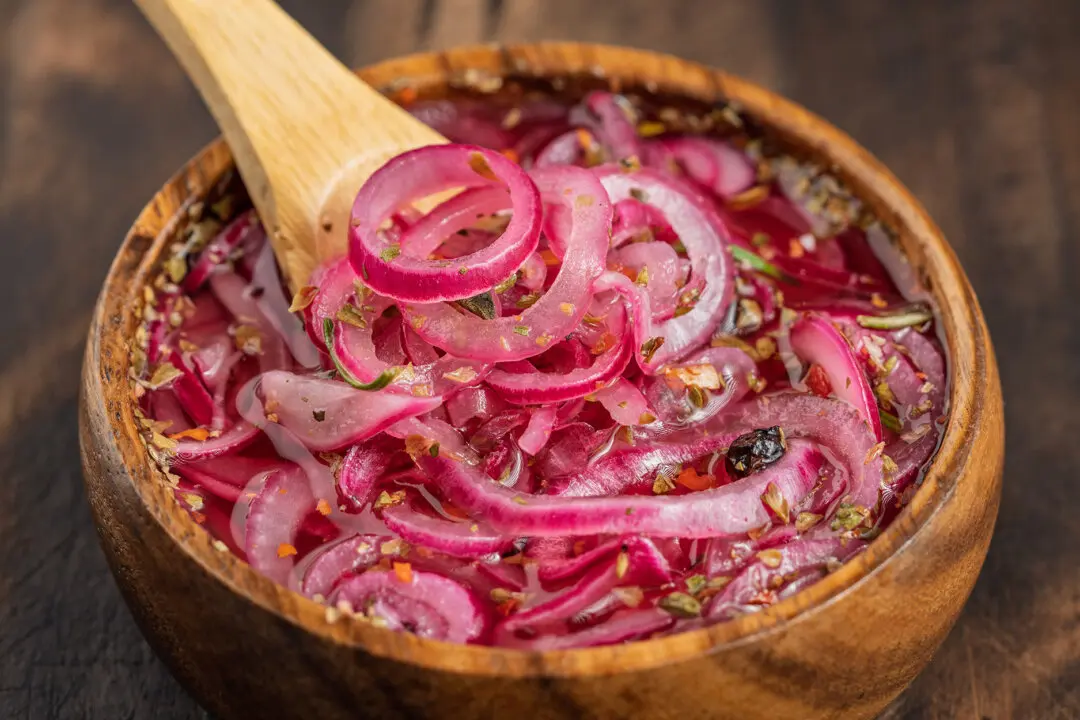
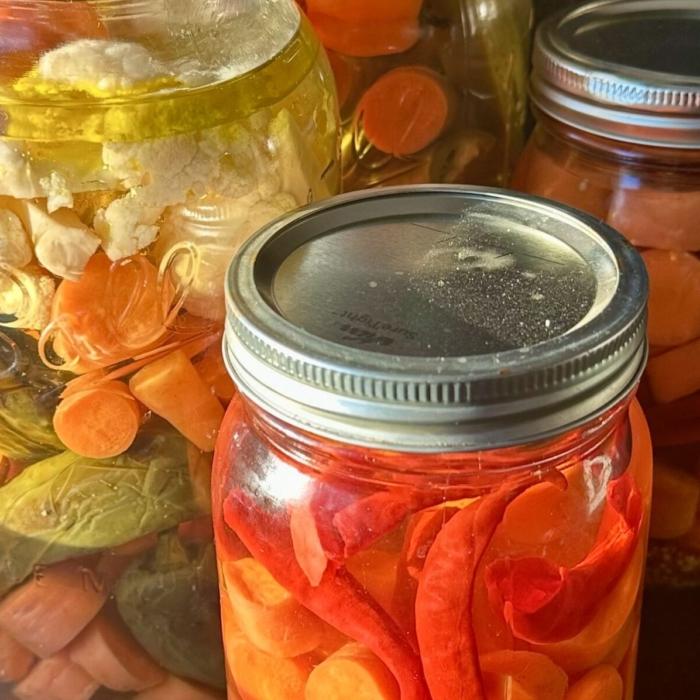
When making quick pickles, you have two options: sweet or savory. Sweet pickles are delicious, but for those watching their sugar intake, the savory option still provides lots of pleasing flavor. Plus, with this recipe, you’re not limited to cucumbers: You can pickle a variety of vegetables, so long as they lean on the hardier side. Carrots, cauliflower, pearl onions, radishes, and sweet bell peppers make superb pickles. You can even combine them in one jar.A Sweet and Tangy Favorite
Have you ever wondered how bread and butter pickles got their name? The most commonly shared story is that in the early 1920s, a woman named Cora Fanning, along with her husband, Omar, decided to trademark their old family recipe for Sweet and Sour Pickles. These pickles were very tasty and immensely popular, so much so that Mrs. Fanning was able to trade her pickles at the local general store for supplies, including bread and—you guessed it—butter.Fast forward to the 1930s, and the recipe and name experienced a resurgence in the kitchens of loving moms doing their best to feed their families during the Great Depression. With limited food options, they would make sandwiches with a simple combination of bread and butter—and, you guessed it, pickles. These three ingredients made for a flavorful and filling sandwich during hard times.
Crisp Fermented Pickles to Aid Digestion
There is nothing like biting into a super crisp pickle spear. And it’s even better if that pickle spear has been naturally fermented through the lacto-fermentation process, which makes the pickles rich in probiotics—otherwise known as gut-loving good bacteria.The only problem is that lacto-fermentation and crisp often don’t go together—whether in the spoken word or in the jar. The fermentation process usually creates a tangy and flavorful end product, but one that is also typically soft in texture. This is where black tea, caffeinated or decaf, comes to the rescue.

Tea contains tannins, which, when dispersed in a fermentation brine, help keep the pickles crisp. All you need is a standard tea bag, nothing fancy, submerged into the bottom of your jar before you start adding in your cucumbers. The tea will not affect the final taste, but it will guarantee that your pickles will not only be delicious, but also have a delightful crunch with every bite.
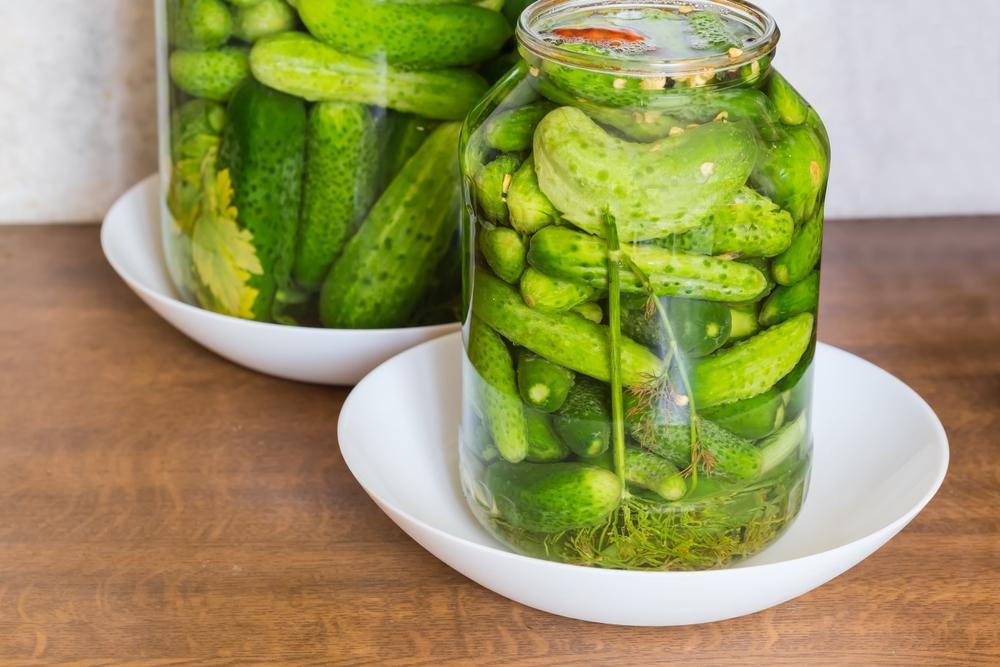
Quick Pickles
As you are working through this recipe, I am here to help with a full-length step-by-step video on my “Mary’s Nest” YouTube Channel.Prep Time: 1 hour, 30 minutes Cook Time: 15 minutes Chilling Time: 1 hour Total Time: 2 hours, 45 minutes
- 4 pounds pickling (Kirby), English, or hot house cucumbers (see Recipe Notes)
- 1/4 cup fine ground sea salt
- 3 to 6 tea bags, preferably black tea, caffeinated or decaffeinated
- A few sprigs of fresh herbs, such as dill, optional
- 4 cups white vinegar, 5 percent acidity
- 3 cups white cane sugar, optional (If you omit the sugar, substitute 2 to 3 cups of water to create a sufficient amount of brine)
- 2 teaspoons yellow mustard seeds, optional
- 1/2 teaspoon celery seed, optional
- 1 teaspoon turmeric, optional
- 1/2 teaspoon red pepper flakes, optional
- 3 quart-sized jars or 6 pint-sized jars, with lids
- Large bowl
- Colander or large mesh strainer
Once cucumbers have been allowed to drain, prepare to place them in the jars. Do not rinse the cucumber slices. Reserve the accumulated liquid in the bowl that was underneath the cucumbers.
Place one black tea bag at the bottom of each jar. (This will not affect the flavor, but the tannins in the tea will keep the pickled cucumbers crisp.)
Begin to layer the cucumber slices into the jars. Periodically gently press down on the vegetables to try to compact them slightly without crushing them. If you are using fresh herbs, you can layer them periodically between the cucumber slices. Set the filled jars aside.
To make the brine: In a medium saucepan on high heat, mix the vinegar, reserved cucumber liquid, sugar (for a sweet brine) or water (for a savory brine), and spices if using. Bring the mixture to a boil and stir well until all the sugar has dissolved. Remove the pan from the heat.
Using either brine, ladle the hot brine into each of the jars, leaving a 1/2-inch headspace in each jar. (Headspace is the distance from the liquid to the rim of the jar.) (See Recipe Notes.) Allow the jars to cool, and then place a lid on each jar and refrigerate the jars for at least one hour before serving. These pickles will stay fresh in the refrigerator for approximately six months.
Instead of cucumbers, you can also use a combination of firm vegetables including carrots, cauliflower, pearl onions, radish, and sweet bell peppers. Skip the salting and draining steps above and begin by directly placing the vegetables into the jars, and add 2 teaspoons fine ground sea salt to the brine.
If you find you are a bit short on brine, no problem. Just top off your last jar with a mixture of equal parts white vinegar and water. If instead, you find you have more brine than you need, do not throw it out. Refrigerate it and use it up within a few weeks to pickle additional vegetables or in place of vinegar when making a sweet and tangy salad dressing.
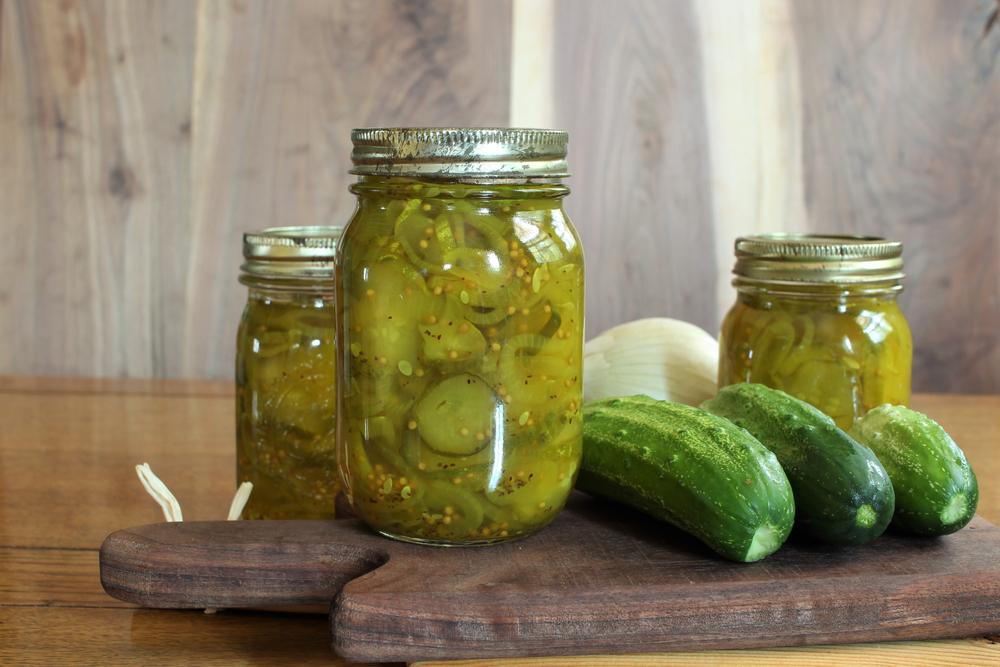
Bread and Butter Pickles (With Water Bath Canning Option)
Bread and butter pickles are easy to make, but if at any time you need some visual assistance, especially if you decide to water bath can your pickles, I am here to help with a full-length step-by-step video on my “Mary’s Nest” YouTube Channel.Prep Time: 1 hour, 45 minutes Cook Time: 15 minutes Chilling Time: 1 hour Optional Water Bath Canning: 10 minutes Total Time: 3 hours, 10 minutes
- 4 pounds cucumbers (approximately 12 cucumbers), preferably pickling cucumbers such as Kirby or other variety (thin-skinned cucumbers can be substituted, such as English or hot house cucumbers)
- 2 pounds yellow onions (approximately 2 large onions), thinly sliced
- 1/3 cup fine ground salt (see Recipe Notes)
- 3 cups white cane sugar
- 2 tablespoons yellow mustard seeds
- 2 teaspoons ground turmeric
- 2 teaspoons celery seeds
- 1 teaspoon ground ginger
- 1 teaspoon whole black peppercorns
- 3 cups white vinegar, 5 percent acidity
- 3/4 teaspoon Pickle Crisp, optional for water bath canning (see Recipe Notes)
- 6 pint-sized jars or 3 quart-sized jars with screw top lids
- Water bath canner, optional
- 6 pint-sized wide-mouth canning jars with lids and bands (rings), optional
- Canning jar lifter, optional
- Debubbler or flat-edged knife, optional
Using a colander, rinse the cucumbers under cold water. Drain and transfer to a large bowl.
Remove the stem and blossom end of each cucumber. Cut cucumbers crosswise into 1/4-inch slices and place the slices into a colander that you have placed over a bowl to catch any liquid drippings.
Add sliced onions to the colander. Toss the entire mixture with the salt.
Allow the mixture to drain at room temperature for 1 1/2 hours (or in the refrigerator for 3 hours).
After the cucumber mixture has completed the draining process, combine sugar, spices, and vinegar in a large non-reactive saucepan or stockpot (stainless-steel or enameled). Bring this brine mixture to a boil and stir until the sugar dissolves. Now add the un-rinsed cucumbers and onions, along with any liquid that has drained into the bowl, into the saucepan and bring the brine back up to a boil. Stir well. Once the mixture comes up to a boil, remove it from the heat.
If you are not water bath canning your hot pickles and brine, transfer them to clean jars that have been washed in hot soapy water and rinsed well. Make sure the jars are still hot when you fill them with the pickles and brine. Once the jars are filled, allow the pickles to cool slightly, place the lids on the jars, and refrigerate. Pickles should stay fresh stored in the refrigerator for six months.
Prepare your canner, jars, and lids: Fill a large stockpot or stovetop canner 3/4 full with water. If you are using a stockpot, place a rack on the bottom of the pot. If you are using a stovetop canner, the rack should already be in the pot. (Note: If you are using a stovetop canner, check with your manufacturer to make sure that the canner you are using is compatible with your stovetop. For example, you must use a flat-bottom canner on a glass-top stove.)
Place the lid on the canner and bring the water to a boil, then turn the heat down to low. Remove the lid and, using a jar lifter, place the jars on the rack in the canner and replace the lid.
Wash the canning lids and bands (rings) in warm soapy water, rinse well, and set aside on a clean dish towel.
Working with one jar at a time, remove the first jar from your canner using the jar lifter and drain the water from the jar. Transfer the jar to a well-padded level surface. (Terry dish towels work great.) Check the rim of the jar for nicks using a clean paper towel dipped in vinegar. If the jar is nicked, discard it and place a replacement jar into the hot water in the canner.
Pack the hot pickles and brine into a hot jar using a funnel and leave a 1/2-inch headspace. (Headspace is the distance from the liquid to the rim of the jar.)
Add 1/8 teaspoon Pickle Crisp to the pint jar and 1/4 teaspoon to the quart jar.
Use a debubbler or flat edge knife to remove any air pockets from the jars and recheck for 1/2 inch headspace. If headspace has dropped, add a bit of additional hot brine. Wipe jar rim with a paper towel dipped in white vinegar.
Center the canning lid onto the rim of the jar. Apply the canning band (ring) and adjust to “fingertip” tight, meaning just until you meet gentle resistance. Once you meet gentle resistance, give the band (ring) one more gentle turn; this will most likely be no more than 1/4 inch. The band (ring) is used only to keep the jar lid in place but should not be brute force tight. You want air to be able to escape from the lid during the water bath processing.
Place the jar into your water bath canner using the jar lifter and repeat this process until all your jars are filled.
After 10 minutes, turn off the heat and remove the lid of the canner. Be careful when you remove the lid, as steam will be released. Allow the jars to stand in the hot water for 5 minutes.
After 5 minutes, remove the jars, one at a time, from the water bath canner using a jar lifter. Keep the jars upright as you remove them and place them on a well-padded surface. Allow them to cool for 24 hours.
After 24 hours, verify that each jar is sealed properly by checking to see that the “button” (raised area) on the canning lid is now depressed.
If all the jars are sealed properly, remove the bands (rings) and store them in a cool, dry place, preferably in the dark but at the very least out of direct sunlight.
If, for any reason, a jar does not seal properly, refrigerate it to keep the contents fresh. Water bath canned pickles should stay fresh, unopened, for 18 months, but check with the packaging of the lids you used since different manufacturers may guarantee different shelf-stable freshness time frames. (Most Ball brand lids guarantee that food canned using their lids will stay shelf-stable for 18 months.) Once opened, the pickles must be refrigerated and should stay fresh for six months.
Salt: Look for salt free of preservatives and anti-caking agents. Sea salt or real pink salt are good choices. However, if you are going to water bath can these pickles, use salt specifically labeled for pickling and canning.
Pickle Crisp: This is calcium chloride. It will keep your pickles crisp during the water bath canning process.
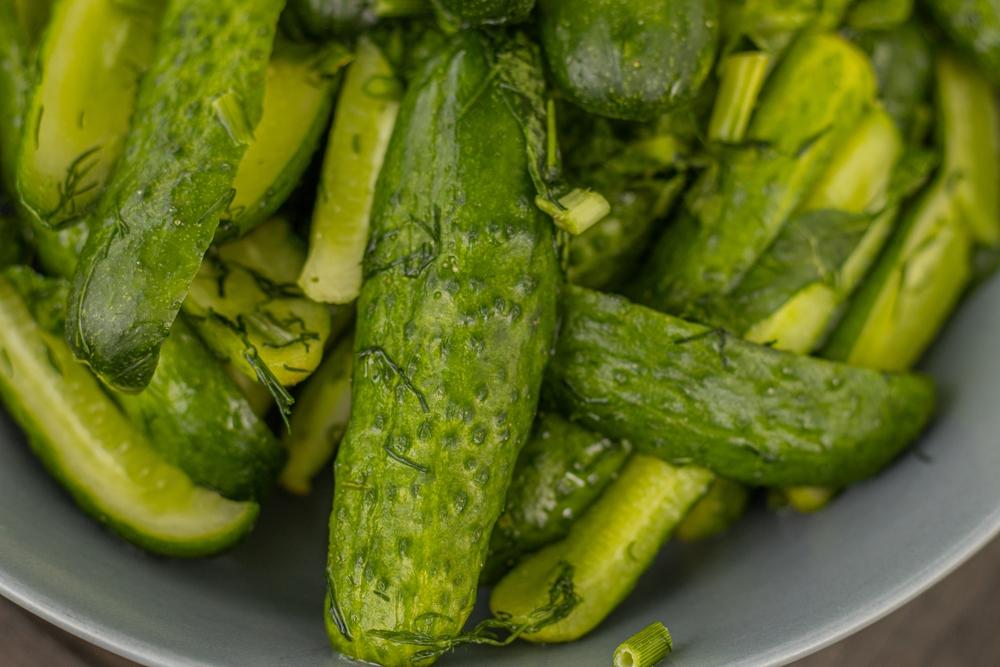
Crisp Fermented Pickles
Fermenting vegetables, especially pickles, is probably one of the easiest ferments of all to make. But if at any time you need a visual reference, I’m here to help with a full-length step-by-step video on my “Mary’s Nest” YouTube Channel.Prep Time: 5 minutes Maximum Fermentation Time: 7 days Total Time: 7 days, 5 minutes
- 4 pickling cucumbers such as Kirby or other variety (2 thin-skinned cucumbers can be substituted, such as English or hot house cucumbers.
- 1 tablespoon pickling spices (or any combination of spices that you like)
- 1 bunch fresh dill, optional (or any combination of herbs that you like)
- 1 bag black tea, caffeinated or decaffeinated
- 1 rounded tablespoon coarse-ground sea salt or 3/4 level tablespoon fine-ground sea salt
- Chlorine-free water, enough to cover cucumbers
- 1 quart-sized jar
- 1 four-ounce glass jar (canning “jelly” jars work great) or a glass fermentation weight
- 1 screw on lid or 1 canning band (ring) and 1 pickle pipe
- pH strips, optional but highly recommended (see Recipe Notes)
Slice cucumbers vertically into spears and add to the jar, packing tightly.
Mix salt with a small amount of water and pour into the jar. Pour additional water into the jar to make sure that the cucumbers are completely covered.
Place the four-ounce jar or glass fermentation weight on top of the cucumbers.
Place the lid (or pickle pipe with canning band) on the jar. Tighten the lid (or canning band).
Place the jar in a room-temperature area that averages between 68 degrees F to 72 degrees F. This is the ideal temperature range for fermenting pickles. Make sure that this ferment is out of direct sunlight; ferments do not like temperature fluctuations caused by direct sunlight.
After a few days, you will begin to notice bubbles forming in your jar. This is carbon dioxide gas. If using only a lid on the jar, release the lid daily and retighten. This will release some of the carbon dioxide gas that is produced by the fermentation process and prevent your jar from breaking. (Using a pickle pipe will help you skip needing to release the lid daily.)
After a few days, you can check the progress of your fermentation by removing a small amount of the brine and dipping a pH strip into it. If the pH is 4.6 or lower, your fermentation has been successful. At this point, you can remove the small glass jar or weight, put a lid on the jar, and refrigerate your pickles.
If the pH is above 4.6, allow the pickles to ferment longer. By the seventh day, the pH should have dropped to 4.6 or lower. At this point, you can remove the small glass jar or weight, put a lid on the jar, and refrigerate your pickles.
If, after 7 days, the pH has not dropped below 4.6, your ferment was not successful. It is best discarded as it may be contaminated with bad bacteria. Possibly, the temperature conditions were too cool or too hot, or other factors may have played a role in its failure. Do not lose heart. Try again and place your ferment in a different area. I am confident that by your second or third try, you will find the sweet spot perfect in your home for creating successful ferments.
Fermented pickles will stay fresh, refrigerated for approximately 6 months.
Although I highly recommend you use pH strips to verify the correct pH of your ferment, if your ferment shows no indication of mold, is slightly effervescent, and has a pleasant yeasty aroma, it is most likely a successful ferment that can be consumed. But if at any time it takes on some discoloration or develops a foul odor, discard it immediately.
Initially, the pickles, which are now fermented, will taste salty. Over the next few weeks, during refrigeration, the pickles will absorb more of the brine, increasing their flavor, and the brine will become less salty.