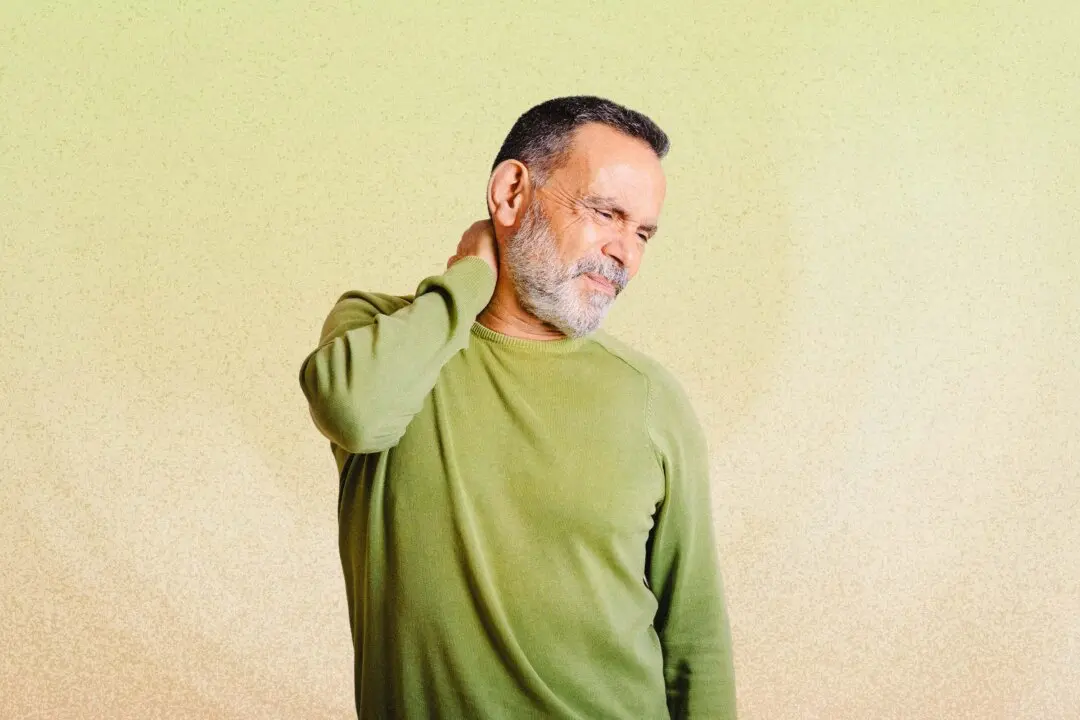
Cervical Spine Problems Can Cause Vision Deterioration and Brain Strokes
First of all, let’s take a look at the structure of the cervical spine. There are seven vertebrae in the cervical spine. From top to bottom, the higher a vertebra is located on the cervical spine, the more difficult it is to adjust it. Doctors are all very careful when dealing with the cervical spine issues, especially regarding the first and second vertebrae.Since blood directly passes through the first and second vertebrae to the brain, if they are misaligned, it can cause headaches, dizziness, tinnitus, degeneration of vision, and even serious problems such as brain strokes and dementia.
Usually, when pressing acupuncture points on and/or rehabilitating the vertebrae, osteopaths are extremely careful.
1. Longitudinal Traction
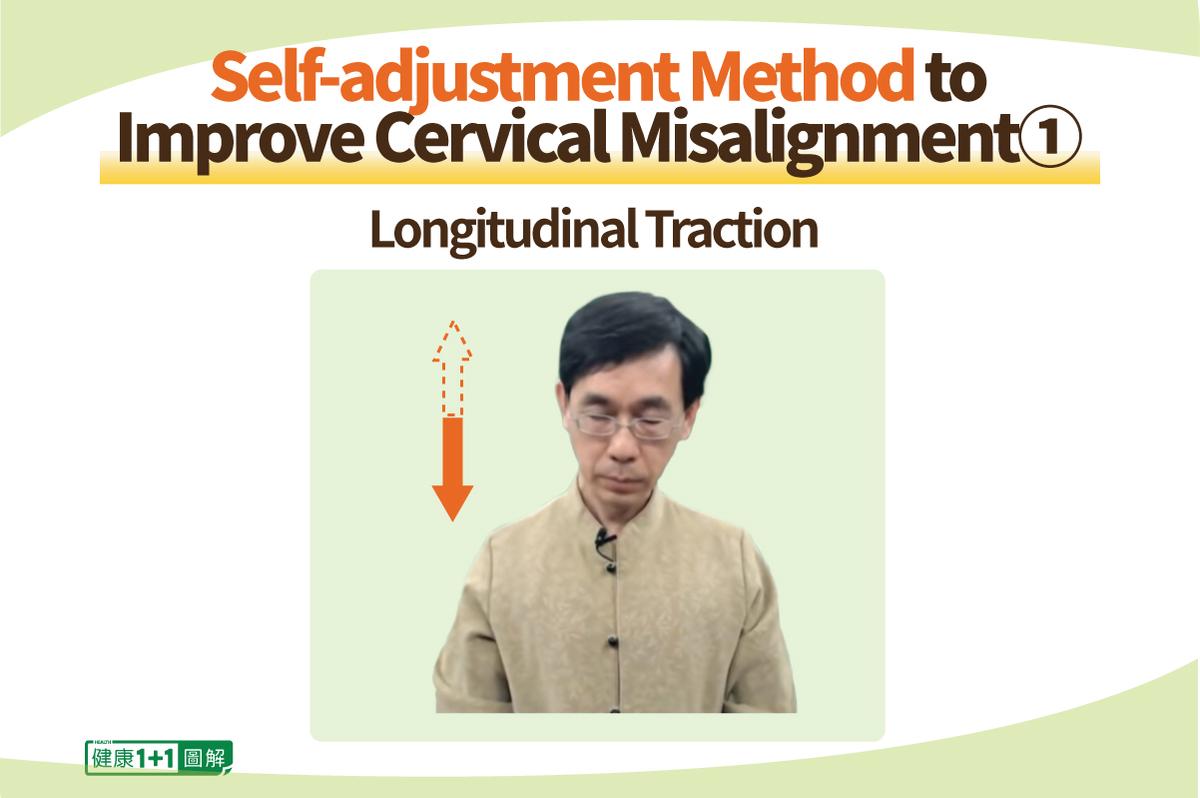
When doing this exercise, we should stretch our shoulders downwards, while pulling the head upwards, as if stretching the neck. When stretching the shoulders and head, it feels like the neck is rising.
2. Horizontal Traction
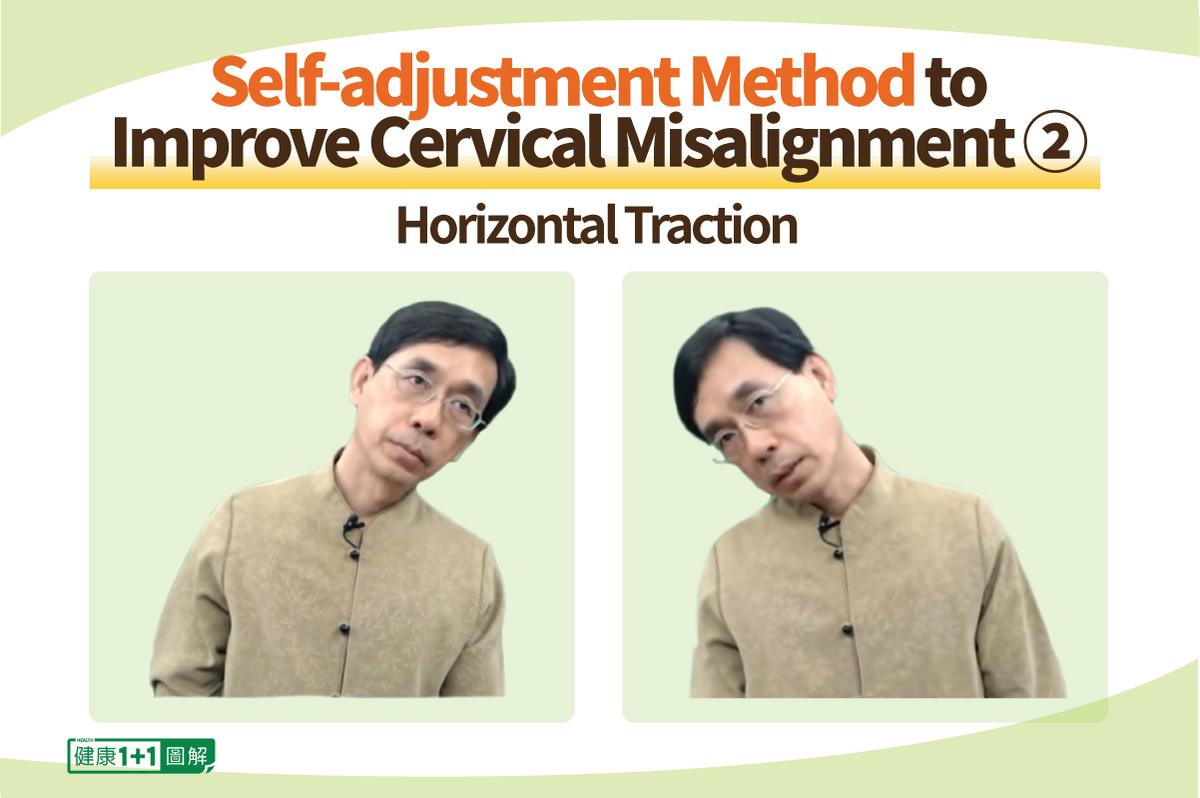
First, we should pull one side of an armchair with one hand, and turn our head downwards to the other side. After about ten seconds, we switch hands and the direction of our head stretching. Repeat the same movement on both sides four more times.
When our head turns to one side, we will find that the muscles on this side of the neck become relaxed. This would stretch the deep lateral muscles and ligaments of the first and second vertebrae. This is because when the cervical spine is misaligned, the muscles and ligaments around it on one side would become tighter, while the muscles on the other side become looser.
3. Back of the Head Massage
We can use our thumbs to massage a series of key acupuncture points located on the back of the head and below the cranium, including: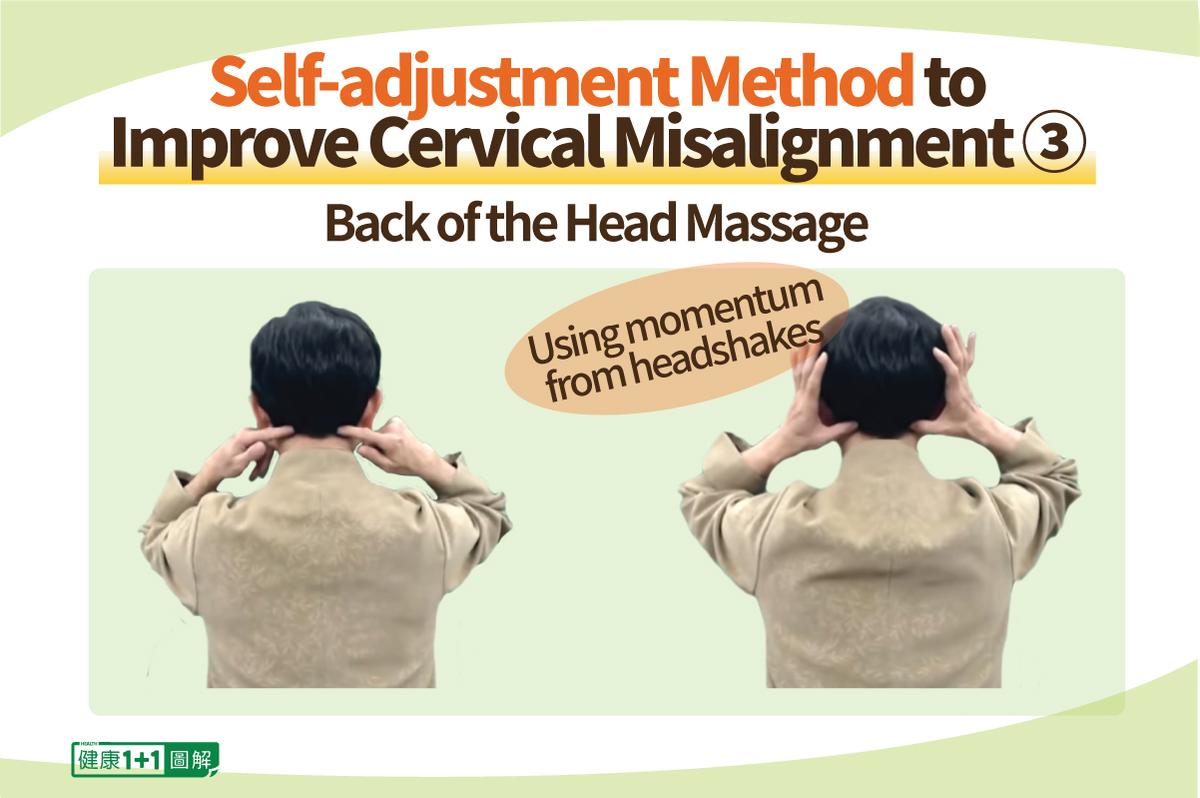
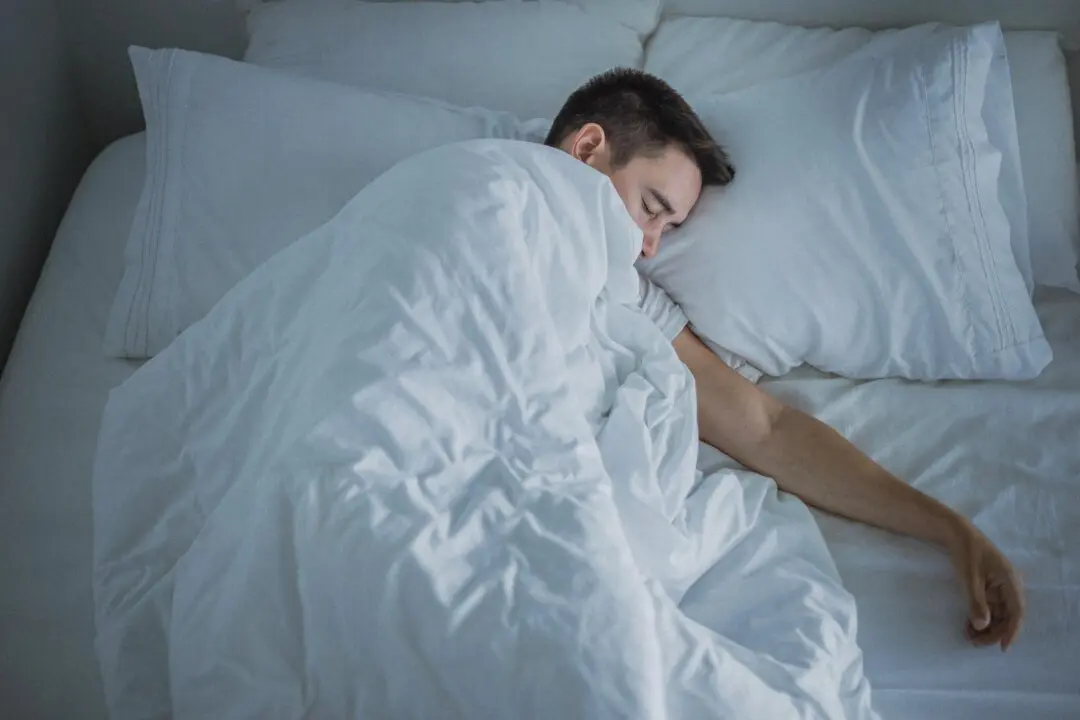
We can use the thumbs on both hands, in a symmetrical manner, to press these acupuncture points one by one to relax them. During this process, our eyes will start to brighten up, and we can sleep better at night.
According to Dr. Wu, although the aforementioned “static massage” can relax the muscles, it’s insufficient to restore the misaligned cervical spine.
4. Back of the Neck Kneading
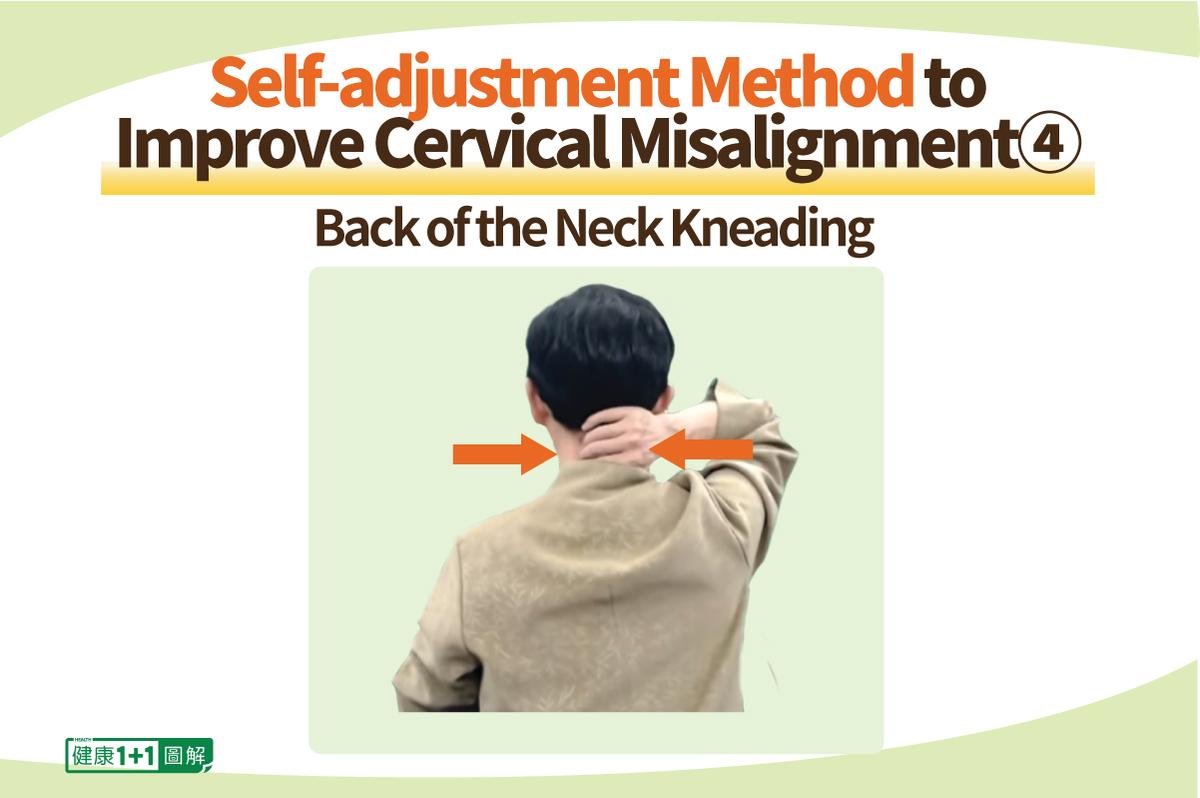
Dr. Wu suggests that when massaging the back of the neck, especially the area around the cervical vertebrae, we should position the index finger, middle finger, and ring finger on one side of the cervical vertebrae and the thumb on the other side, and knead the neck with these four fingers. This would apply a stronger force on the back of the neck.
During the kneading process, you may find a certain spot to be particularly painful. This is the place where the cervical spine is misaligned.
5. Transverse Process Pressing
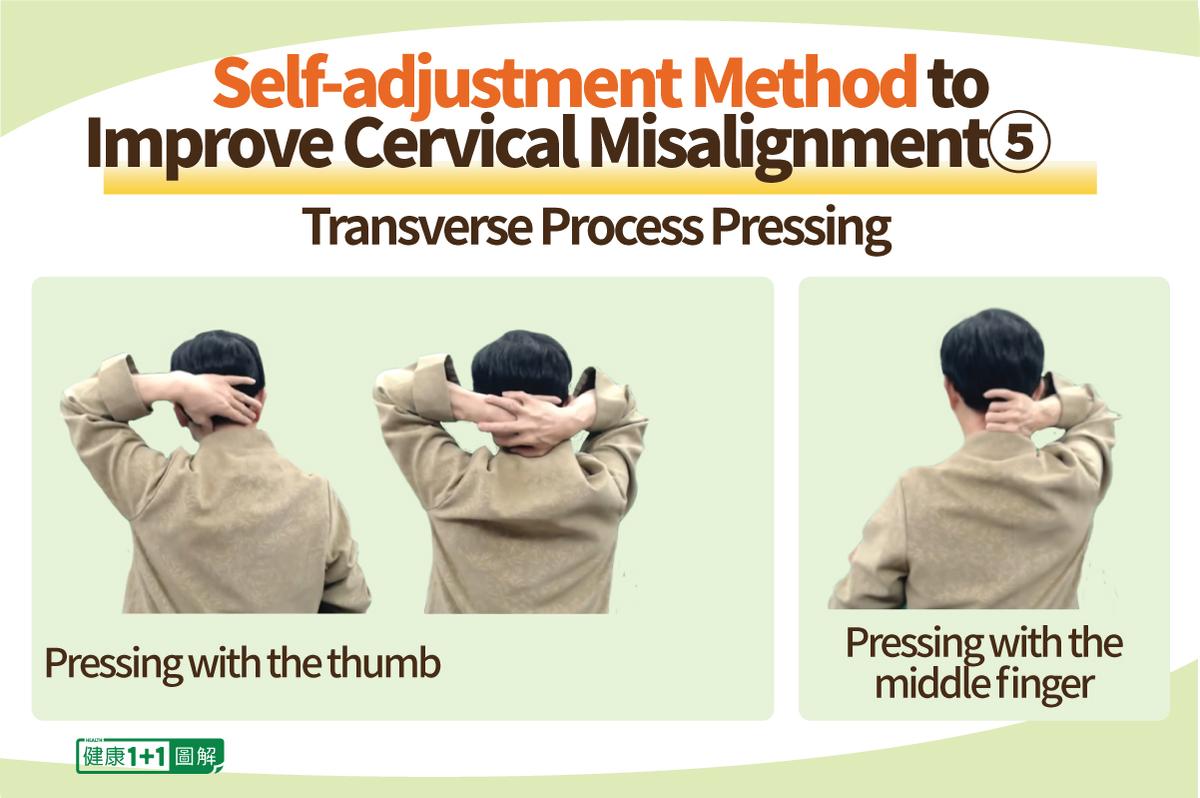
The purpose of this method is to pop the vertebra that’s out of place back to its original place from the back of the neck with the thumb (or the middle finger).
We should first place the thumb on the painful spot, which you discovered with the back of the neck kneading method, and then put the other four fingers on the other side of the cervical spine. We then press on the painful spot with the thumb and hold for 30 seconds. During this process, we will feel a lot of aching pain.
If we feel that the pressure from the thumb is not strong enough, we can also use the other hand for more strength.
During the pressing process, we should feel that the painful spot is like a clod slowly disintegrating and gradually crumbling. This means that the vertebra, which is out of place, is slowly coming back into its original place.
6. Slow Head Turning
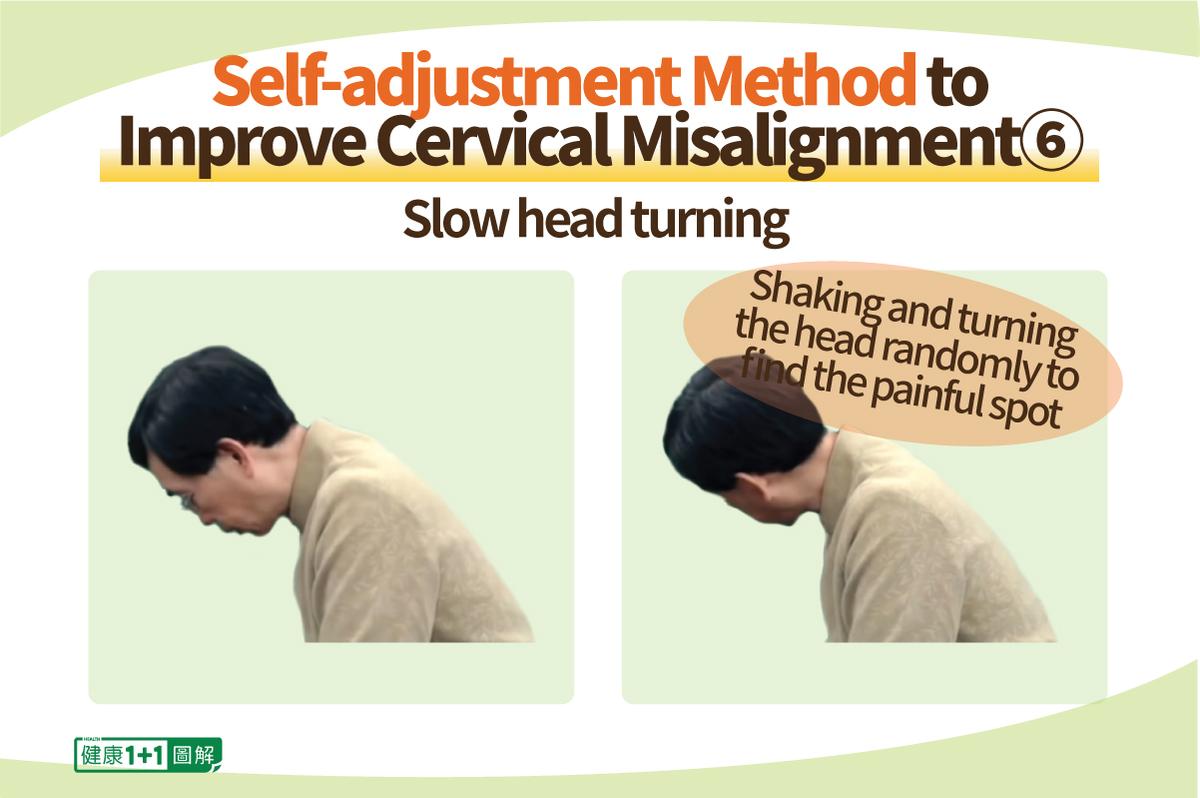
The method of slow head turning is the favorite of many of Dr. Wu’s patients.
When our cervical spine becomes misaligned, we will find no problem turning our head in the direction of the misalignment. However, we will not be able to turn our head in the opposite direction, as the neck will ache and get stuck.
The key of this method is to turn the head in the direction of pain, in order to slowly turn the misaligned cervical spine back to its correct position.
When using this method, it’s best for us to be sitting or lying on our stomach. We should tilt our body forward first, with the neck as parallel to the ground as possible (this reduces the head’s weight on the cervical spine).
Then, we can slowly shake and turn our head around randomly.
The spot where the cervical spine gets stuck may be in a different location for each individual.
When we finally find the spot, we should stay at it for ten seconds. Then we should continue to turn a little bit more in the same direction and hold it for another ten seconds. In the last step, we should turn our head at a larger angle in the same direction, and hold it for another ten seconds.
7. ‘Union Jack’ Head Turning
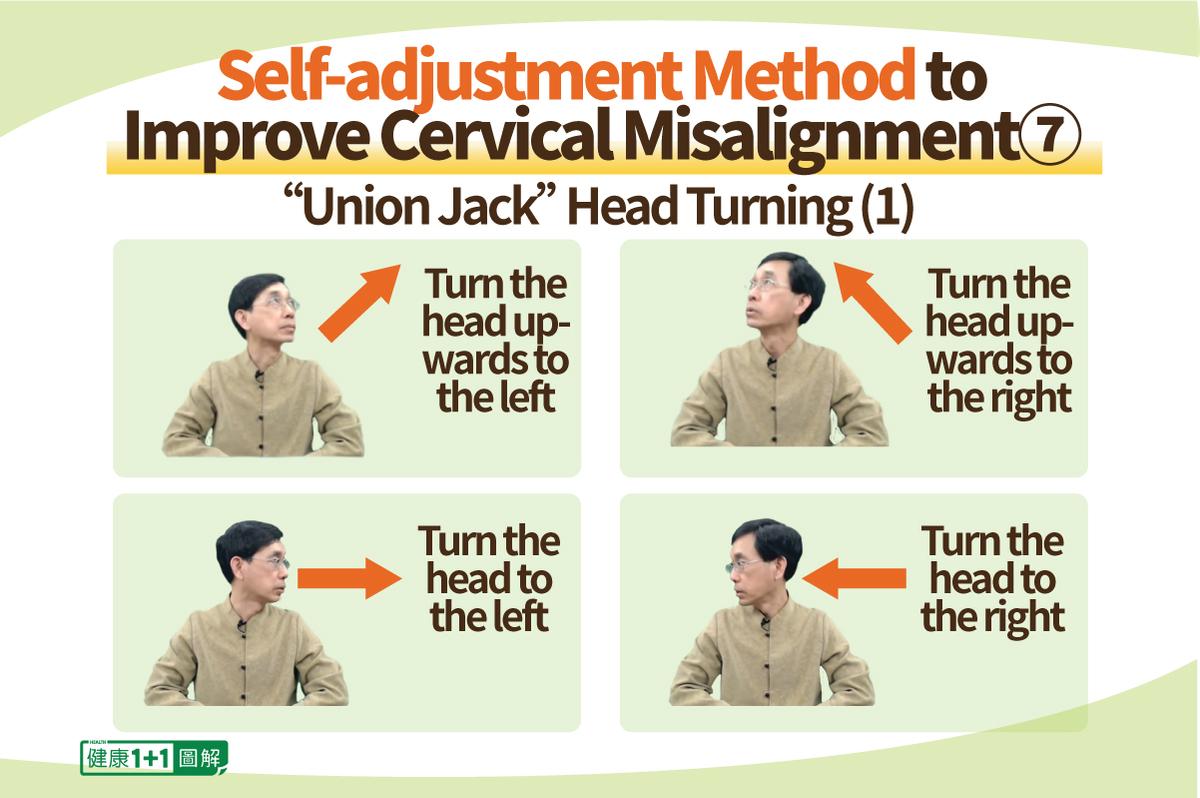
This method is like drawing a Union Jack with our head.
When using this method, we should first slowly turn our head 45 degrees upwards to the left, then back to the center; and then turn our head 45 degrees upwards to the right, then back to the center. We should slowly repeat this set of movements five times.
Next, we should turn our head to the left (without moving our shoulders), then back to the center and pause; and we then turn our head to the right, and again back to the center. We should also repeat this set of movements five times.
The rule of thumb when turning our head is to let our neck stretch as much as possible, even if the neck muscles feel very tight. After doing so, our neck will be able to turn at a much larger angle.
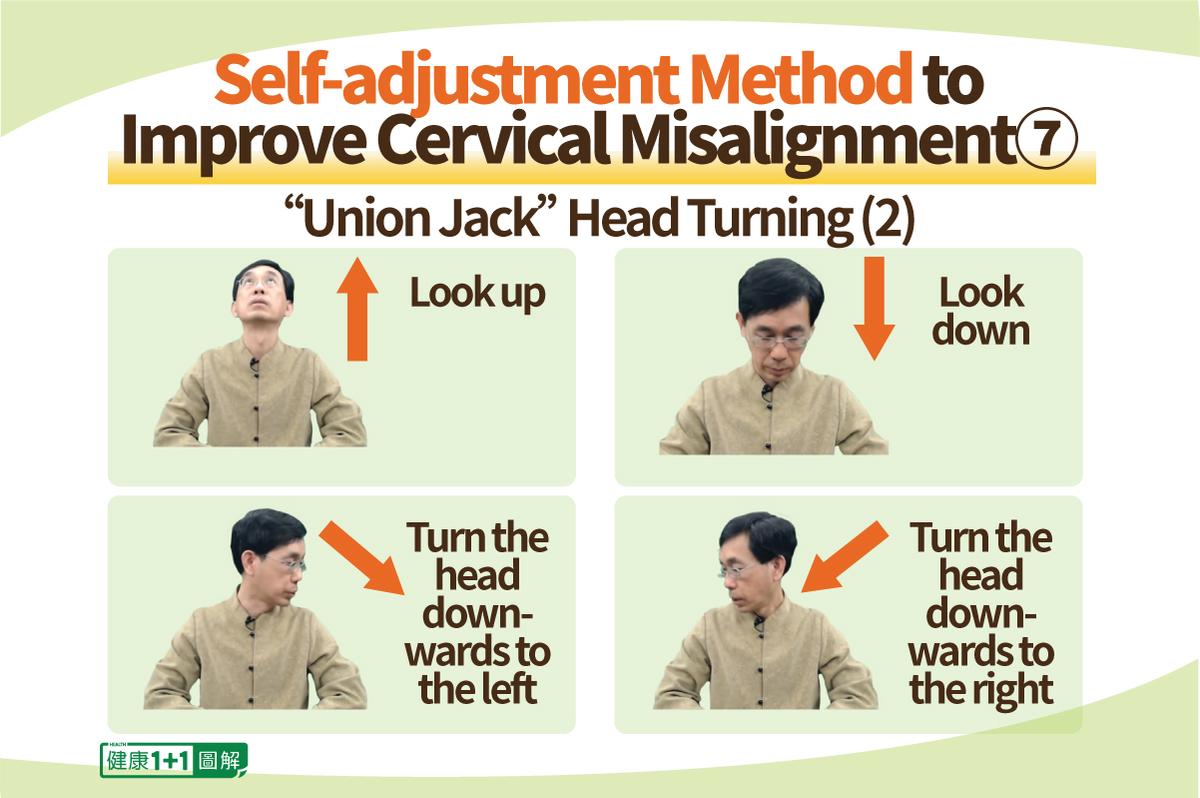
Next, we should raise our head and look up, then we will lower our head again, while looking down at the same time.
Then, we should slowly turn our head 45 degrees downwards to the left, then back to the center; and then turn our head 45 degrees downwards to the right, then back to the center.
We should slowly repeat both sets of movements five times.
The Union Jack head turning is simple, effective, and gentle. It helps exercise the first to seventh vertebrae of the cervical spine.
8. Butterfly Swim
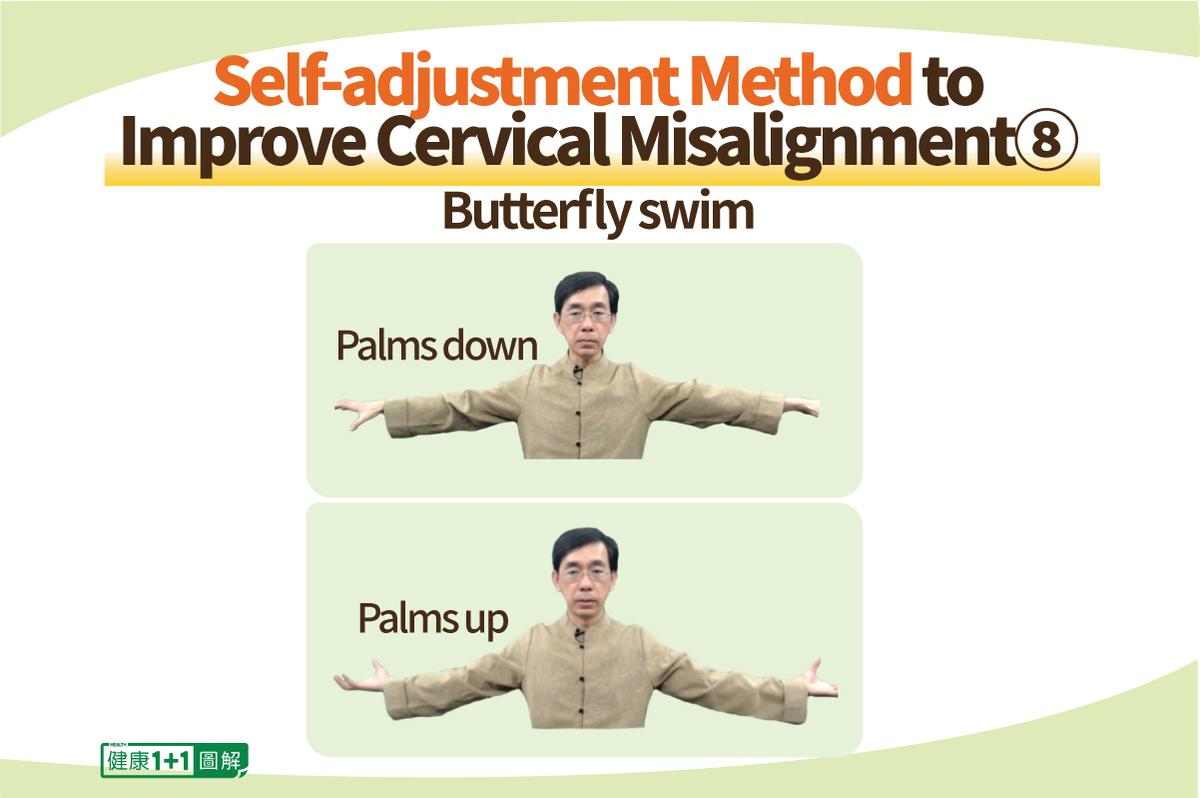
The butterfly swim method is used to improve the lower cervical spine.
Problems with the cervical spine cause many people’s hands to go numb. More commonly, many people, who bend their heads down a lot, end up with a “dowager’s hump.” These patients’ necks are often stretched forward, instead of being upright. The correct posture should be holding the head high and keeping the shoulders open, while relaxing and keeping the body upright.
In doing the butterfly swim, we should first straighten our arms horizontally to the sides of our body, make an eagle’s claw with each hand and bend our hands downwards with force.
Then, shrug to make the shoulder blades go up and down. During this process, we should keep our arms straight, let our fingers exert a lot of force and also concentrate a lot of force on our shoulder blades, so that they move from back to front.
Note that we are moving the shoulder blades, not the shoulders. You will find that when the shoulder blades move, the muscles on our entire back will also move, including the muscles around the cervical spine and the muscles on the back of the shoulders. This allows the whole body to relax instantly.
9. Tilting the Head Back and Swaying From Side to Side

This is still part of the butterfly swim. The previous movements have loosened the muscles around the cervical vertebrae, and this last exercise is to open the cervical vertebrae up. When doing this exercise, we tilt our head back, look ahead, and sway our head from side to side.
Which Exercises Are the Most Suitable for You?
We can choose to do all the exercises or pick several according to our needs.The first three movements can bring the misaligned first and second vertebrae back to their correct position in a simple and safe way.
The fifth movement is a more powerful technique, which can use the thumbs to directly push back the protruding cervical vertebrae.
The slow head turning and the “Union Jack” head turning are all-round and relatively simple movements that many people enjoy doing. The Union Jack head turning allows for the exercising of the first to seventh vertebrae. The slow head turning is a way to get rid of painful spots.
The last two movements are one set, which can loosen the muscles on the back and around the cervical spine. Patients who have numbness in their hands and even have trouble holding things can get some relief by doing these two exercises.
Mastering these movements allows us to take care of our own cervical spines.