
Whenever I see weed grasses waving their seed heads by the side of the road, it makes me hungry—for wild sourdough.
Over the past few years, I’ve cultivated sourdough from the green heads of foxtails, wild oats, ripgut brome, and even the little“propellers” of crab grass. They all made tasty sourdoughs, some more excellent than others.
I wish someone had told me I could make sourdough from my own backyard—I would have done it decades ago.
Several years ago, I discovered on the internet that you can make “wild” sourdough by using wheat or barley grains from the store. I suppose that’s one form of “wild,” but it didn’t have that Alaska-frontier nostalgia I was looking for.
So I ordered some sourdough starters online. Then I realized, hey, don’t I have wild “grains” right here?
I ended up baking a loaf of backyard sourdough before the ones I ordered online even came in the mail. In the end, some of my wild ones won my taste test, too.
The Best Method for Starting a Starter
The best method I found for culturing “wild” sourdough (from dry grains from the store) was in Debra Wink’s blog “The Pineapple Solution,” on The Fresh Loaf website. As far as I know, she pioneered the sweet+sour-juice method—her blog is very informative.I’ve adapted her method for my backyard grains.
The traditional method for cultivating sourdough is to use plain water and flour, with an initial starter. The “starter” can also be created by using whole grain flour instead of white, since whole grains come with their own starter organisms.
How the Juice Method Works
Sourdough is a combination of lactobacteria and wild yeast. This combination flourishes best under an acidic environment.As Wink said in her blog, without acid added at the beginning, other bacteria often get a foothold first, such as Leuconostocs, which produces bubbles that look like sourdough, but don’t smell right. (They’re not toxic, but they won’t raise a loaf of bread.)
Meanwhile, the sourdough organisms begin to produce acid, which slowly builds up, allowing the sourdough to grow stronger until it finally takes over the culture.
This process can take a week or more, but with Wink’s fruit-juice method, it can take as little as three days. The sweetness in the juice also speeds up the starter’s growth.
Instructions for Making the Wild Starter
Ingredients A handful of wild grass seed heads White flour Sweet-sour juiceHarvest some grain heads and snip with clean scissors into a bowl or other container. Add about two tablespoons juice mixture and two tablespoons white flour and stir.
Rough up the grains to disperse the sourdough organisms. At first I used a clean coffee grinder or blender to fragment them, but later I realized that snipping the heads with scissors and pressing the grains with the back of a spoon works fine.
Stir briskly until well mixed and aerated, and cover such that air can escape.
Keep It Warm
Keep the mixture warm to ensure that things go quickly and smoothly, though it usually works fine on the counter, just slower. (You’ll need it warm when you raise a loaf, though.)For example, maybe put it in an oven with a pilot light, or in the oven near the light bulb, turned on. You can add more heat by turning the oven on and then off after a minute (set a timer). You can also set the starter in a bowl of hot water and refresh it occasionally.
Tip: If your sourdough is in the oven, tape something to the oven knob to keep yourself from accidentally turning the oven on and killing it.
Feed at least every 24 hours and as often as three times a day or so if it’s kept warm and your schedule permits. If you want to speed things up further, you can give it a stir now and then to redistribute microorganisms and food supply.
Feed about two tablespoons of the juice mixture and white flour at each feeding.
Sourdough Takes Off
When the sourdough begins to activate, you’ll see bubbles forming. You may want to keep a plate underneath for when it suddenly goes crazy. When the mixture “takes off” with vigorous bubbles, the sourdough is established. It should smell like delicious sourdough.Now praise it enthusiastically and tell it that you’re going to start changing its diet. Switch to plain water over the next few feedings. You might see a slump in activity as it adjusts. When it’s going strong again, introduce it to whole wheat flour, if that’s your goal.
Before you go to whole wheat is a good time to strain out any remaining pieces of the original seed chaff. Feed it the water first, stir, then pour through a wire mesh strainer, then add the flour.
Making the Bread
Build up enough starter to make a batch of bread plus some leftover for continuing the starter. This should take only one or two feedings, depending on how much starter you have and how vigorous.If you don’t have a scale, feed with one cup of flour for about every 2/3 cup of water. The ratio isn’t critical, especially if you’re just feeding and not baking, but you’ll want to be consistent when you bake so you can get consistent results with your recipes and adjust accordingly.
After feeding the starter and making bread from it, feed the starter that remains and store it in the refrigerator. Feed weekly if kept in the fridge, or daily when on the counter or in a warm place. Always feed your starter before putting it in the refrigerator, so it has something to munch on.
Tip: Let the starter come up to room temperature before feeding. The lactobacillus component doesn’t grow as well when it’s cold. If this happens, feed a few times to let it catch up.
Jumpstarting a Starter
If you ever think your starter needs a boost, you can feed it several times over a few days before returning it to the fridge.RECIPE
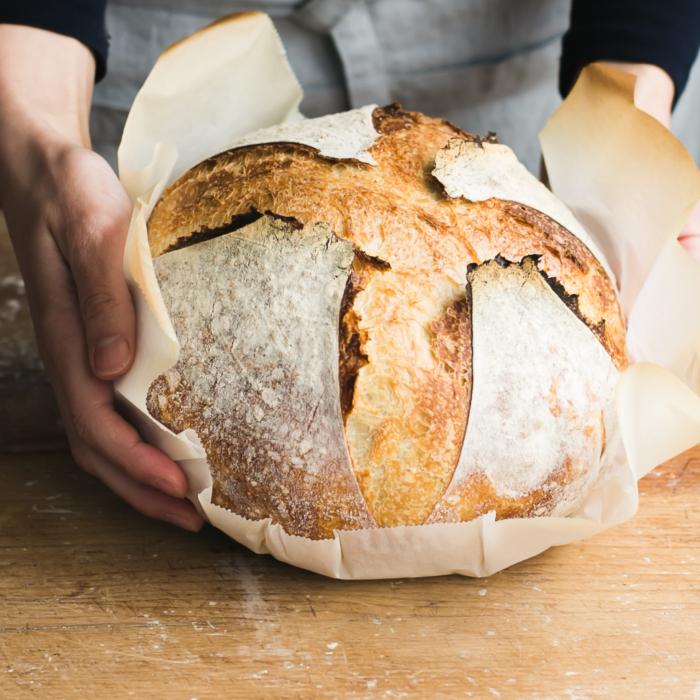
Backyard Sourdough 3-pound loafThis is the bread I make for the family every week.
I use a gram scale because flour is difficult to measure consistently in a measuring cup, and weighing ingredients is easier than using cups.
Before beginning, feed your starter such that you have at least 2 1/2 cups, or 550 grams or so. Let the starter sit in a warm place for about three hours.
Tip: The longer the sourdough starter feeds before you make bread, the wetter it will become. Letting the starter sit for three hours or so seems to give a good consistency. If it becomes runny, you can stir in a little more flour.
Put all the ingredients in the breadmaker tin, or in a bowl, if kneading by hand. This recipe makes a very large loaf, so if you have a smaller breadmaker, or want a smaller loaf, you can cut it in half.
Run the breadmaker on the dough setting, or knead by hand. To allow for extra care in handling between rises, it’s good to remove it from the breadmaker after done kneading and before the rise. Place it on a pizza stone or insulated cooking sheet sprinkled heavily with whole wheat flour. (Those shakers are great.)
Roll the dough gently into a ball. Re-flour the pizza stone as needed.
Cover with a large piece of plastic wrap, loosely, but well covered. I like to tape two pieces together to make a wide square and save it to use next time.
Put in a warm place (as mentioned above), at around 75–85 degrees F.
When the bread has doubled in size (about an hour), press it down slowly and gently all over with your fist, to deflate the larger bubbles. Don’t actually “punch” the dough, which will break the gluten fibers.
Pull the bread up gently into a ball or oval, and flip it over—flour side up, wrinkle side down. Or you can cut into two and make balls, or make other shapes such as pizza crust, calzones, hoagie rolls, and so on.
The reason for the second rise is to reduce the size of the bubbles and give it finer texture and richer flavor. If short on time, one rise is fine.
With a sharp knife, cut 1/4-inch-deep decorative lines across the dough to help the bread expand.
Cover and let the bread double in size again. It should feel very soft and light when you touch it.
Remove the plastic wrap carefully and cook at 350 degrees F for 35 minutes or until done.
Cool on a rack.


