If you’re looking for the best way to roast a Thanksgiving turkey, you’re in the right place. I’ve been cooking professionally and hosting Thanksgiving for 25 years, and I’ve tried just about every method out there. In my experience, nothing beats a dry brine—it’s the simplest, most reliable way to get juicy, perfectly seasoned meat and shatteringly crisp skin without the hassle of a messy wet brine.
The process couldn’t be easier: rub a salt and seasoning mixture all over the turkey, let it rest in the fridge overnight, and the salt works its magic. It deeply seasons the meat, locks in moisture, and dries out the skin so it roasts up beautifully golden and crisp. Whether you’re a seasoned cook or making your first Thanksgiving bird, this method is about as foolproof as it gets.
What You’ll Need To Roast Your Thanksgiving Turkey
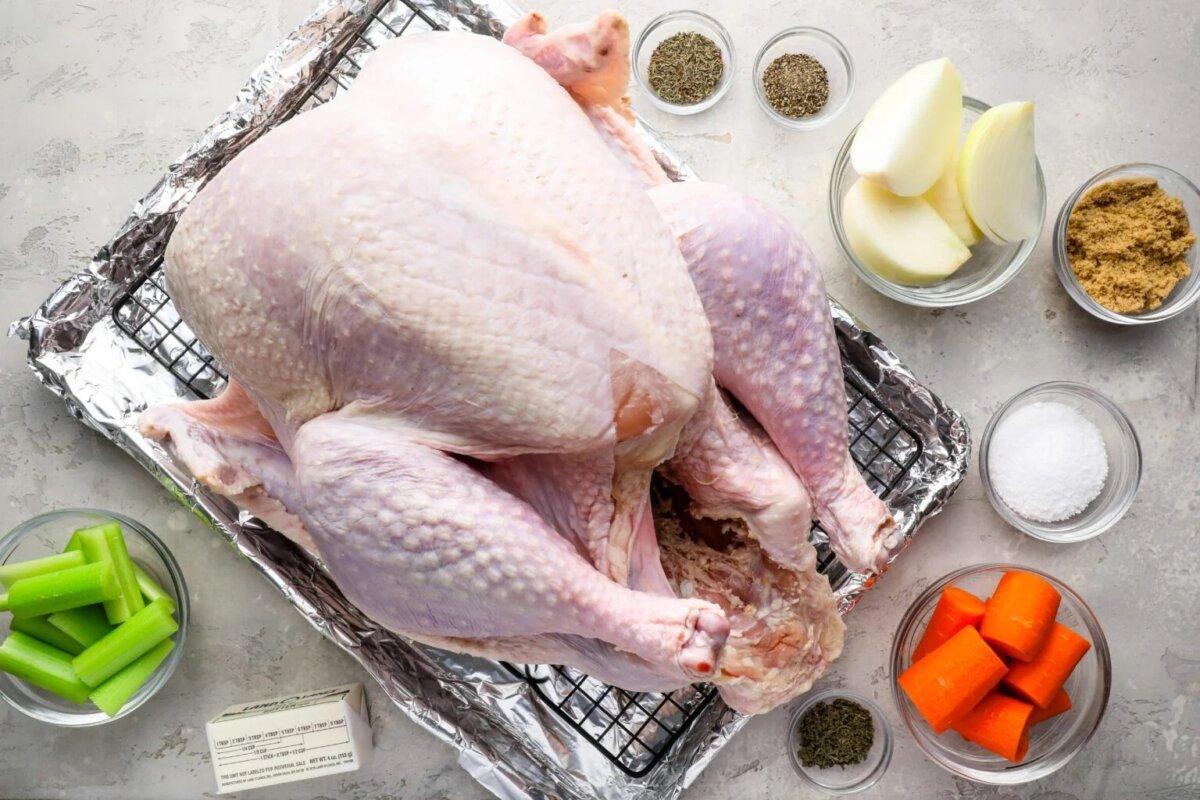
- The bird—For the best results with this dry-brining method, look for a plain or “natural” turkey—one that hasn’t been injected, self-basted, or pre-salted. This gives you the most control over the seasoning. That said, if you can’t find a natural bird, you can still use this recipe; just halve the amount of salt in the brine to avoid over-salting.
- Dry brine (kosher salt, light brown sugar, dried thyme and sage, black pepper)—This simple mix does all the heavy lifting. The kosher salt draws moisture out of the skin for extra-crispy results while seasoning the meat throughout. The sugar balances the salt and enhances the turkey’s natural flavor, while the herbs and pepper infuse the bird with classic holiday aroma and warmth. I use Morton kosher salt; if you’re using Diamond Crystal, increase the amount to 1/4 cup to get the same level of seasoning, since it’s lighter and flakier.
- Unsalted butter—Rubbed on before roasting to add richness and help the skin brown evenly.
- Aromatics (onion, carrot, and celery)—Placed in the roasting pan to add sweetness and depth to the drippings; you’ll want that flavor to make a good gravy.
Step-by-Step Instructions
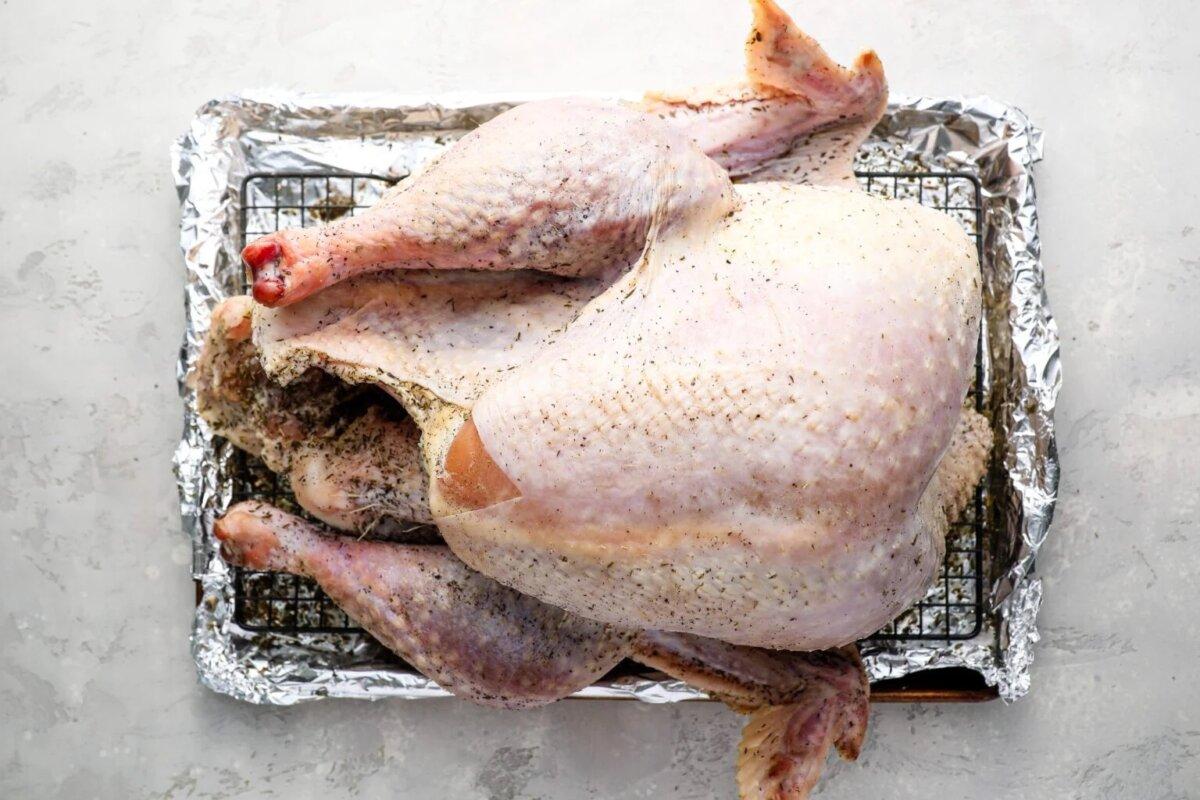
Step 1. Dry brine the turkey. In a small bowl, mix the sugar, salt, thyme, sage, and pepper. Place the turkey breast side up on a rack set over a baking sheet. Rub the dry brine all over, including inside the cavity. Refrigerate, uncovered, for 24 to 48 hours. (The longer you allow the turkey to brine, the more flavorful and moist it will be, but don’t go beyond 48 hours.)Pro Tip: Slide the sheet pan with the turkey onto a bottom shelf where the air is coldest and most consistent—it’ll help keep the bird safe and the skin drying out properly for crispness.


Step 2. Remove the brine. Use damp paper towels to wipe the dry brine off the turkey’s exterior, leaving the seasoning inside the cavity.
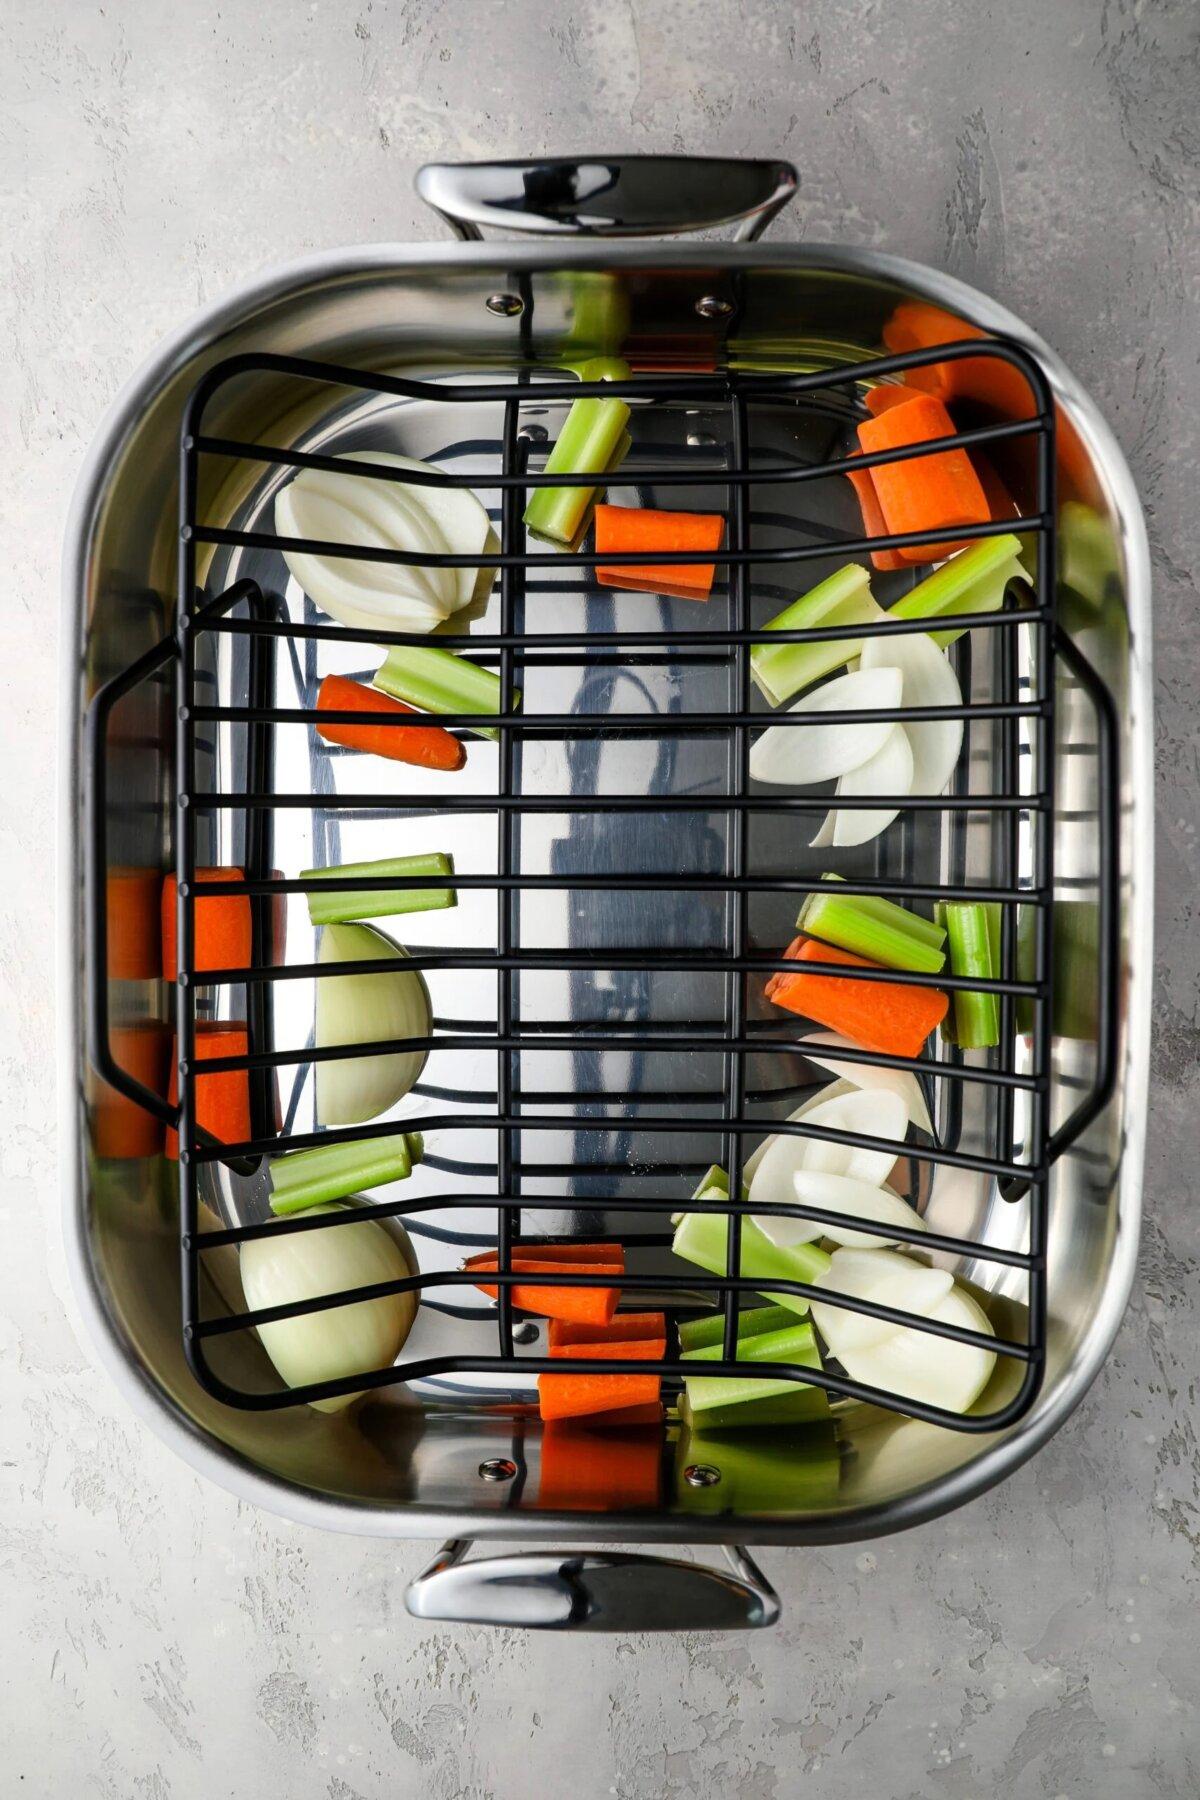
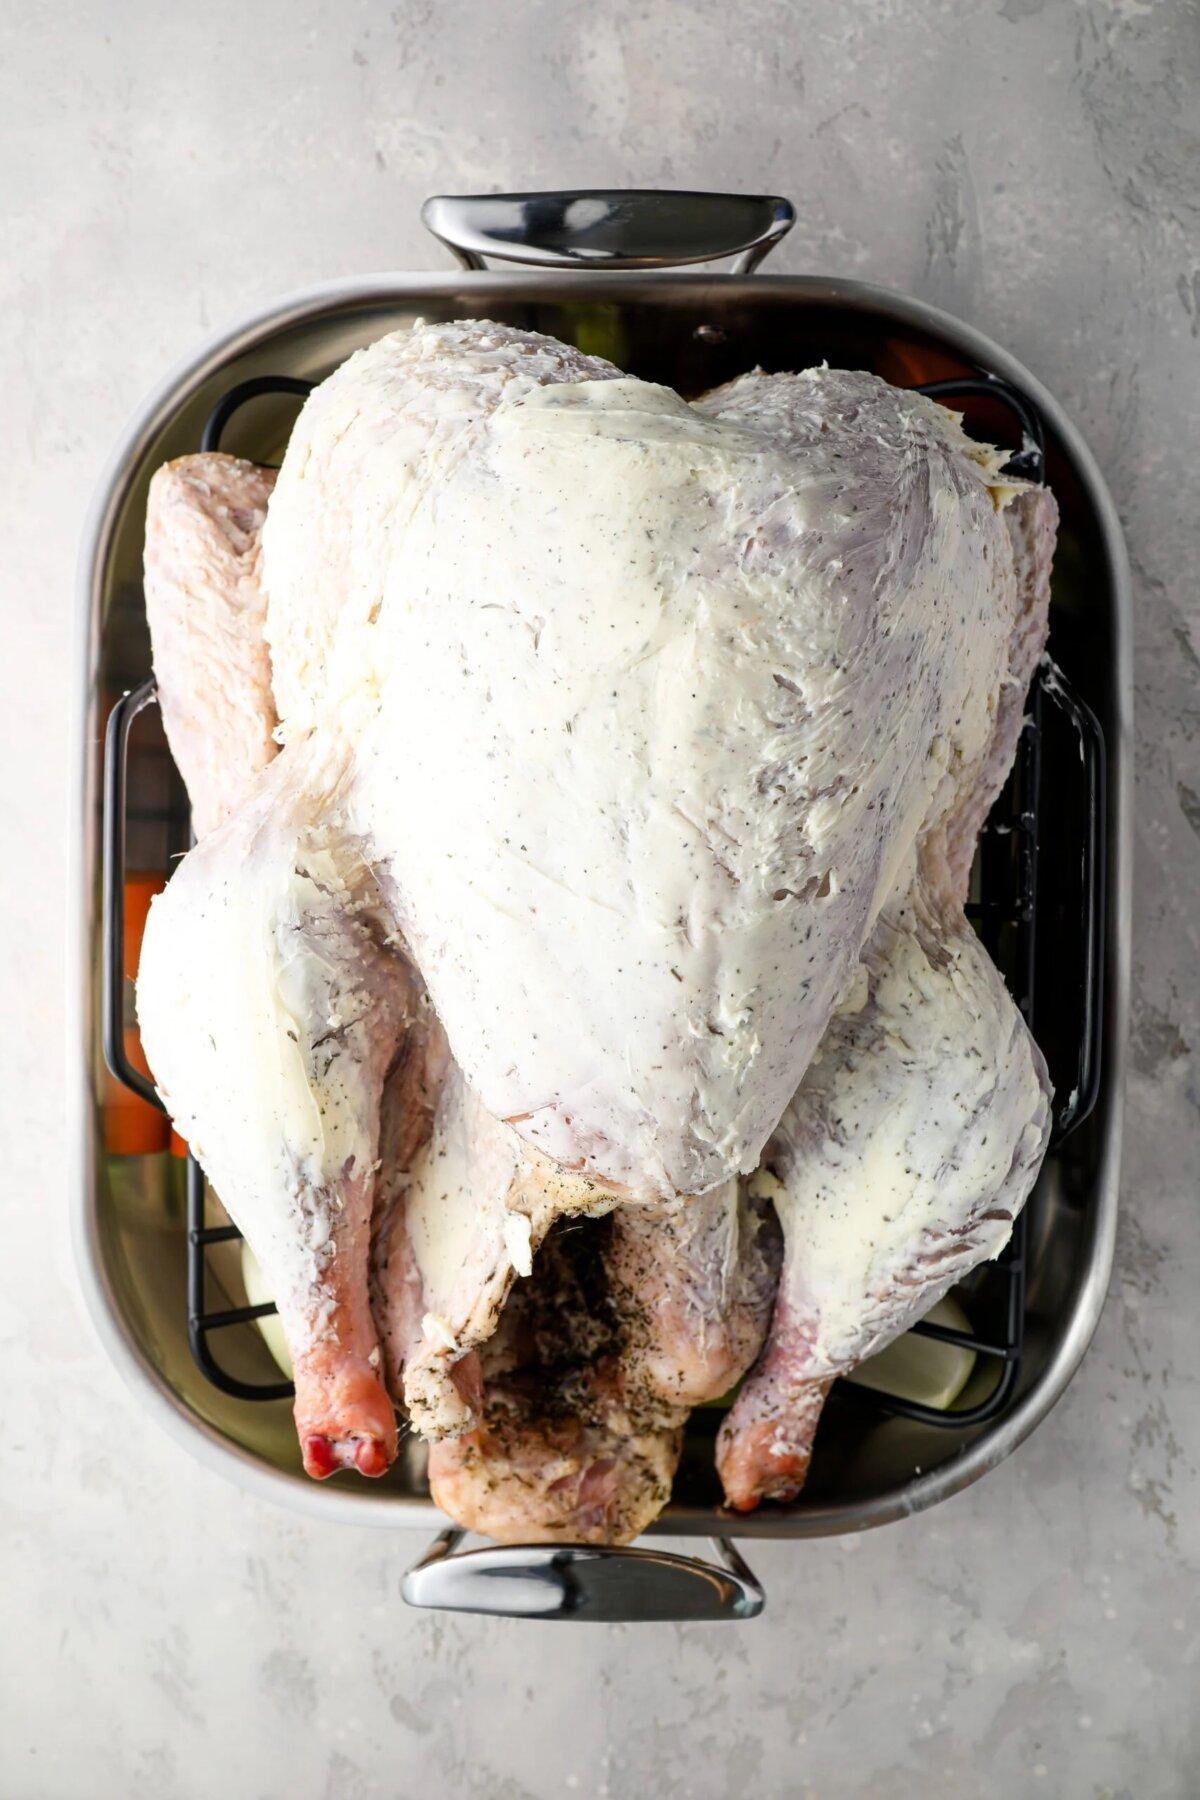
Step 3. Prep for roasting. Scatter the onion, carrots, and celery in the bottom of a large roasting pan. Set a rack inside, then place the turkey on the rack and tuck the wings underneath. Using your hands, smear the butter evenly over the turkey.
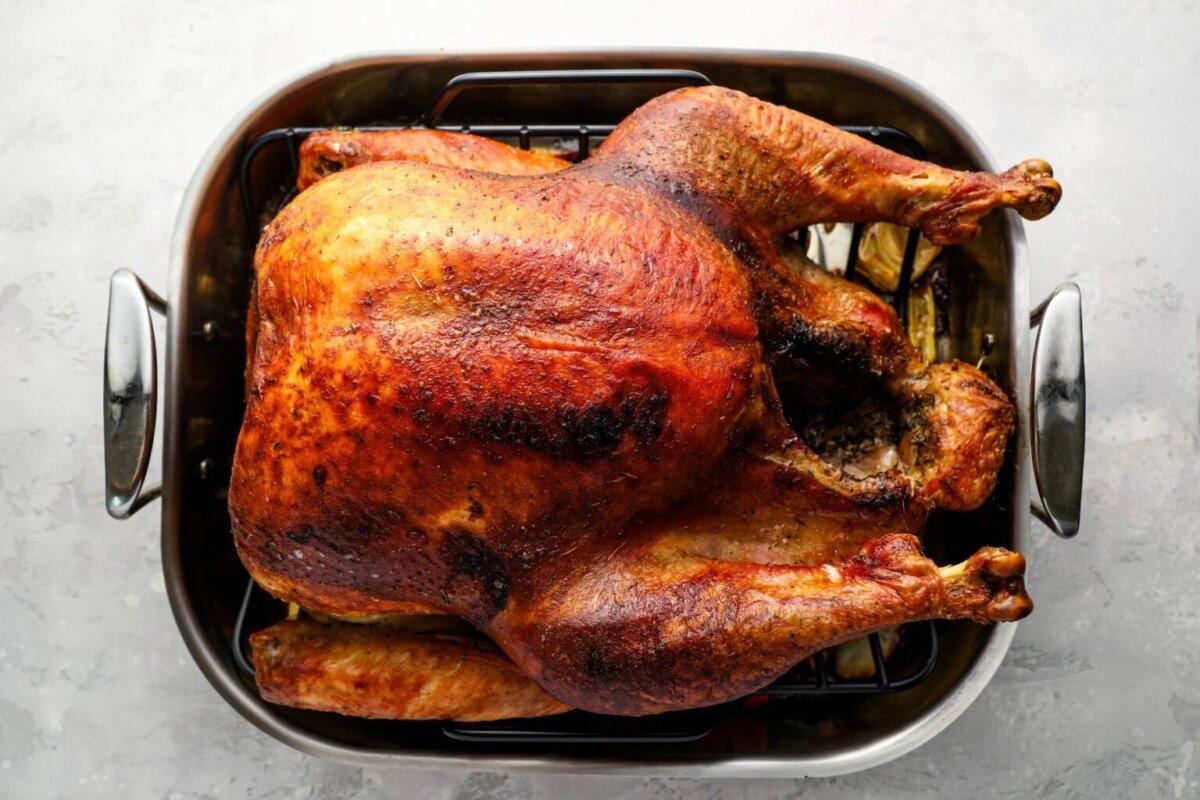
Step 5. Roast the turkey. Roast in a 375 degrees F oven until the skin is deep golden and an instant-read thermometer registers 165 degrees F in the thickest part of the breast and the thigh, about 1 3/4 to 2 1/2 hours. Check after 1 1/2 hours; if the skin is getting too dark, cover loosely with foil.
Dry Brine Turkey
Serves 8 Prep Time: 30 Minutes Cook Time: 2 Hours 30 Minutes Total Time: 3 Hours, plus at least 24 hours to dry-brine the turkey- 1 (12 to 14-pound) turkey, patted dry (see note)
- 1/4 cup (packed) light brown sugar
- 3 tablespoons Morton kosher salt (or 1/4 cup Diamond kosher salt)
- 2 teaspoons dried thyme
- 2 teaspoons dried sage leaves or ground sage
- 1 teaspoon freshly ground black pepper
- 6 tablespoons unsalted butter, at room temperature
- 1 large yellow onion, cut into wedges
- 2 carrots, cut into 2-inch pieces
- 2 stalks celery, cut into 2-inch pieces
Remove and discard the truss that holds turkey legs together (if the legs are held together with turkey skin, cut the skin to release them). Trim off and discard any excess fat in the neck or body cavity. Remove giblets and neck; discard or save for stock. Pat the turkey dry with paper towels.
In a small bowl, mix the sugar, salt, thyme, sage, and pepper for the dry brine. Place the turkey on the rack of the prepared baking sheet. Rub and pat the dry brine all over the turkey, including inside the cavity. Refrigerate, uncovered, for at least 24 hours and up to 48 hours. (For food safety, ensure the turkey remains in the refrigerator at 40 degrees F or lower during the entire brining period. If brining for longer than 24 hours, you can cover the turkey loosely with plastic wrap for the first part of the brining process and then uncover it for the final 24 hours to allow the skin to dry.)
Preheat the oven to 375 degrees F and set an oven rack in the lower third of the oven. Using damp paper towels, brush the dry brine off the turkey’s exterior (keep the brine as-is in the turkey’s cavity).
Scatter the onion, carrots, and celery in the bottom of a large roasting pan. Place a roasting rack inside the pan and place the turkey on the rack. Tuck the wings underneath the bird. Using your hands, smear the butter all over the turkey.
Roast the turkey until the skin is deep golden and a leave-in or instant-read thermometer registers 165 degrees F (74 degrees C) in the thickest part of the breast and 175 degrees F (80 degrees C) in the thigh, 1 3/4 to 2 1/2 hours. Check the turkey after about 1 1/2 hours; if the skin is browning too quickly, cover it loosely with foil.
Using clean oven mitts that you don’t mind getting dirty (silicone grilling gloves or mitts work well), carefully tilt the turkey so any juices from the cavity pour into the roasting pan. Transfer the turkey to a platter or cutting board. Tent with foil and let rest for 20 to 30 minutes. Remove the vegetables from the pan and discard (or if they aren’t too soft/brown, save them and arrange on the serving platter with the turkey). Reserve the drippings in the pan for the gravy.
While the turkey rests, make the gravy.
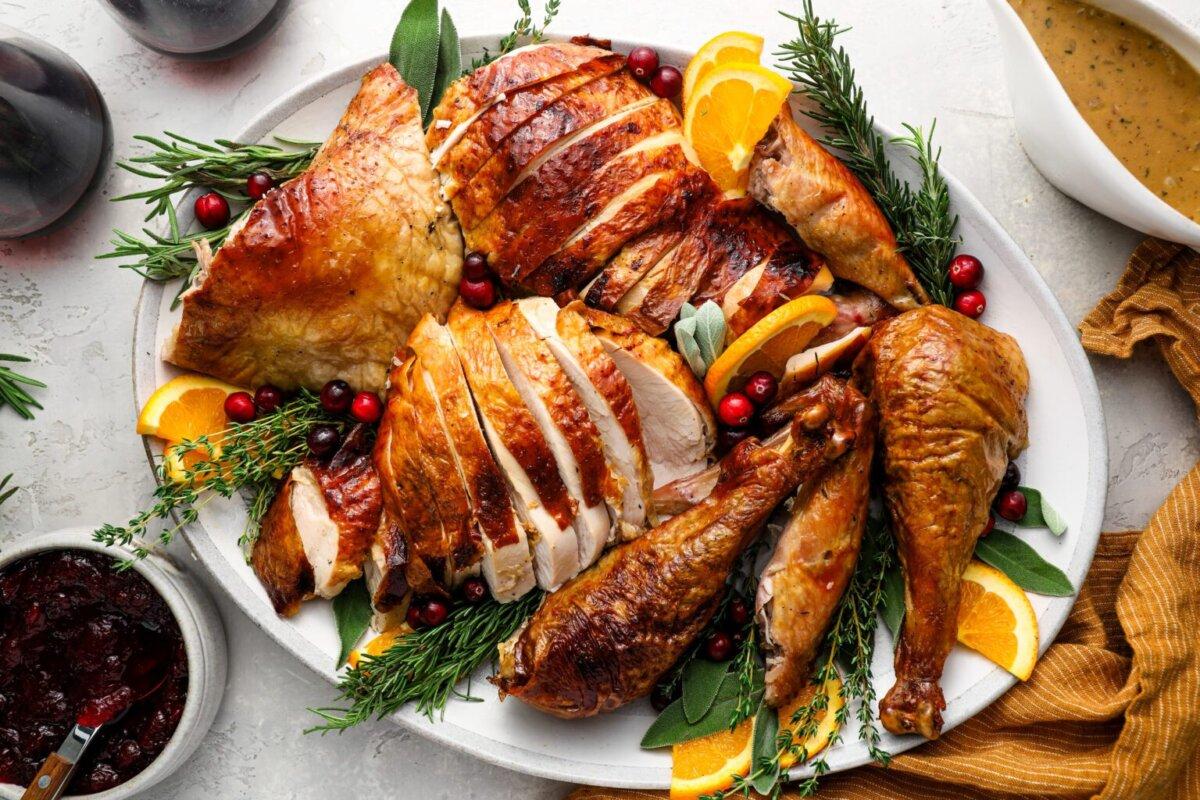
Carve the turkey and serve with the gravy on the side.
Make-Ahead Instructions: If you don’t mind losing the crispy skin, the turkey can be roasted and carved ahead of time. Pour a thin layer of the gravy into an ovenproof serving dish. Arrange the carved turkey nicely on top of the gravy; cover tightly with plastic wrap and refrigerate for up to two days. Refrigerate the remaining gravy in a separate container. To reheat: remove the plastic wrap and cover the platter with aluminum foil. Place in a 325 degrees F-oven for 20 to 30 minutes, until the turkey is hot. Reheat the gravy in the microwave or on the stovetop.
Note on selecting your turkey: For the best results with this dry-brining method, look for a turkey that is not injected, kosher, or labeled as “self-basting.” These types of turkeys have already been treated with salt or a brining solution. However, if your bird has been treated, you can absolutely still use this recipe, as these birds do still benefit from additional seasoning. Just halve the amount of salt in the dry brine to avoid over-salting.
Nutrition Information
Per serving (8 servings)Calories: 1,075, Fat: 47 g, Saturated fat: 15 g, Carbohydrates: 6 g, Sugar: 5 g, Fiber: 0 g, Protein: 147 g, Sodium: 1,619 mg, Cholesterol: 513 mg
Gluten-Free Adaptable Note
To the best of my knowledge, all of the ingredients used in this recipe are gluten-free or widely available in gluten-free versions. There is hidden gluten in many foods; if you’re following a gluten-free diet or cooking for someone with gluten allergies, always read the labels of your ingredients to verify that they are gluten-free.