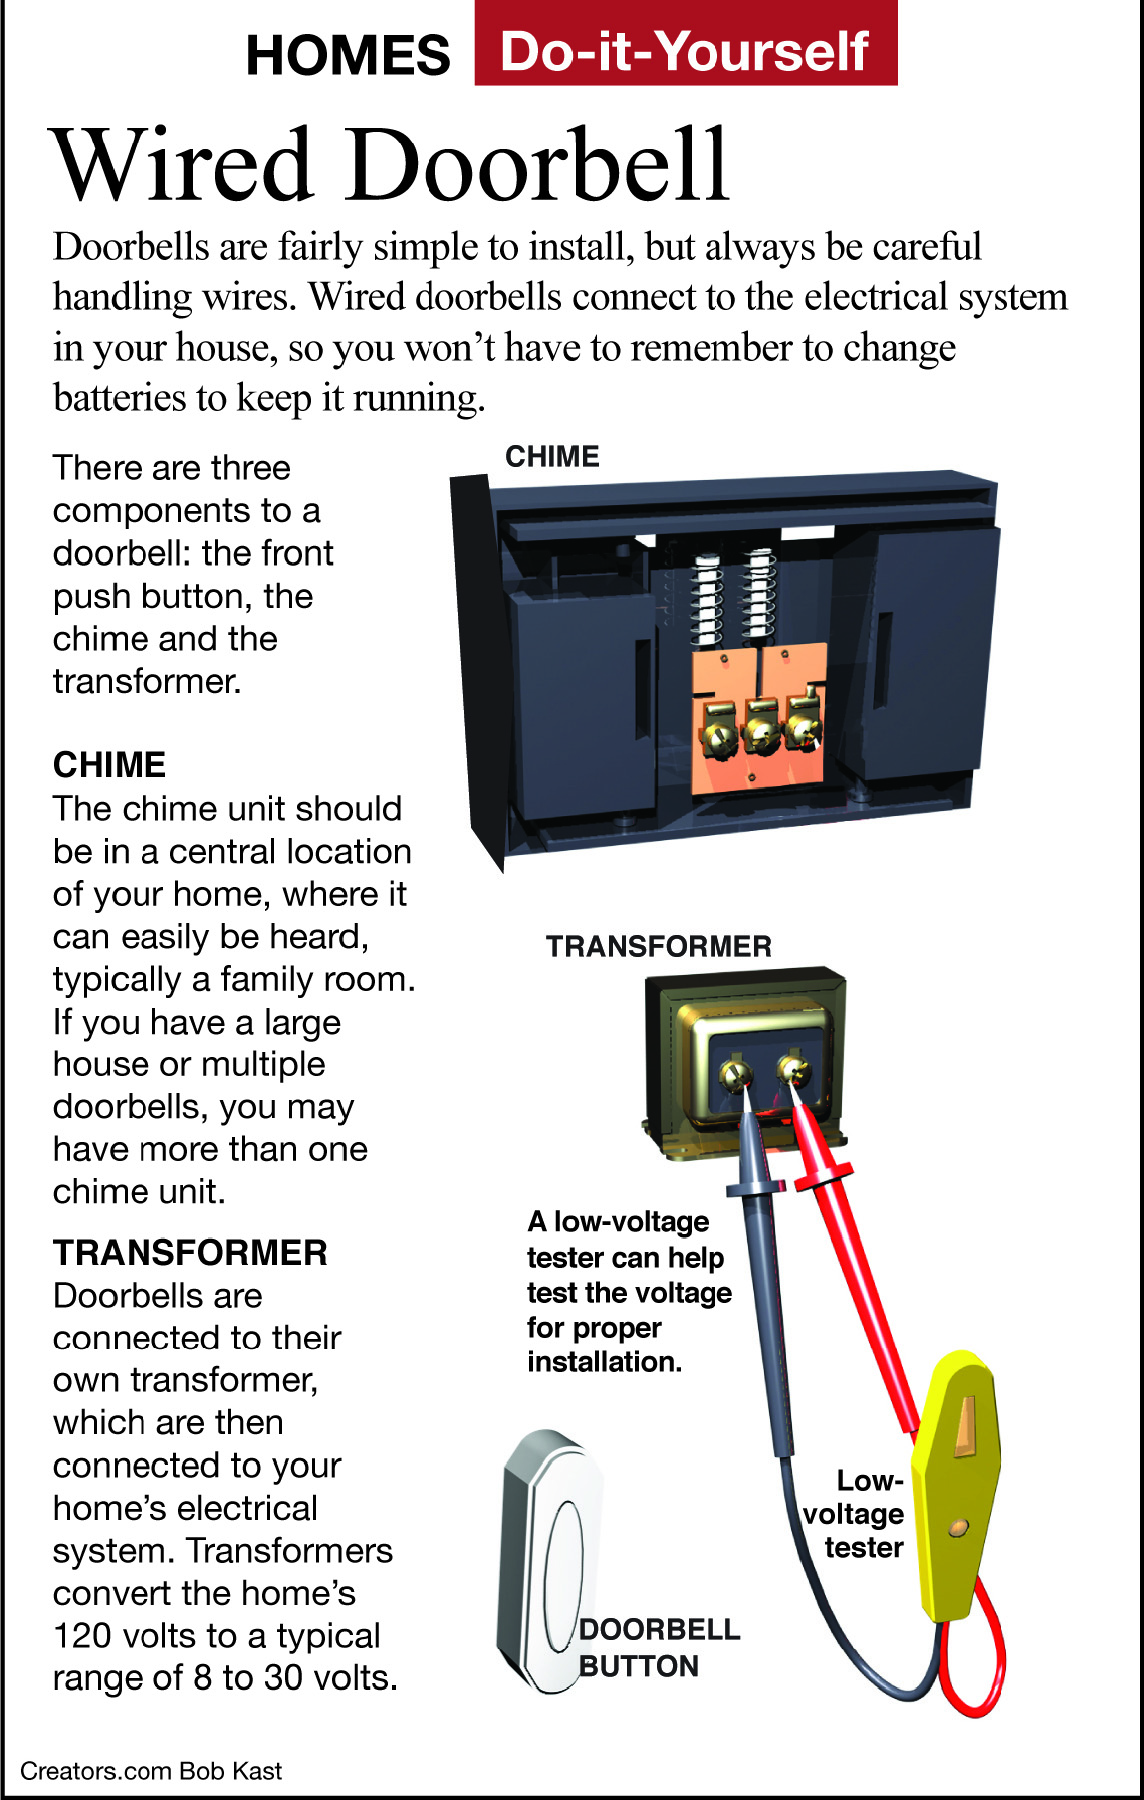
Installing an additional doorbell chime does not require the skill of a professional electrician. The entire electrical circuit for doorbells uses a low-voltage transformer and converts 110-volt house current usually down to 16 volts to power the chime. This low-voltage circuit is easy and safe to work with for even inexperienced do-it-yourselfers.
First, find your electrical circuit breaker box, usually in your utility room or basement. You will see the small transformer (they often hum a little) located near the box or actually attached to it. Don’t just start grabbing wires because one side of the transformer is attached to the 110-volt house current.
Look over the transformer to see its wattage rating. Ten watts is usually adequate for one chime, but you should probably replace that one with a 30-watt model to power both chimes or even a third one if needed later.
Switch off the circuit breaker leading to the transformer and test it with an inexpensive circuit tester to make sure the power to it is off. Install the new, more powerful transformer in the exact location as the old one. When you buy your chime, I suggest sticking with a standard two-tone model for simpler wiring.
All new chimes come with simple wiring diagrams to show you how to wire them. Since you have only one doorbell button on your front door now, wiring it is simple. Just locate the wires, one from the transformer and one from the doorbell button that lead to the old chime, and attach these to the new chime.
Do not be alarmed when you pull off the cover of the new chime and see several sets of screw terminals. They may be marked front, side, rear, and so on. These are used if you have doorbell buttons at each of the doors. Just use the one marked front, but any of them will work fine.
The hardest part of the job is running the wires to the new chime in your kitchen. Fishing the wire through the walls is slow and can be a frustrating experience. Use U.L.-listed 18- or 20-gauge solid wire. Do not use stranded copper wire for this application.
Now, let’s assume that you did not lose your mind fishing the wire through the wall to where you want to locate the new chime. Prepare the ends of the wires and attach them to the appropriate terminals on the chime.
Switch the power on again to the circuit breaker and give the doorbell button a push. Both should ring loudly. If the new one does not work, make sure the connections are tight. Since these use low-voltage circuits, clean, tight connections are imperative for it to function properly.
Although this really is quite simple, if all this wiring sounds like more than you want to tackle, consider installing a wireless remote chime. These rely on a radio signal. When the doorbell button is pushed, a radio signal is received by the new chime, and it sounds.