Installing glass in place of one or several panels in a wood door is not a difficult project. It just requires patience and a steady hand. Most of the cutting will be done with a circular saw (fine-toothed blade), but a small amount of handsawing or use of a chisel will be required.
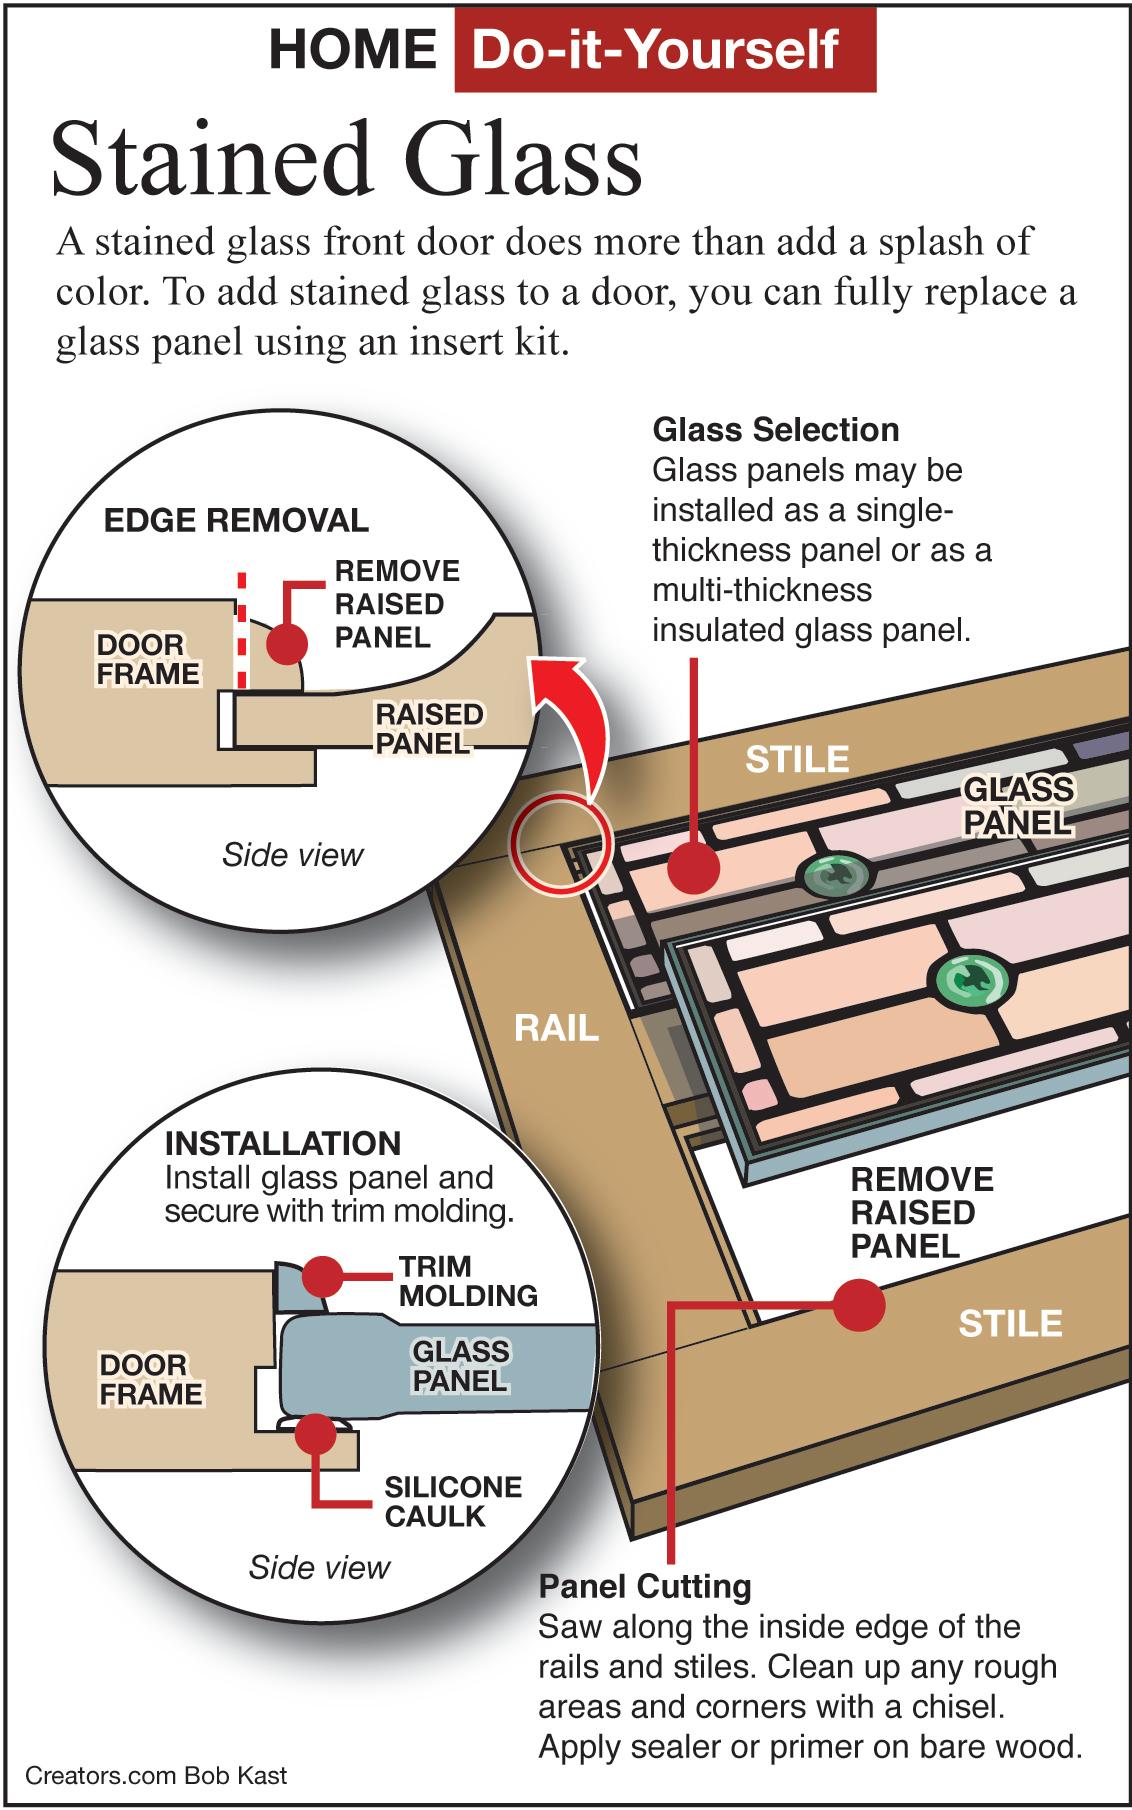
First, measure the size of the opening you plan to cut. Measure from the solid edge of the rail and stile where the taper for the panel begins. Have your glass sections made to dimensions 1/4 inch smaller than the opening to provide 1/8-inch clearance all around.
For energy efficiency and security, it will probably be best to install a thin, clear, double-pane insulated panel first, with the stained glass on the indoor side. This will also protect the stained glass from possible damage and the weather.


Once the glass panels have arrived at your house, you can begin the panel removal process. The ideal removal method is to saw along the indoor edge of the rails and stiles to a shallow depth, about 3/4 inch. You will have to use a wood chisel or handsaw to finish-cut the corners.
You want to saw just deep enough to remove the indoor tapered edge and the panel, but not the outdoor edge. The glass panels will rest against the outdoor edge, so the trim around the glass will still match the other panels.
Brush some sealer or primer on the bare wood. When dry, lay a fine bead of silicone caulk along the edge of the opening and place the insulated glass panel into it. Place several small lumps of silicone caulk on the edge of the insulated panel and place the stained glass against it.
Don’t place a continuous bead of caulk between the insulated glass and the stained glass panels. This would make it difficult to remove the stained glass panel at a later time, and it could trap moisture between them. In colder climates, this could result in fogging between the panes.
Purchase some screen-type trim molding to finish off the indoor side of the glass. You should be able to find some that resemble the other panel trim profiles. Use a miter box to cut 45-degree angles and nail the trim in place over the stained glass. Be careful when using the hammer near the stained glass.