One of the biggest benefits of starting seeds indoors is the selection; one is no longer limited to the varieties found at local nurseries and home and garden stores. Most any plant can be started indoors and transplanted when the timing is right.
All this selection isn’t necessarily a good thing; seeds need to be chosen judiciously. For example, northern gardeners with shorter growing seasons should focus on quicker harvest times. A good example is snap beans, which can mature in as few as 50 days, versus pole beans, some of which can take up to 110 days.
The Importance of Timing
Ordering seeds early is the key to getting the best selection, but that doesn’t mean that they should be planted the minute they arrive. While most plants should be sprouted two to eight weeks before they should be planted outdoors, there are exceptions, such as petunias, which may need up to 10 weeks, or pansies and violets, which require up to 14 weeks. In contrast, zinnias usually need only four weeks. The trick is to count backward from the date that they can be planted outdoors.Additional Head Start
One way around the timing restriction, if there’s sufficient light and space indoors, is to pot up the plants indoors from their initial starter trays or cups to the next larger pot size, or the one after that. Tomatoes are an excellent example, with most green-thumbed gardeners starting them in four- or six-cell starter trays. These seedlings can be potted up to a four- or six-inch pot once they are 3 inches tall and have a few sets of true leaves (the first leaves that don’t look like all those that come after them are called “seed leaves”).To get even more of a head start, these plants can be potted up a second time into a 1-gallon pot, which promotes deeper root growth and allows a near-mature plant to be set out in the garden after hardening off (slowly exposing them to chilly temperatures and direct sunlight in increasing increments before planting in the ground).
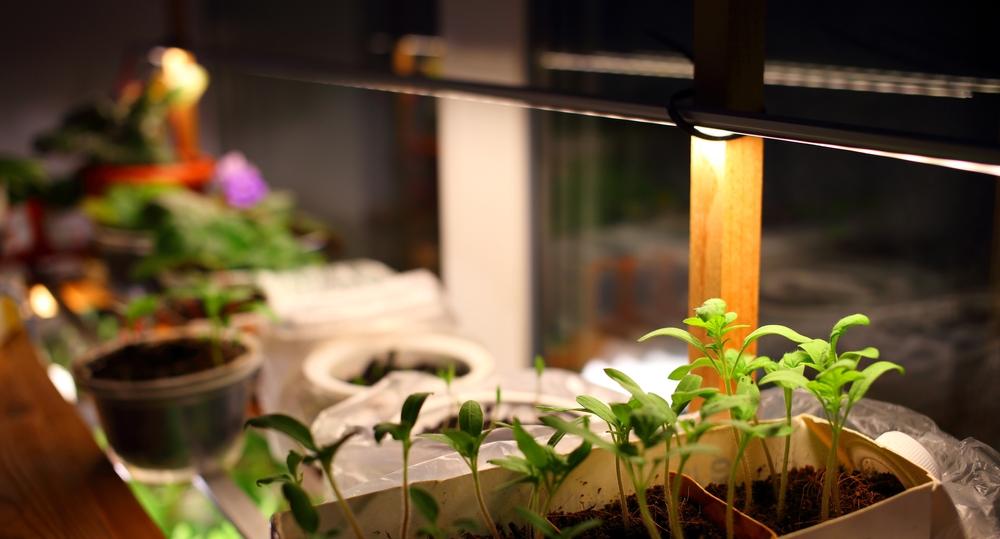
Growing Bright
While, for centuries, home gardeners have been starting seedlings indoors with a window and small pot, why not take advantage of the latest technology, starting with proper lighting?

Most plant varieties will grow stronger and faster under fluorescent lights—even simple, standard cool white tubes—compared to natural indoor light alone. A combination of fluorescent and natural light is best, but fluorescent alone will do if necessary. Hang the lights on chains that can be raised as the seedlings grow. Ideally, lights should be suspended 2 inches above growing plants, with a 4-inch maximum. These limits are to help the plants grow compactly. Seedlings that don’t get sufficient light will develop long, skinny, weak stems as they stretch toward an alternate light source. Invest in an inexpensive timer, as most seedlings are happiest with 12 hours to 16 hours of light daily and a dark period each night.
Professional grow lights can be expensive, but they offer the benefit of being designed to provide the specific light ranges required by plants. These can range from individual bulbs or standalone grow light fixtures to complete grow light systems with built-in sprouting/growing trays that are attractive enough to be placed in the living room for a dash of living greenery to counteract the gray outdoors.