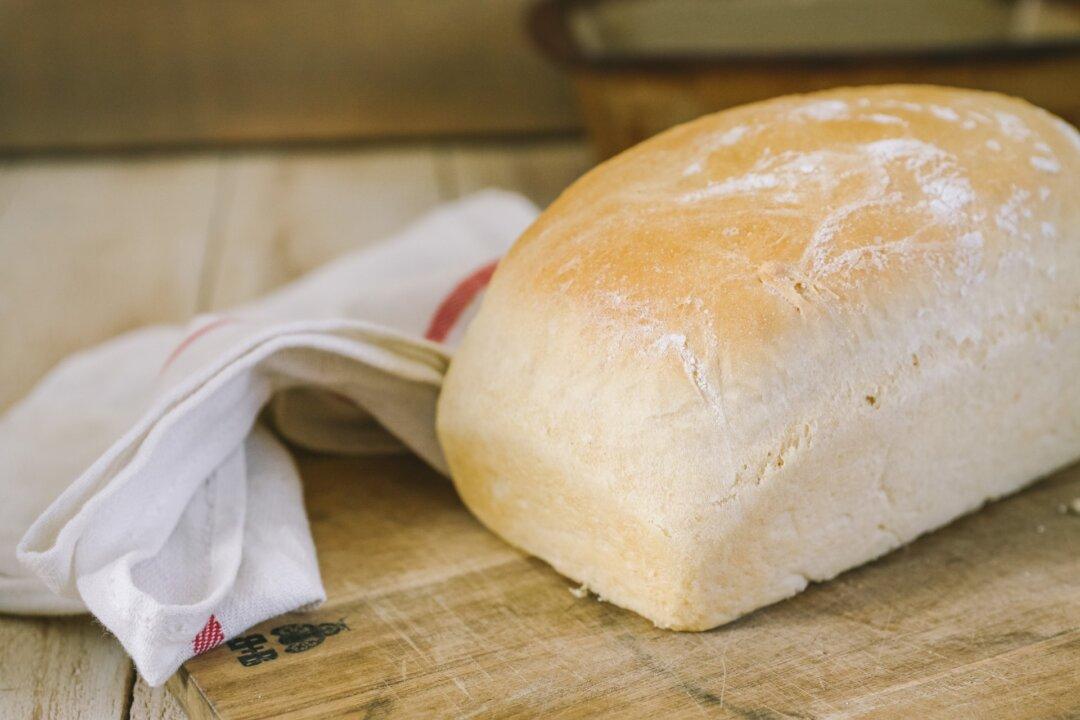
New to Baking Bread? Start Here

New to Baking Bread? Start Here
This simple sandwich bread is perfect for beginners.
4/7/2020
Updated:
4/7/2020
 Name a way to mess up a bread recipe, and I’ve probably done it. 
Whether it’s killing the yeast with blazing-hot water, over-rising the dough and spilling it all over the oven, or baking loaves that emerged doughy and under-baked or so hard they could double as bricks, I can guarantee you that it has happened in my kitchen at some point.  
Yet, onward I march. 
Stubbornness aside, I’ve stayed committed to this bread journey because I find there are few things as primally satisfying as making bread with your own two hands. 
Possessing the power to command flour and water to become whatever shape and flavor I desire at that moment feels magical. It’s an infatuation I suspect traces back to the first humans who accidentally discovered that flour and water, if left alone, spontaneously become leavening.  
For me, making bread is a form of meditation. Like many modern folks, I tend to spend an extraordinary amount of time wrapped up in technology—always multitasking, always rushing to the next thing.
But when I’m baking bread? I’m baking bread. The mixing, kneading, punching, and smelling require all of my senses and keep me singularly focused on the task in front of me. That’s a tall order these days. 
Plus, the fruits of my labor are delicious. 
However, somewhere along the course of human history, we unfortunately decided that baking bread was not only difficult, but best left to the experts. But while there is absolutely a time and place for a hunk of crusty, artisan bread handcrafted by your favorite bakery, I have good news, my friend: 
With a handful of very basic ingredients, it is entirely possible to make an outstanding loaf of bread at home—no machines or fancy mixers required. 
In a moment, I’ll introduce you to the simplest, most versatile bread recipe you’ll ever meet. It’s my standby recipe, as it lends itself well to a variety of flours and can even be morphed into pizza crust or cinnamon rolls. But first, let’s tackle a few of the most common questions that arise around the topic of homemade bread. 

The Yeast

What kind of yeast to use? I recommend using basic active dry yeast that can be purchased at most grocery stores. I’ve found the small jars to be more reliable than the single-serving packets, which can be more hit-or-miss in their rising power. 
The age and freshness of the yeast you use are two of the most important contributing factors to a successful loaf. You can test the strength of your yeast by following the simple proofing process that I detail in this recipe. 
Active dry yeast stores very well in the freezer, so even if you don’t make a lot of bread, it’s a good investment.

The Flour

In case you’ve seen the bread flour at the grocery store and are concerned that you don’t have it in your pantry, never fear. Bread flour simply contains more protein, which is handy, but not absolutely necessary for the average home baker. Regular all-purpose flour will work perfectly fine in this recipe. 
Can you use whole wheat flour instead? Absolutely. Just keep in mind that whole wheat flours are heavier and might slightly affect the texture and density of the finished loaf. A good place to start is by substituting half of the all-purpose flour in the recipe with whole wheat. 
Your favorite 1:1 gluten-free flour should also work well with this recipe. 

Kneading the Dough

Yes, you have to knead this dough, but don’t worry—kneading isn’t as hard as you think. 
As much as I love the ever-popular no-knead recipes, the process of kneading is incredibly easy and very low-tech. Perfect technique isn’t important. Just work the dough with the palms of your hands until it’s smooth and add more flour if you need it.
This recipe calls for a quick 4–5 minute kneading step, which will result in a loaf with a soft texture and impressive rise. 

The Simplest Homemade Bread Dough

Makes one 9 x 5-inch loaf (or one 12-inch pizza crust, or one 9 x 13-inch pan of cinnamon rolls, or one 9 x 13-inch pan of dinner rolls)
  • 1 1/3 cup warm water (100–110 degrees F, see Notes)
  • 1 1/2 teaspoons active dry yeast
  • 2 teaspoons brown or white sugar or honey
  • 1 egg
  • 1 teaspoon fine sea salt
  • 3–3 1/2 cups all-purpose flour
In a large mixing bowl, combine the water, yeast, and sugar.
Stir well, then allow to sit for 5–10 minutes to “proof” the yeast. You should begin to see some bubbles form. If you don’t see any bubbles, it may mean your yeast is old and you will need to try again with fresh yeast. 
Proofing the yeast.
Proofing the yeast.
After the proofing process is complete, mix in the egg and salt.
Add 3 cups of flour, one at a time, mixing with a fork between each addition. Once the mixture is too stiff to mix with a fork, transfer it to a well-floured countertop.
Combining the wet and dry ingredients.
Knead the dough for 4–5 minutes, or until it is smooth and elastic. Use the remaining 1/2 cup of flour to dust the countertop and the dough if it wants to stick to your hands.
The dough after kneading.
Shape the smooth dough into a ball and place it back into the bowl. Cover it with a dishcloth and let rise in a warm place for one hour, or until the dough has doubled in size (see Notes).
Letting the dough rest and rise.
After this first rise is complete, use these directions to turn it into the following baked goods:
For sandwich bread: Grease a standard-sized (9 x 5-inch) loaf pan. After the first rise is complete, punch down the dough and shape it into a log. Place it into the loaf pan and allow it to rise 20–30 more minutes, or until it starts to peek over the edge of the pan. Bake in a 350-degree-F oven for 25–30 minutes, or until lightly browned.
For pizza: After the first rise is complete, press the dough into a 12-inch circle on a baking stone or baking sheet (you can also use a standard cookie sheet, if that’s all you have). Top with sauce, cheese, and your favorite toppings. Bake in a 450-degree-F oven for 15–20 minutes, or until the crust is golden brown and the cheese is bubbly.
For dinner rolls: After the first rise is complete, divide the dough into 15 pieces. Shape into balls and arrange in a greased 9 x 13-inch pan. Rise for an additional 30 minutes in a warm place. Bake at 375 degrees F for 20–25 minutes, or until golden brown.
For cinnamon rolls: After the first rise is complete, roll the dough into a 13 x 20-inch rectangle on a floured countertop. Spread 4 tablespoons of softened butter on top, leaving a 1/2-inch margin around the edges, and sprinkle with 1/2 cup brown sugar and 2 tablespoons cinnamon. Starting on the long side, roll it up and press the seam together to seal the roll. Using a serrated knife, cut into 12 rolls. Arrange the rolls in a greased 9 x 13-inch pan and allow to rise for 30 minutes, or until the rolls are puffy. Bake in a 350-degree-F oven for 25 minutes, or until golden brown.

Kitchen Notes

The water you use should be warm, not hot. Test it with your finger—it should feel close to the temperature of comfortable bathwater. 
Dough rises best when it’s warm. I like to put my rising dough next to our wood stove or near the oven if something is baking. However, if you don’t have those options, simply preheat your oven to 350 degrees F for 4 minutes, turn it off, and then allow the covered dough to rise in the warm oven for one hour.

Make Ahead

To freeze this dough, simply make it and allow it to finish the first rise. Then, punch it down, wrap it tightly in plastic wrap, and freeze it for up to 3 months. When you are ready to use it, defrost it on the countertop, then shape as directed for the item you’re making. Let the dough complete the second rise before baking. 
A second rise in the loaf pan.
Alternatively, you can freeze the finished, baked loaves by wrapping them tightly and popping them in the freezer, where they will keep for 3–6 months. When you are ready to enjoy, allow them to gently defrost on the countertop until they come to room temperature.  
Baked until lightly browned.
Jill Winger is the founder of ThePrairieHomestead.com, where she helps folks who are uninspired with modern life learn how to grow their own food and master old-fashioned skills.
Author’s Selected Articles
Related Topics