To make the repaired areas look good, you will have to replace some of the old wood. Remove a piece of the old woodwork without damaging it and take it to an experienced woodworker or mill in your area.
They can tell you what type of wood it is so you can at least start by matching the species.
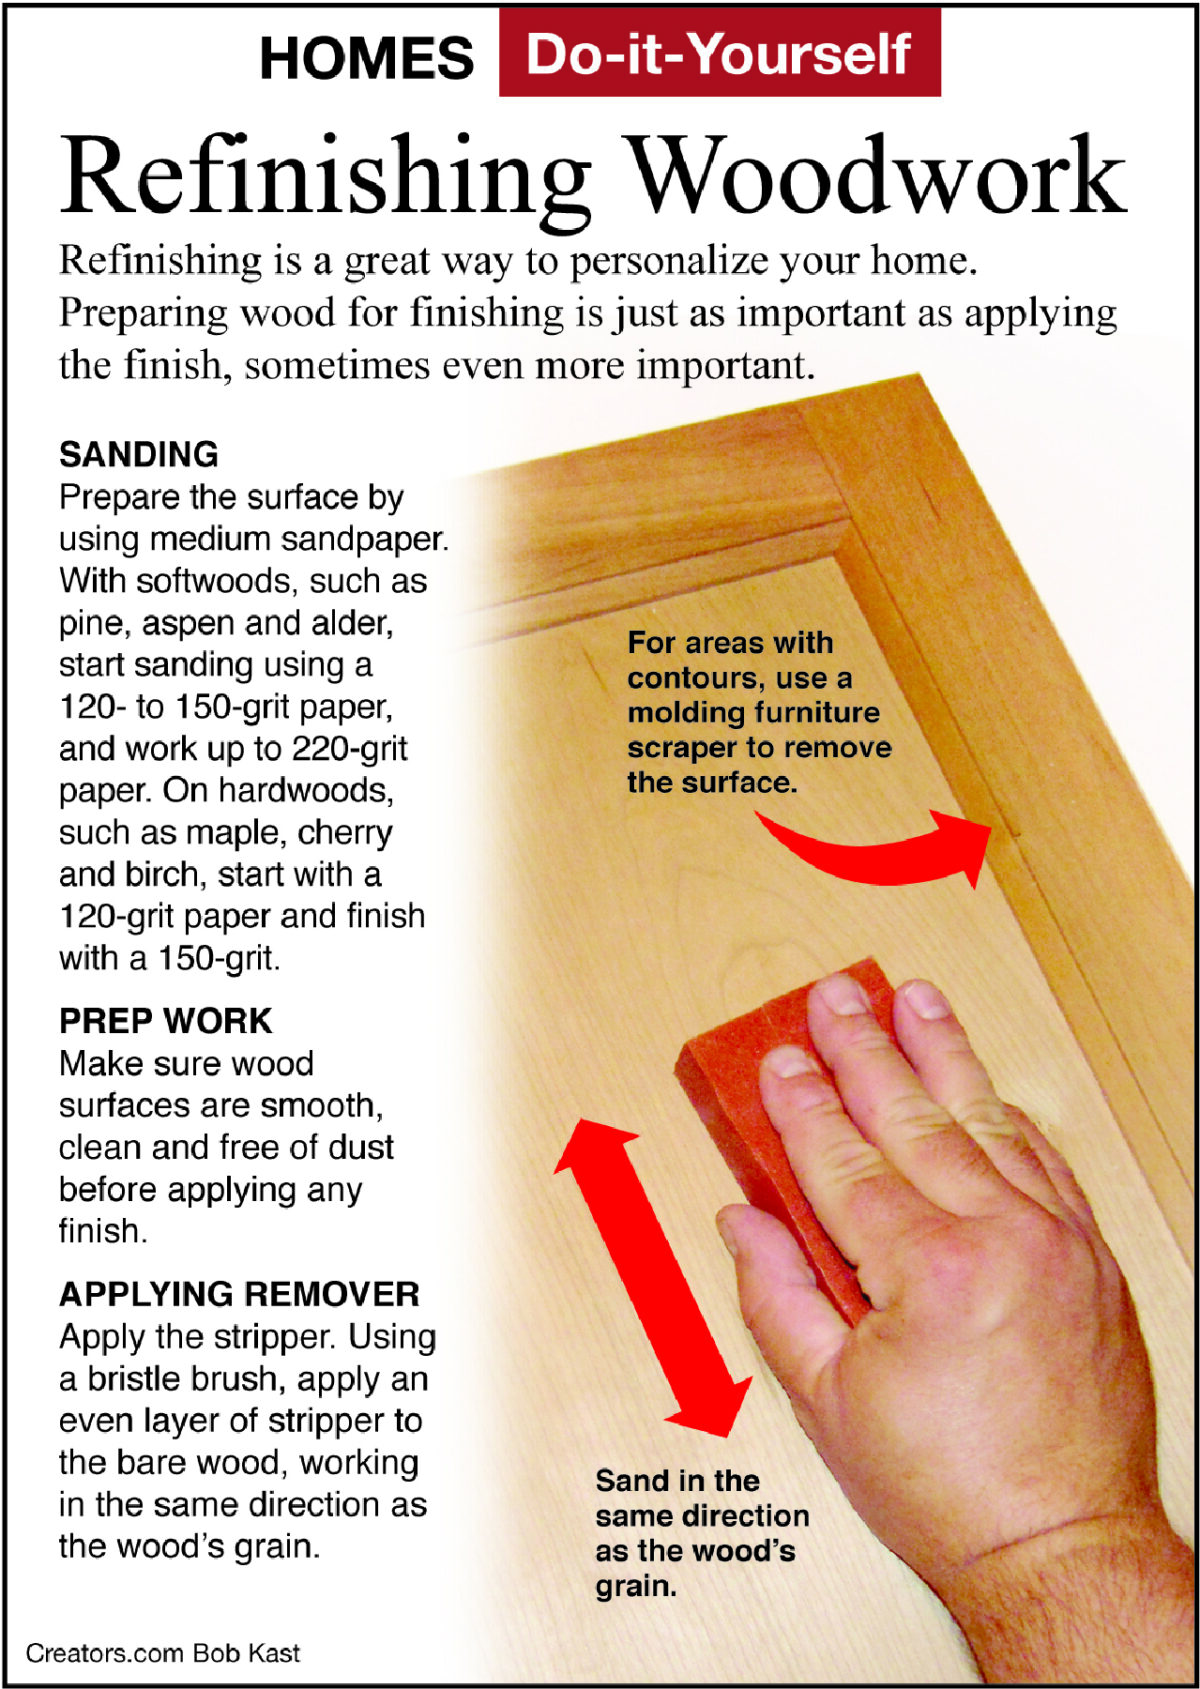
Chemical strippers are the quickest method to remove the old finish—often several layers—but sanding is the best method to get a sound beginning surface. If you use strippers, you will likely have to sand it anyway. Even the new wood pieces should be sanded before attempting to stain them to match the old woodwork.
Sanding is important for several reasons. It removes the old surface finish and eliminates small scratches and other imperfections. It also creates a uniform surface to apply the stain. Even though the wood may look smooth all over, if it was not properly sanded and all of the grain opened an equal amount, the stain will look blotched or streaked.
This is particularly true of the new wood pieces you are installing. The mill machines the contours with planes or shapers. The wood surface may look shiny and ready to stain, but it is not until it’s sanded. The machining crushes some of the surface fibers, and the pores are blocked closed and will not accept stain well.
Generally, start with 120-grit sandpaper and sand the entire surface. Be careful not to round off the sharp corners too much. On larger flat surfaces, a random orbital sander can be effective. Good-quality sanding sponges are great for hand-sanding and getting into tight spots and grooves.
Your final sanding should be with 150-grit sandpaper. Always sand with the grain of the wood and be careful to apply even pressure. Just uneven pressure from fingertips can show up as streaks when the wood is stained. If there are any extremely sharp corners, round them off ever so slightly so they do not split. Slightly rounded corners also hold the finish better.
Now, once the wood surface is prepared, it is time to stain the wood. Make sure to select the proper type of stain for the type of woodwork. Your paint store can advise you. Brush on the stain, and then wipe it off after several minutes. Try to keep the soaking time consistent for all the areas.
Brush on your first thin coat of polyurethane. Fill any small nail holes with matching wood filler. Don’t fill them before the first coat, or you may see larger smudged spots. Sand the surface lightly. Apply two to three more topcoats for a durable finish.