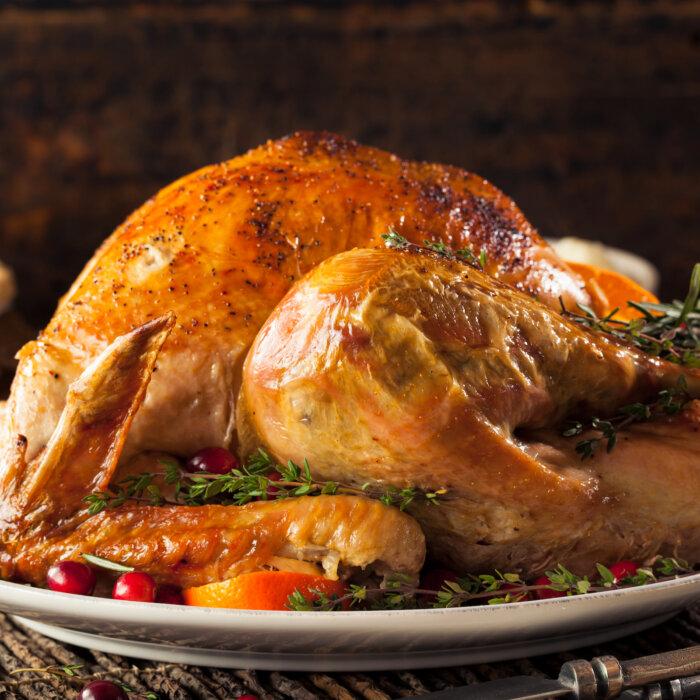
A standing roast is my favorite classic holiday-style cut. It’s the most well marbled and the most tender, and because it has the rib bones in it, it has a tremendous amount of flavor. Just putting it on the table gives the meal a special quality. This is the kind of thing you might only serve once a year, but it’s also particularly good for large family gatherings because it lets you cook high-quality meat for a large number of people.
I always tie up my rib roasts—using the classic method of looping twine around the roast and securing it with half-hitch knots—because when you buy bone-in roasts, most butchers will cut the meat away from the bones so that they’re easier to carve and serve. Tying the roast holds the meat against the bones in its original shape, which helps the meat cook evenly and gives it a better flavor. (You can always ask your butcher to tie it for you.)
I also like to prep and season my roasts the night before I cook them so that they have plenty of time to absorb the flavors of the rub as they sit in the refrigerator.
Active Time: 25 minutes Total Time: 3 hours, 25 minutes for medium rare, including resting (or longer if it rests overnight)
- One 7-pound bone-in standing rib roast, at room temperature
- 10 garlic cloves
- 5 teaspoons kosher salt
- 2 teaspoons chopped fresh rosemary leaves
- 1 teaspoon fennel seeds
- 1 teaspoon ground black pepper
- 2 fresh rosemary sprigs
- Horseradish Cream (recipe follows)
- Kitchen twine
- Mortar and pestle
- Meat thermometer
Make a big loop with the long end of the twine (the piece attached to the spool), twisting the loop once at the bottom, so it crosses over on itself. Put that loop over the far end of the meat (sliding the meat through the loop) with the twisted section on top, then tighten the loop around the meat about 1 inch below the first knot; you’ll have two loops of string around the meat connected with a small piece of twine running between them.

Repeat this process until the entire roast is tied up (another 3 to 4 times), making sure the string that connects the loops makes a vertical line down the center of the meat. When you’re done, snip the end of the string, leaving a 20-inch tail.
Flip the meat over and make sure the horizontal lines of twine are evenly spaced. Take the long piece of string, pull it over the loop closest to it, then push it back under that same loop (so it’s looped around the horizontal piece of string). Using that same long piece of twine, repeat this process with each horizontal line of twine, looping it over and then under each piece so that all the horizontal lines are connected by the vertical piece of twine.
Flip the roast back over and pull the string around the closest horizontal line of twine to secure it. Tie the end of the twine tightly to the other cut end, and then trim both ends so they are only a couple of inches long.
Put the garlic, 4 teaspoons of the salt, the rosemary, fennel seeds, and pepper into the mortar and mash them together with the pestle to form a rough paste. Rub the paste all over the meat and cover with plastic wrap.
Refrigerate the meat for at least 1 1/2 hours to absorb the rub, or (preferably) refrigerate it overnight and bring to room temperature before cooking.
Preheat the oven to 450°F.
Put the roast in a large cast-iron pan, rib side up. Sprinkle on another 1/2 teaspoon of the salt and roast the meat in the middle of the oven for 30 minutes.
Remove the pan from the oven. Flip the roast so that it is bone-side down, season it with the remaining 1/2 teaspoon salt, and top it with the rosemary sprigs.
Return the pan to the oven and roast until the meat is 130°F for rare, 140°F for medium-rare, 155°F for medium, or your desired doneness (this takes between 1 and 1 1/2 hours). When you remove the roast from the oven, let it sit at least 20 minutes before carving; the heat in the meat will continue to cook it the last few degrees it needs to reach your desired doneness.
Horseradish Cream
Active Time: 5 minutes Total Time: 5 hours or longer, including resting- 5 ounces horseradish root, peeled and roughly chopped
- 3 tablespoons white wine vinegar
- 2 tablespoons water
- 1 teaspoon kosher salt
- 2 cups sour cream
- 2 tablespoons finely chopped chives
Add the vinegar, water, and salt and process everything until it is well mixed.
Transfer 1 cup of the horseradish mixture to a medium bowl and add the sour cream and chives. Taste the sauce and add more of the ground horseradish if you like.
Pour the sauce into a jar and refrigerate it for least 5 hours or (preferably) overnight to let the flavors meld. Serve in small bowls, placed around the table. Store in the refrigerator for 2 to 3 days.