There is a simple shelving design that should not take more than about a weekend afternoon to build. If your garage has finished or wood walls so you do not have to drill into masonry, the project will go even faster.
As with any project, careful planning is critical and a time saver. First, determine how far the shelves can extend out without interfering with the cars. Condo garages are often a bit narrow.
Next. plan what you will put on each shelf to determine their heights. Many items, like paint cans, are standard height. If you like to redecorate often, you probably have plenty of paint cans to fill an entire shelf.
Plan on putting the paint cans on the bottom shelf so that you can slide one out and read the color code on the top. Make the shelf height about 3 1/2 inches taller than the cans. This allows clearance under the front shelf support and room to store paint brushes on top of them.


When planning the upper shelf heights and contents, consider the weight of the items. This is not so much for the strength of the shelves, but the strength of your arms. You may find it difficult to place and retrieve heavy items from upper shelves.
For the typical items stored in a garage, four or five shelves will take you as high as you can comfortably and safely reach. Round off the depth of the shelves to 16 or 24 inches to minimize scrap lumber. Try to make the width 8 feet for the same reason.
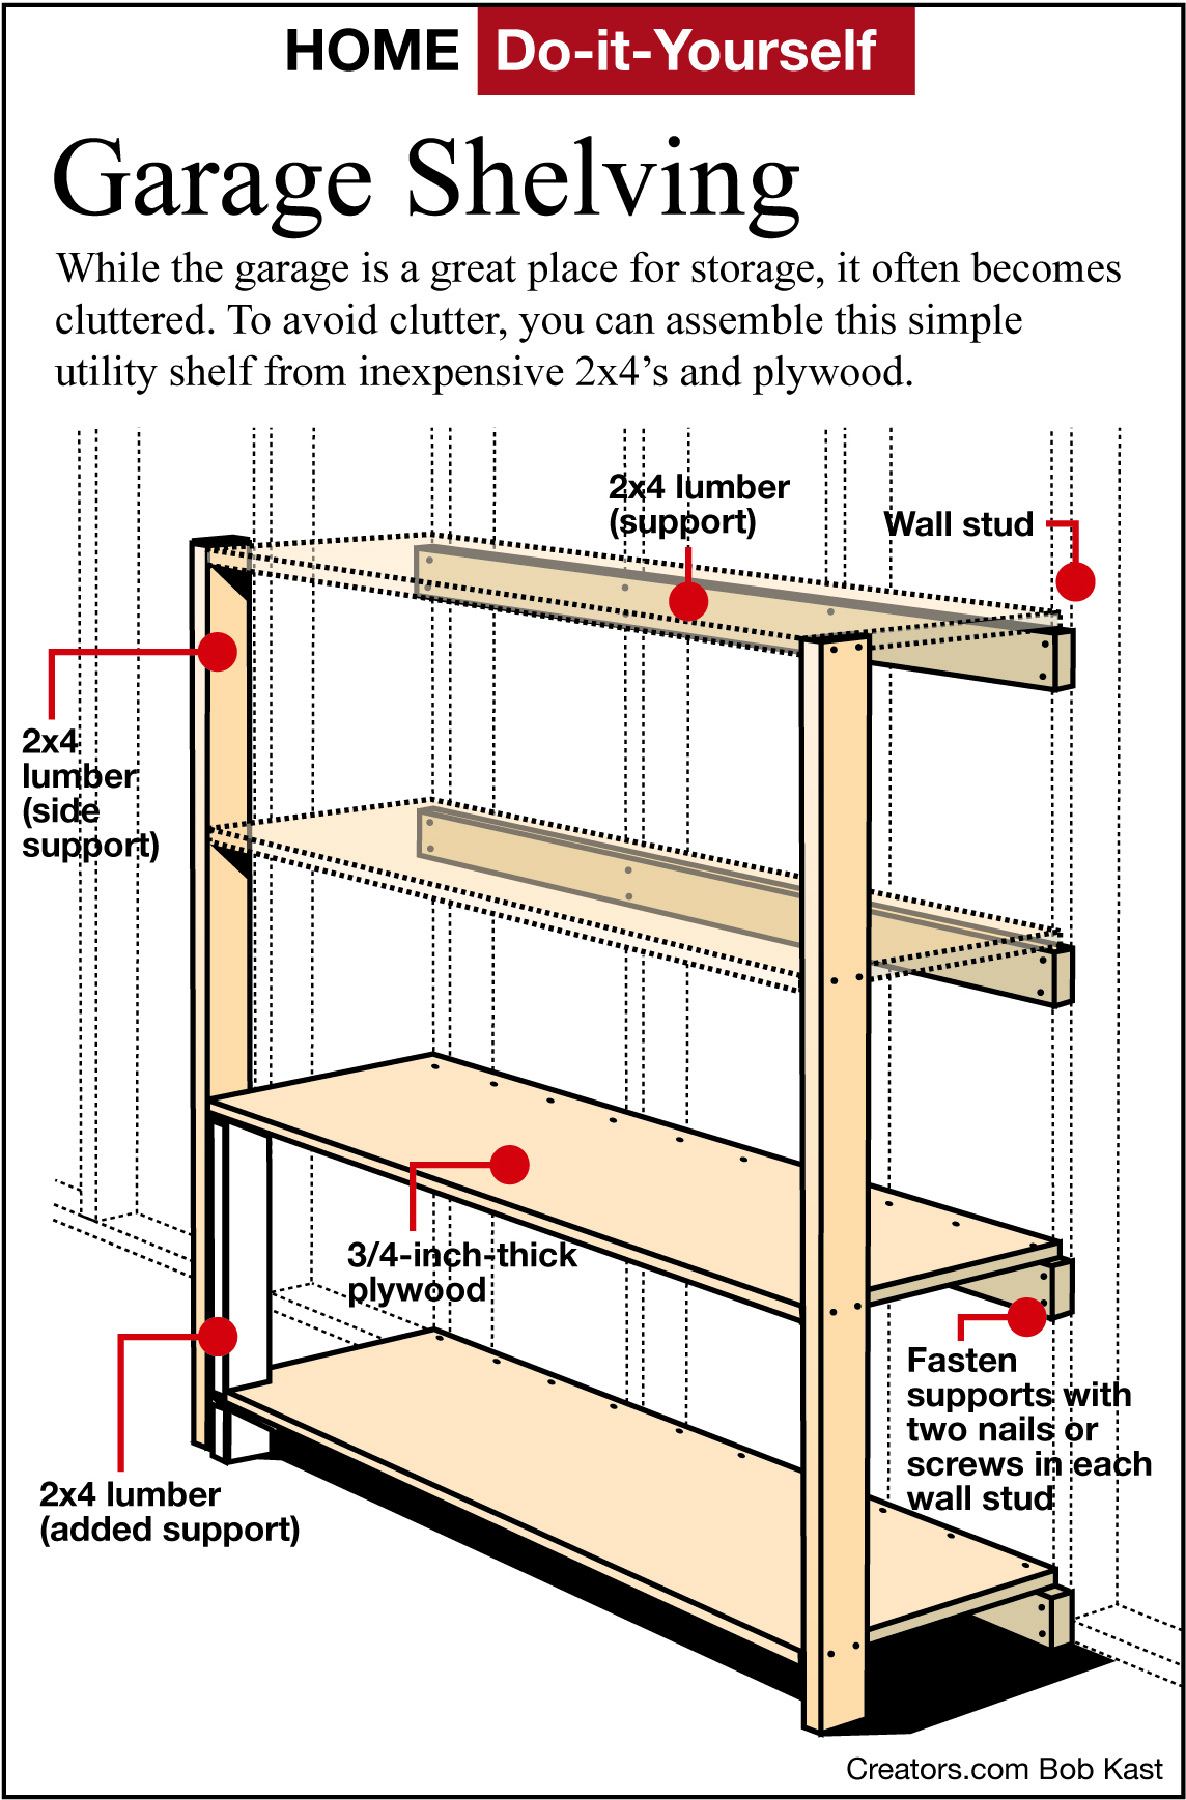
The simplest shelf design uses 2-by-3 and 2-by-4 lumber for the framing and 3/4-inch plywood for the shelves. You may get by with 1/2-inch plywood, but for a few extra dollars, it is best to err on the stronger side.
On the garage wall, mark the positions of the bottom surface of the shelves. This will be the location of the shelf rear supports on the wall. Recheck your shelf height dimensions and make sure you included the extra 3/4-inch thickness for the plywood shelf. It has been forgotten more than once.
Make the rear shelf supports with the 2-by-3 lumber and attach the 3-inch surface to the wall. Use a level to get them all parallel for a nice appearance. On a masonry wall, install screws every two inches. On a finished wall, use two screws at each stud location.
Saw the sheets of plywood to the shelf depth that you need or have the home center store saw them for you. Cut pieces of the 2-by-3s to use as front shelf supports and screw the 2-inch (actually narrower) edge to the shelf.
Once you have completed all the shelves/front support pieces, screw the top shelf to the back support on the wall. Space the screws one per foot. With someone holding the shelf level, measure the height needed for the long, vertical, 2-by-4 front legs and saw the two legs to length.
Drill through the vertical leg and screw it to the front shelf support. Work your way down until you have all the shelves attached to the vertical legs on each side. Paint the entire assembly. Now, start cleaning!