Take all of the measurements and determine the size and weight of the objects you want to store on the loft. Next, plan the dimensions of the storage loft. If the objects aren’t very tall, position the loft high enough above the floor so that you can walk under it without stooping.
If you plan to put some tall items on it and you want the most storage space, go ahead and position it lower. Since you won’t be able to walk under it easily, make it as low as possible while leaving clearance above the car hoods. It’s also easier to access a loft that’s lower.
If you’ve ever built a deck, building a loft uses a very similar design concept. A loft is basically just a raised deck built inside your garage instead of in your backyard.
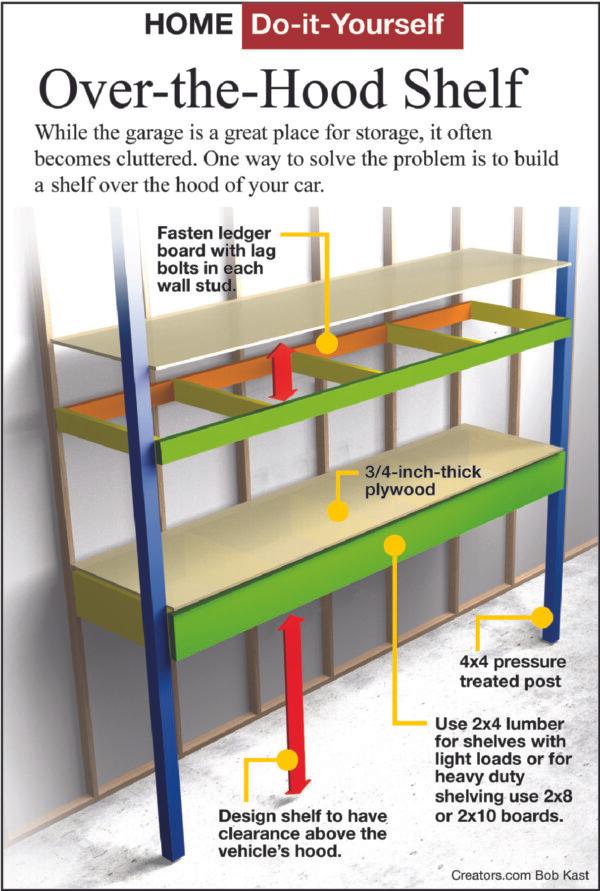
Let’s get started. Attach a two- by eight-inch ledger board to the back wall. Position it so that the bottom provides the height clearance you desire. One-half-inch-diameter lag bolts are used to attach the ledger board to the wall. Use one bolt at each wall stud location.


To support the loft at the end over the cars, run four- by four-inch posts from floor to ceiling. It’s a good idea to use pressure-treated posts. The garage floor will get wet when you hose it out and when you pull the car in after rain or snowstorms.
Bolt two two- by eight-inch pieces of lumber together to create a horizontal beam. This beam will be attached to vertical posts to support the floor joists for the loft. Use throughbolts to attach the horizontal beam to the posts.
Attaching the floor joists differs slightly from building a deck. On a deck, the joists usually rest on top of the beam. Use joist hangers on both the beam and ledger ends. Position the hangers at the bottom of the beam to provide as much loft storage height as possible. Position the joist hangers on standard 16-inch centers.
One very important note that’s often missed: Always use structural nails when attaching the joist hangers to the beam and ledger. Don’t use standard roofing nails that aren’t as strong. The head can pop off and the nail shank may actually shear right through from a heavy load.
Although you can get by with cheaper one-half-inch plywood for the loft floor, three-fourths-inch will hold up better and provide a more stable feel when you walk on it. Attach the plywood with nails or screws as you would do when building a deck.
Even though you may store only long items such as pipe, lumber, etc., on the loft, cover the entire floor with plywood for safety. Also build a strong rail with narrow openings because your children will surely get up there to play.
Don’t worry about fancy stairs to access the loft when it’s completed. Just a wooden ladder near one end is adequate and takes up less garage space. If you feel more comfortable on stairs, purchase and install a metal spiral staircase kit and locate it in a back corner.