The Best Chocolate Ice Cream Can Be Made in Your Own Kitchen
RECIPES

The Best Chocolate Ice Cream Can Be Made in Your Own Kitchen

Ready IN
55 mins
Servings
4
Save
By Irvin Lin
TheKitchn.com
My husband is obsessed with everything chocolate, from soft chocolate chip cookies and fudgy brownies to French silk pie. Surprisingly, chocolate ice cream is lower on his list of treats than you would expect. Part of the reason is that most chocolate ice creams aren’t chocolaty enough for him. They taste vaguely like the idea of chocolate, landing somewhere in the vicinity but not quite on the mark.
But my homemade chocolate ice cream hits the target every time. And although I love the ease of the Philadelphia-style chocolate ice cream, because I grew up in St. Louis where frozen custard is king, chocolate ice cream with an egg-enriched base just hits differently. The secret is using a higher-quality cocoa powder as well as a chopped dark chocolate that you like eating out of hand. Swapping out the cocoa powder from natural to Dutch-process means you also get a bit of a choose-your-own-adventure ice cream, where each ending is equally delicious.

Why You’ll Love It

Unbelievably creamy. The egg yolks in the ice cream base lend a richness and creamy body to the ice cream that just using milk and cream can’t achieve.

It has a rich chocolate flavor. This recipe calls for a combination of quality cocoa powder and melted dark chocolate for the best flavor without compromising texture. Plus, a smidge of kosher salt and optional espresso powder amps up the chocolate flavor and sweetness without being noticeable.

Key Ingredients

Egg yolks: Egg yolks are 65 percent fat; they help lend a richness to the ice cream that you just can’t get if you use an ice cream base that is strictly dairy. Egg yolks also have lecithin in them, which is a natural emulsifier. This emulsifier binds both the fat from the dairy and the egg yolks to the water in the ice cream base, producing a thicker and creamier ice cream scoop. It also extends the shelf life of the ice cream; it doesn’t thaw as quickly, so it lasts longer in the freezer.

Cocoa powder: With ice cream, you can use whatever type of cocoa powder you have on hand, but keep in mind that the type of cocoa you use affects the flavor and texture. Natural cocoa powder will give you an icier texture but a sharper and more intense chocolate flavor. Dutch-process cocoa will give you a smoother and more fudgy texture with a mellower flavor. Regardless of which you use, I recommend a higher-quality cocoa powder, like Guittard’s organic natural cocoa powder or Guittard’s Cocoa Rouge Dutch-process cocoa powder. The higher percentage of cocoa fat in the cocoa powder means a more robust chocolate flavor in either version.

Dark chocolate: As with all chocolate desserts, I tend to recommend a high-quality chocolate that you like eating out of hand for this recipe. I do not recommend using chocolate chips for this recipe, even if you have high-quality chocolate chips. Chocolate chips are designed to hold their shape even at high temperatures, while bar chocolate will melt at much lower temperatures. You want a chocolate that will melt easily for this recipe. Ice cream made with melted chocolate chips will result in a hard-to-scoop stiff and grainy ice cream.

Espresso powder (optional): Espresso powder (or instant coffee) is there to help boost the flavor of the chocolate. It’s optional, but if you like a more chocolate-forward ice cream, then I’d recommend using it.

Light corn syrup (optional): Light corn syrup (not to be confused with high-fructose corn syrup, which is totally different) is mostly glucose, an invert sugar that keeps the ice cream soft and scoopable. It also absorbs more water than plain sugar, helping to keep the ice cream from becoming too icy.

Helpful Swaps

If you don’t have corn syrup or don’t want to use it, you can substitute honey, which is a natural invert sugar. Keep in mind that honey might impart a slight honey flavor to the ice cream. You can also omit the corn syrup completely. The resulting ice cream will be stiffer, harder to scoop, and have a slightly icier texture. Just remove the ice cream from the freezer and let it sit on the counter for 15 minutes to soften it a bit and make it easier to serve.

Storage and Make-ahead Tips

  • Make ahead: You can make the custard base up to two days ahead of time. Just make the custard, cover it with plastic wrap or pour it into a gallon zip-top bag, then refrigerate it.

  • Storage: Homemade ice cream doesn’t last as long in the freezer as the grocery store stuff. This is because most commercial ice creams have stabilizers like gums that extend the product shelf life. Store this chocolate ice cream in the freezer, with a piece of parchment paper or plastic wrap over the top of the ice cream, to help prevent freezer burn. Eat the ice cream within two to four weeks of churning it (although ideally, it’s best consumed within a week).
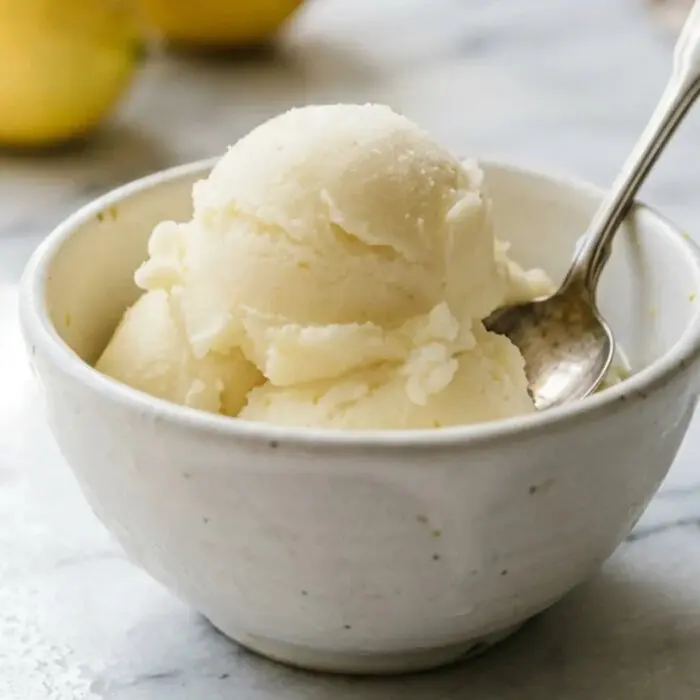
Chocolate Ice Cream
TheKitchn.com
Time
55 mins
(Prep 20 minsCook 35 mins)
Servings
4
Ingredients
  • 5 large egg yolks
  • 3/4 cup granulated sugar, divided
  • 1 teaspoon vanilla extract
  • 1/4 cup natural or Dutch-processed cocoa powder
  • 1/8 teaspoon kosher salt
  • 1/8 teaspoon instant espresso powder (optional)
  • 1 cup whole milk, divided
  • 2 cups heavy cream
  • 1 tablespoon light corn syrup (optional)
  • 4 ounces bittersweet chocolate (not chocolate chips), chopped into rough 1/2-inch pieces
Instructions
STEP 1
If your ice cream machine has a bowl that needs to be frozen before churning, put it in the freezer the night before you plan to churn the ice cream.
STEP 2
Whisk large egg yolks, 1/4 cup of the granulated sugar, and vanilla extract together in a large heatproof bowl.
STEP 3
Sift cocoa powder into a large saucepan. Whisk in the remaining 1/2 cup granulated sugar, kosher salt, and instant espresso powder if using. Whisk in 1/4 cup of the whole milk until smooth, adding a splash more milk if the paste seems too thick to dissolve all the cocoa (do not add all the milk at once).
STEP 4
Add the remaining 3/4 cup whole milk, heavy cream, and light corn syrup if using. Cook over medium heat, stirring constantly with the whisk (do not whisk vigorously), until it reaches a bare simmer.
STEP 5
Remove the saucepan from the heat. Drizzle about 1/2 cup of the cocoa mixture into the egg mixture and whisk to combine. Repeat whisking in another 1/2 cup of the cocoa mixture.
STEP 6
Scrape all of the egg mixture into the saucepan with the chocolate cream. Cook over medium-low temperature, stirring constantly, until thickened enough to coat the back of a spoon and it holds a line when you swipe your finger through it (about 170 degrees F; do not let it come to a simmer).
STEP 7
Remove the saucepan from the heat. Stir in chopped bittersweet chocolate until the chocolate is completely melted.
STEP 8
Cover the saucepan. Refrigerate overnight or for up to 2 days. (Alternatively, for same-day churning, see note for how to cool the base down in an ice bath.)
STEP 9
Stir the base, then transfer it to the bowl of the ice cream machine. Churn according to the ice cream machine instructions until it is thickened to a soft-serve consistency, 20 to 35 minutes. Eat immediately if you prefer a soft-serve texture. For hard ice cream, transfer to an airtight container or loaf pan, press a sheet of parchment or wax paper against the surface, then freeze until solid, at least 8 hours. If frozen solid, let sit at room temperature for a few minutes to soften before scooping.
Note
If you do not have time to refrigerate the ice cream base, it can be cooled in an ice bath. Transfer the base into a gallon resealable plastic bag, press out the excess air, and seal the bag. Submerge the bag in a large bowl of ice water, adding more ice to the bowl as needed, until well chilled, about an hour.