Diskpart is one of the most powerful Windows command line utilities which first appeared in Windows XP. Diskpart is mainly used by Windows administrators to manage tasks like partition management, formatting, creating, re-sizing and getting a detailed information regarding the hard disk or other removable disks attached to the computer.
Even though you have a built-in GUI application called Disk Management utility in Windows, Diskpart is much more flexible and works well in a server environment where you need to set up some advanced features like RAID.
Note: This post isn’t intended for beginners, and doing something wrong while using Diskpart utility may cause drive failures and data losses, so make sure that you have a good backup before continuing. You have been warned.
Assign Drive Letter Using Diskpart
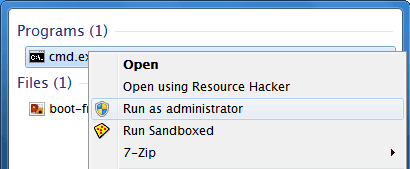
Assigning a new drive letter to a partition or removable device using Diskpart is really easy. First, search for the command prompt in the Start menu, right click on it and select the option “Run as administrator.” If you are using Windows 8, press “Win + X” to open the power user menu and select the option “Command Prompt (Admin).”
The above action will open the command prompt window with administrative rights. Here enter the following command to start the Diskpart utility.
diskpart |

The next step is to list all the volumes in your computer so that you can clearly see all the volume numbers and drive letters of your hard disk partitions and any other removable devices. Use the command below to list all the volumes.
list volume |

Once the Diskpart utility lists all the volumes, take a note of the volume number of the drive you want to assign a new drive letter. In my case, I’m trying to assign a new drive letter to the drive I:, so my volume number is 7. Now execute the following command to select the volume while replacing the # symbol with an actual volume number.
select volume # |

Once the volume is selected, use the following command to assign a new drive letter. Don’t forget to replace the letter “V” with the drive letter you want to assign.
assign letter=V |

That’s all there is to do; you have successfully changed or re-assigned a new drive letter to a partition or a removable drive in Windows. In fact, if you open the Windows explorer, you can see that the change is reflected immediately.

Remove Drive Letter using Diskpart
Before moving any further, removing or un-assigning drive letter will effectively hide the drive or partition from plain sight, i.e. you cannot see that drive in the Windows explorer. To remove a drive letter, follow the above steps 1 through 4 and then use the below command to remove the drive letter of a drive or partition. Don’t forget to replace the letter “I” with the actual drive letter.
remove letter=I |

As soon as you have done that, Diskpart will remove the drive letter for that volume. If you list the volumes again, you will see that the drive you just interacted with will have no drive letter next to it.

Moreover, if you navigate to the Windows explorer, you will see that the drive which got un-assigned isn’t listed anymore. But again, always be careful while you are messing around with Diskpart utility; it may cause irrecoverable data loss if used incorrectly.
Republished with permission from MakeTechEasier. Read the original.