There are plenty of reasons why you may need to take ownership of files and folders in Windows. For one, when you are replacing or modifying a system for some custom edits, you may receive errors stating that you don’t have enough privileges to access that specific file or folder.
In those scenarios, you can simple take ownership of that file of folder as an Administrator. But like many things in Windows, there are several steps involved, and it is sometimes confusing and cumbersome for beginners.
So if you ever need help, here is how you can take ownership of files and folders in Windows so that you can easily edit or modify system files without any “Access denied” errors.
What does Take Ownership Mean?
Technically speaking, most of the system files and folders are locked to prevent themselves from being modified. This is an important security feature to protect system integrity. If you ever need to modify these files for whatever reason, you need to acquire the necessary permission to access and modify the files.
Take Ownership of a File or Folder
Note: To demonstrate the procedure, I’m taking “shell32.dll” system file as an example which is created by Windows itself. The same procedure is applicable to any file or folder. In case you are wondering, “shell32.dll” is a file which holds most of the Windows shell API functions.
To take ownership of a file or folder, we need to edit some of the properties of the said file or folder. To do that, right click on a file and select the option “Properties.” This action will open the file properties window. Here navigate to the “Security” tab and click on the “Advanced” button located at the bottom of the window to open “Advanced Security Settings”.
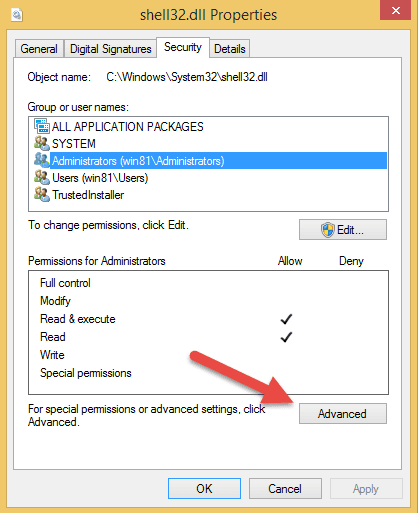
Here in this window, you can see the current owner of the file next to the “Owner” option. Since the file I am working on is created by the system, the current owner is set to “TrustedInstaller.” To change the owner, click on the link “Change.”

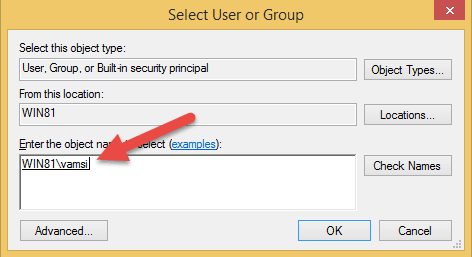
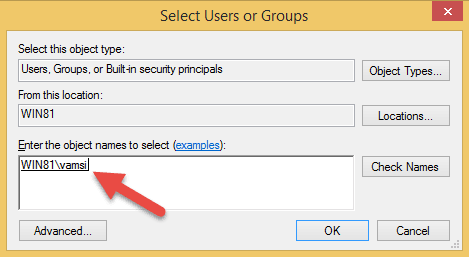
The above action will open the “Select User or Group” window. Here enter your username and click on the “Ok” button.
As soon as you’ve done that, the owner of that file is changed. Simply click on the “Ok” button to save the changes. You may receive a couple of warning messages; simply accept them to continue.

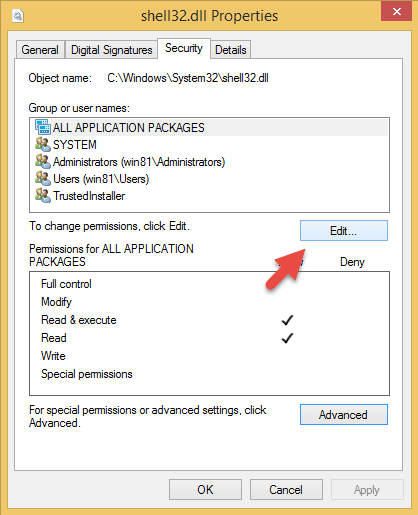
Now, even though you have changed the ownership, you still don’t have full control over the file or folder. In order to get full control, you need to edit the permissions. To do that, open up the Properties windows again and navigate to the Security tab. Click on the “Edit” button displayed under the Group or Usernames sections.
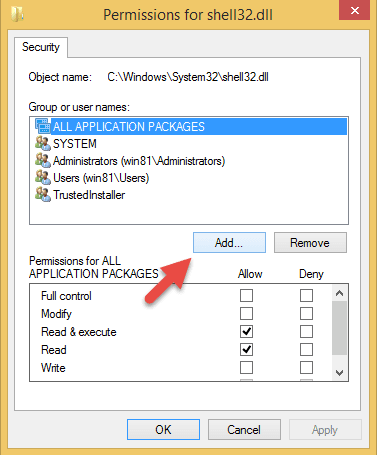
Once the permissions window is opened, click on the “Add” button to add a new user to the permissions list.
The above action will open the “Select User or Group” window. Here enter your username and click on the “Ok” button.
Now that the username is added to the group, just select the username, select the checkbox “Full control” and click on the “Ok” button to save the changes. Again, there may be a couple of warning messages; just accept them to continue.
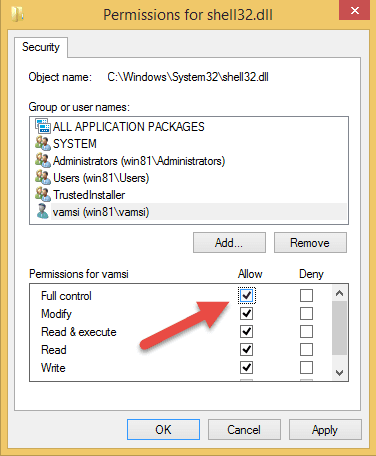
Once you are done, the Properties window should look something like this.

That’s all there is to do, and it is that simple to take ownership of a file or folder in Windows. But again, always be careful while you are taking ownership of a system file or folder as doing it wrong will have unintended consequences and reverting changes is a tad bit difficult.
It is also advisable to restore the file permission after you are done editing the files. This will prevent you from making changes accidentally.
Republished with permission from MakeTechEasier. Read the original.