A panoramic photo involves a process of merging a sequence of shoots of a particular scene together to create an expansive view.
After witnessing a stunning sky scene while commuting home I decided to chase subsequent sunsets with my 35 mm camera for fun, and to practice making panoramic photos.
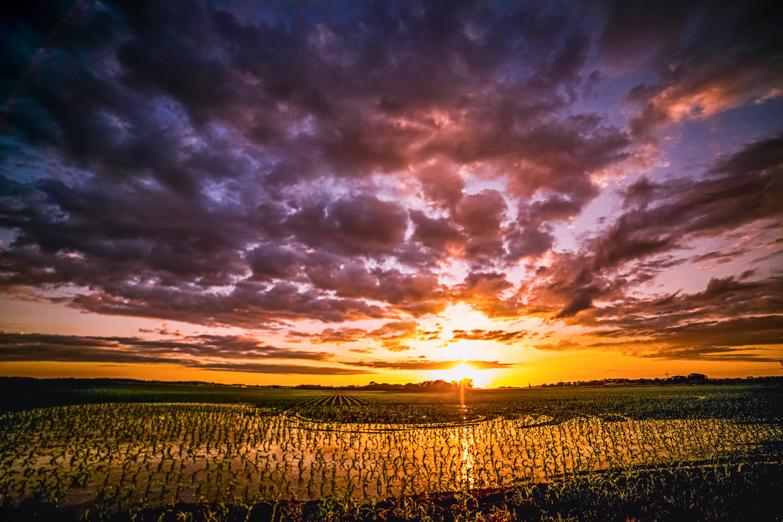
To get the barn sky pictures, I exited the highway and took a gravel road that ran parallel and came upon this scene. The outcome is a 9 by 42 inch picture made of four merged photos.
For this sky scape, I pulled off the highway onto a rural road that had a vantage point for picture taking close to the exit ramp. It consists of three shots merged and then cropped. In the matter of just seconds the light is different as seen by the left side being darker than right side. This made the merging line noticeable requiring some additional editing to blend them. Photo size is 4.5 inches by 14.5 inches.
Here are six steps I have found helpful in creating panoramic photos.
1. Camera settings
a. Check to see if your camera has a panoramic setting. If so, test it out by following the manual instructions, and applying these steps.
b. The exposure settings have to be locked (the same) for the series of photos, thus on manual mode. Otherwise, it lessens the chances of having even lighting throughout the panoramic photo. To establish manual settings, take a shot of the main subject area on program or aperture mode, and then plug those settings into the manual feature. Make sure the aperture is high enough, f/11 or larger, to have everything in the photo in focus.
c. Set white balance on sun.
d. Increase the ISO when light dims with setting sun.
2. Keep camera level and in focus
The trick is to keep the camera at the same level while shooting each area of the sky. Carefully hold the camera by hand or with a tripod. A tripod is also good for when the light diminishes to the point your shutter speed goes below the hand holding point, around 1/50 or 1/40.
3. Shooting positions
Stand in one spot and carefully take all of the photos, or move a couple steps over for each shot. The first method is the easiest, but generally results in the top and bottom of the final photo needing to be cropped significantly.
4. Shooting techniques
a. Work and shoot fast as the scene and light are ever changing.
b. Use len hood to reduce unwanted sun flares.
c. Do not use a polarizer lens.
d. When shooting into the sun, place hand or hat over the top of the lens while making sure the object doing the shading is not in the picture. Standing in shade can do the same thing.
5. Overlapping
Each photo has to have one identifying area that is captured in the neighboring frame. These areas will later have to be lined up (or overlapped onto each other)in order to merge or stitch the different photos together.
6. Merging photos
Photo merging itself is fairly easy with software such as Adobe Photoshop, Photoshop Elements, Windows Live Photo Gallery, Double Take, and Hugin.
After merging and saving the photo any additional editing can be done.
Discussions about photography and/or your experiences are greatly encouraged. Please feel free to comment at the end of the article—I promise to respond. To submit your own photo of a panoramic sky or sunset for posting on this column click here.