Bathurst 12 Hours at Halfway

Bathurst 12 Hours at Halfway
The #1 Erebus Merceedes leads the #88 Maranello Ferrari early in the Bathurst 12 Hours. (bathurst12hour.com.au)
Chris Jasurek
2/8/2014
Updated:
2/8/2014

The first six hours of the 2014 Bathurst 12 Hours from Mount Panorama circuit in Bathurst, New South Wales, Australia provided all the drama and excitement that endurance racing fans have come to expect from this popular international event.

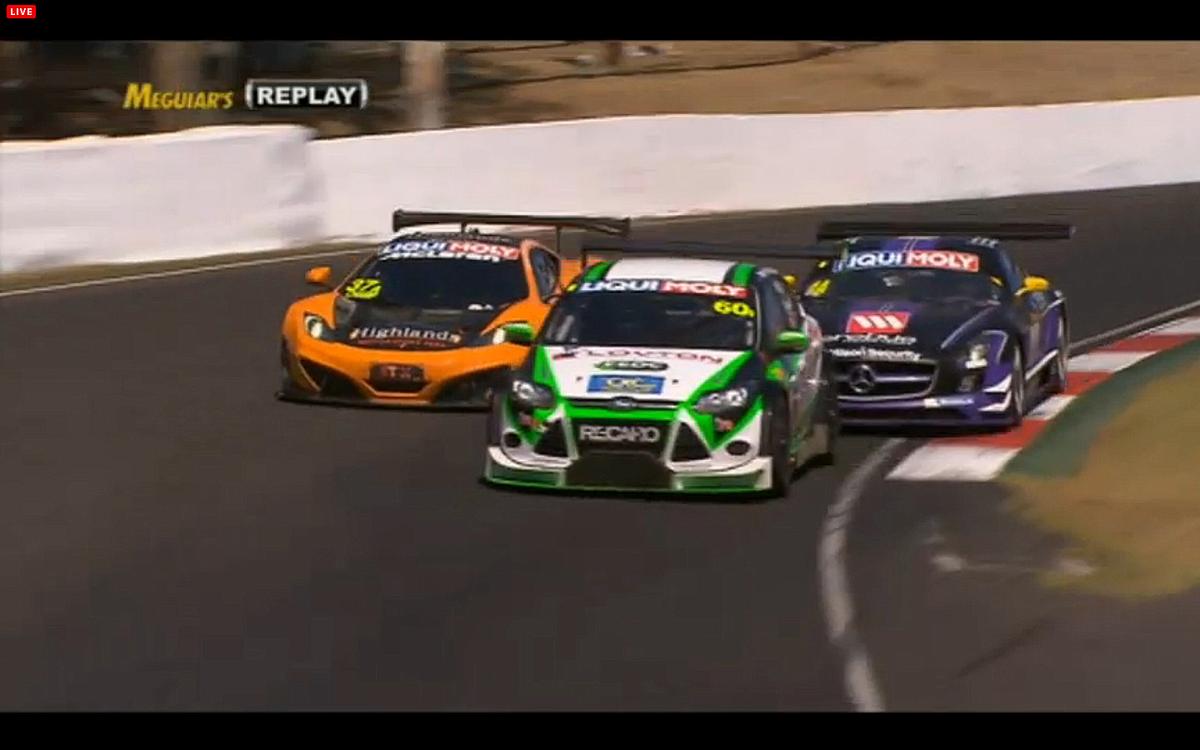
The early action was intense. For much of the first three hours there were six different makes of cards occupying the top six spots—and for much of that time, thirty seconds separated to leader from the sixth-place car.

Things eased a bit after a pair of wrecks around the three-hour mark, heated up again while a pair of ace drivers disputed the lead, then settled down for an hour before a safety car wrapped up the first six hours.

Mechanical failures as well as collisions winnowed the 40-car grid down to 37 by halfway.

Trouble started almost from the waving of the green, as two cars hit kangaroos which were out and about in the cool morning air (the race starts at 6:15 a.m. local time.)

The #63 Erebus Mercedes clipped a kangaroo and lost part of the splitter (and a lot of downforce) but was able to continue. Peter Kox in the #23 JBS Swift Lamborghini Gallardo hit a kangaroo hard enough to total his car.

The thinning of the front-runner field continued on lap 60, two-and-a-half hours into the race, when Hiroshi Hamaguachi in the #33 Clearwater Racing Ferrari F458 Italia GT3 lost control cresting Mount Panorama, and Katsumasa Cyio in the #32 Nismo Athlete Global Team Nissan GT‐R slammed into the stalled Ferrari, which was obscured in a cloud of dust and glaring sun.

The race went back to green half an hour later, and half-hour fans were treated to an intense battle for the lead between local hero Shane Van Gisebergen in the #37 Darrell Lea McLaren and defending winner Bernd Schneider in the #1 Erebus Racing Mercedes.

Shane Van Gisengerg in the #37 McLaren tries to use traffic to pass Bernd Schneider in the #1 Mercedes. (bathurst12hour.com.au)

This pair pushed each hard enough that it was scary, neither one giving way, until the pair passed Ross Lilley in the #48 M Motorsports Lamborghini at exactly the same spot where the Ferrari and Nissan collided. Lilley got into the Speedi-Dri left from the earlier collision, slid right, spun, and slammed the wall, totaling his car and bringing out another safety car.

Schneider dove right into the pits; Van Gisebergen stayed out, then pitted later under caution. Schneider’s quick thinking kept him in the lead, while Van Gisebergen dropped to fifth but the Australian driver was too quick and too determined; he carved his way back to second in three laps.

Finally Schneider gave in and let the insistent Van Gisebergen through, before he wrecked both cars. The wisdom of this maneuver was proved two laps later when the impatient McLaren driver forced his way past the lap-down #88 il Bello Rosso Ferrari of Mika Salo, nearly wrecking both cars.

Shane Van Gisbergen in the #37 McLaren almost wrecks trying to pass Mika Salo in the #88 Maranello Ferrari. (bathurst12hour.com.au)

Both drivers pulled into the pits a few laps later, and here the Erebus crew gained back everything Van Gisebergen had worked so hard to take—the Mercedes got out ten seconds early and retook the lead.

The Class-B leading Rotek Racing Audi R8-LMS actually led the race on two occasions, before retiring to the garage with a broken valve spring. The car eventually returned, but it is out of contention.

The Mercedes/McLaren battle continued on through the next two hours with Maro Engel and Andrew Kirkaldy driving.

Fifteen minutes before halfway a misstep by the race leader nearly changed the whole story.

Nico Bastian in the #1 Erebus Mercedes went off in the same spot that the #33 Ferrari and the #48 Lamborghini. Bastian however was far luckier, in that while he tore off part of the right rear bodywork, he was able to drive and didn’t even lose the lead.

The #1 Mercedes is missing some of its right rear fender after going off at Skyline. (bathurst12hour.com.au)

Seven minutes later, the Class-B leading #45B Rencorp Porsche lost its brakes and ended up in the sand outside the final corner, bringing out a safety car just before halfway.

The #45B Porsche spins off track as it brakes fail. (bathurst12hour.com.au)

So far the leading Mercedes seems to have a lap advantage in fuel economy, but also seems to lose balance as its tank drains. The second-place McLaren is getting great life from its Pirelli tires, and might be able to gain ground by triple-stinting later in the race.

However, as the heat increases, the teams will need to switch compounds, and the Mercedes’ Michelins might work better as the track gets slicker.

Waiting for any error or mechanical failure are a host of Audis and the il Bello Rosso Ferrari.

Class Leaders After Six Hours

Class

Place

Car #

Team and Car

A

1

1

Erebus Motorsport Mercedes SLS AMG GT3 2012

B

9

12

Ice Break/Competition Motorsports Porsche 997

C

17

17

Griffith Corporation Ginetta G50

D

22

22

GT Radial/Radio Hauraki Leon Supercopa

F

23

96

Fiat Abarth Motorsport Abarth 500

I

15

70

MARC Focus GTC